Transcription of EMP LOCK CONTINUED - Cannon Safe
1 Index CEO's Letter 1. Limited Lifetime Warranty 2. Warranty Registration 3. Getting Started & Safe Set-up 5. NL & Lexam Lock 6. Identify your Lock 6. Changing the Battery 6. EMP Lock 7. EMP LOCK CONTINUED 8. Accessories 8. FAQs 9. Cannon 's Brand Promise: Lifetime Lock and Parts Replacement 1 Year Labor For Parts Lifetime Replacement Promise We will REPAIR or REPLACE your safe at ZERO COST! In case of: BURGLARY NATURAL FLOOD FIRE. Every person has the need to protect a diversity of possessions that represent value for them. Our product will meet their needs with quality and affordability. A Safe in Every Home . Congratulations on your purchase of a Cannon Safe! You've made a great decision. I magine coming home to find out your home And while we build our safes with worst- your sanctuary from the outside world case scenarios in mind, they are designed to be part of your everyday life. Each safe destroyed by natural disaster.
2 There are few offers protection from fire and theft and things that have such a traumatic impact on affords easy access to your valuables one's peace of mind. Which is why we at day-in and day-out. Cannon dwell on the very possibility with every safe we design, build, and ultimately, Cannon is committed to making sure every stand behind. We want to make sure that household has a way of protecting its should the unthinkable ever happen to valuables while enjoying more peace of you, that your most precious valuables mind. will always be as you left them safe and secure. Aaron Baker, CEO. Cannon Safe, Inc. 1. Limited Lifetime Warranty T his Cannon Safe carries a lifetime warranty in Residential Use. It is warranted against defects in workmanship tampering with the safe, which might affect the product's use, voids the Warranty. and materials, also against damage by attempted break-in or actual break-in, excludes any liability for defects or damage caused by, or aggravated by, the Industrial applications carry a 1 year use of unauthorized parts.
3 Upon delivery, warranty against defects in workmanship Purchaser must promptly notify Cannon and materials. Safe Inc. of any defect. Purchaser's remedies are limited solely to repair or replacing parts and are at the discretion of Cannon Safe Inc. In order to obtain service under this Warranty, Purchaser must provide Cannon Electronic and mechanical locks carry a one Safe Inc. with following items 1) proof of year warranty for labor; a lifetime warranty purchase 2) police or fire department report for parts. If at any point Cannon Safe Inc. 3) photographs of damaged safe 4) written changes components, the current component testimonial. Cannon Safe Inc. may, at its being used will be sent as replacement. The discretion, repair or replace any defective warranty does not cover lost or forgotten or damaged safe. Whenever possible the combinations, improper opening procedure, safe will be repaired locally. If Cannon weak or dead batteries.
4 Paint is warranted Safe Inc. is replacing a safe, we will require for one year based on proper care and the old safe to be returned to the factory. environment. This Warranty only applies This being the case Cannon Safe Inc. will at to safes located in the continental United its expense have the safe opened and will States, for residential use, and purchased at pay for the return freight to the factory. an authorized Cannon Safe Dealer. The purchaser must have the safe packaged Commercial or business use carries only a and palletized and available for a curb 1 year warranty. side pickup at their expense. The Warranty does not cover labor costs for removal This Warranty is given in place of all or installation of the safe and contents. other warranties and assurances, whether Personal property in the safe is not covered. expressed or implied, including but not The obligation Cannon Safe Inc. has under purpose, or merchantability and Cannon this Warranty is contingent upon proper Safe Inc.
5 Accepts no liability, under installation and use of the safe, and shall any circumstances whatsoever, for any not apply to parts or safes which have incidental or consequential damage or loss been misused, neglected, or put in unusual suffered by anyone as a result of using or or extreme environments. Modifying or being unable to use the safe. Cannon 's Brand Promise: Lifetime Replacement Promise We will REPAIR or REPLACE your safe at ZERO COST! Lifetime Lock and Parts Replacement 1 Year Labor For Parts In case of: BURGLARY NATURAL FLOOD FIRE. 2. Warranty Registration and Customer Support Go to to fill out the warranty registration or call our Customer Service Department at (800)242-1055. Should you ever need help with your safe, your registration helps helps verify your identity and allows us to provide faster service. Please fill out the section below and store in a safe location OUTSIDE of your Cannon Safe. Be sure to retain your original receipt of purchase.
6 MODEL SAFE NAME: PURCHASED AT: CUT HERE. DATE OF PURCHASE: SERIAL NUMBER: CUSTOMER SUPPORT HOURS*: Monday-Friday 5:00AM-6:00PM Pacific Standard Time Excluding holidays (800)242-1055. *Hours subject to change. Please visit 3. 4. Getting Started Now that you have your safe registered it's Step 2: time to set it up. Follow the steps below to Install the spokes into the hub found get started. on the door of the safe. Step 3: Step 1: Open your safe using the preset code Choose location to set up safe. 1-2-3-4-5-6; turn the handle Keep in mind that if you have the Power counter-clockwise. Supply option you want to be close to an outlet and have the back of the safe 1-2. One white box containing: inches away from the wall as the power supply plug sticks out. Cannon Tips . Before determining where to place your (3-5) spokes (6-7) shelf clips safe, verify the load bearing weight will reside or stairs the safe will be moved over. Measure doorways ahead of time to be sure your safe will safely pass through One lifetime the necessary doorway.
7 Pre-drilled holes. Consider a location that is suitable for bolting down your safe for extra theft One power supply plug (not all models). protection. Removing Safe from pallet/Bolting Down Safe Step 1: Open safe (preset combination is 1-2-3-4-5-6) use same as step 1 above. Step 2: Take out any removable * Cannon recommends contacting interior parts. professionals to install your safe. By Step 3: Remove the 4 lag screws using choosing to install the safe on your own a 15mm socket and ratchet, then close and you agree to take any responsibility for lock safe door. damages (physical or to your property) Note: Be safe! Use caution as the safe is top that may occur* heavy; this will take two or more people. It is recommended that you hire a piano mover or safe dealer to help in this process. Tools Needed: Step 4: Acquire the correct bolts and 1 Socket head (15mm) tool(not included). 1 Ratchet Step 5: Bolting down a safe is dangerous, please make sure that you are fully trained or hire a professional to do this (local safe dealers and locksmiths usually offer this service).
8 5. Identify Your Lock below go to and utilize our live chat feature to speak directly with one of our agents or call us at 1(800) 242-1055. EMP LEXAM NL. NL Lock & Lexam Lock Programing the Lock Step 4: Enter new six (6) digit code - You Step 1: Open the safe door (factory code is will hear a double beep 1-2-3-4-5-6). Leave safe door open and put Step 5: Re-enter new six (6) digit code - You the safe in the locked position so that the will hear a double beep bolts are visible Step 6: Test the combination with the safe Step 2: Press and hold 0' until double beep. door open to ensure proper programing The LED remains on during the following **If lock gives a long beep, the old code is steps still valid, re-start from step 1. Step 3: Enter existing six (6) digit code- You will hear a double beep Changing the Battery Low Battery Warning: The lock will repeatedly beep during unlocking. **The lock manufacturer highly recommends the use of either Duracell or Energizer 9V alkaline battery with an expiration date 5 years out.
9 Changing the Battery on NL Keypad Changing the Battery on a Lexam Keypad Step 1: Unlock safe and leave door open Step 1: Unlock safe and leave door open throughout the next steps throughout the next steps Step 2: Locate the battery tray on the Step 2: Twist the keypad ring clockwise bottom of the keypad and pull off then pull out the battery plug- in Step 3: Slide the battery door open and pull out battery plug-in Step 3: Connect the battery and slide the battery into the tray Step 4: Connect the battery and slide the battery into the tray Step 4: Put the ring back onto the keypad and twist clockwise Step 5: Close the latch and test combination before shutting door Step 5: Test combination before shutting door 6. Protecting your code Lock out mode entered safe will go into lock out for 5. minutes, from there, if another 2 invalid codes are entered, the safe will again go into lockout mode. The factory preset code is 1-2-3-4-5-6 and Step 1: Enter the six (6) digit code slowly.
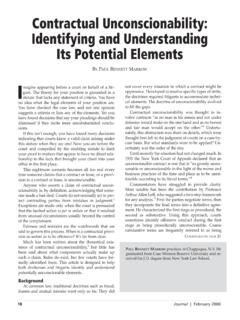
10 Should be changed before using the safe. It you will hear two beeps if the code is is the owners' responsibility for safekeeping accepted. of the code. Step 2: Turn handle counter-clockwise Lockout Mode: After 4 invalid codes are immediately after. EMP Lock How to use The factory preset code is 1-2-3-4-5-6 and Step 2: Turn the mechanical dial clockwise should be changed before using the safe. It until the dial comes to a complete stop is the owners' responsibility to maintain the (usually around 90). code. The lock is ultimately a mechanical lock and requires the turning of the dial Lockout Mode: After 4 invalid codes are to lift the tongue of the lock entered safe will go into lock out for 5 Step 3: Turn handle counter-clockwise minutes, from there, if another 2 invalid immediately after to unlock safe codes are entered, the safe will again go into Step 4: If there is (1) long beep after lockout mode. entering the code, the codes not recognized Step 1: Enter the (6) digit code slowly; you Slow down and retry will hear two beeps if the code is accepted EMP Lock Programing Electronic Code Step 3: Enter existing (6) digit code- You on other safe models.