Transcription of Epic Remote Access for Windows - UF Health Jacksonville
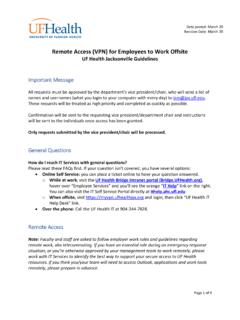
1 Epic Remote Access for Windows Go to Internet Explorer users need to add the website to the Trusted Sites. Go to Tools/Internet Options/Security Click on Sites Add the Uncheck the box next to Require server verification Change Domain to UMC. Log in using your shands Jacksonville computer login credentials. If this is the first time logging in from home you will be prompted to download the Citrix client. Check the box above Download, and then click the Download button. If asked to run or save click on Run. If asked to Run ActiveX Control then click on Run ActiveX Control The Citrix client will now be installed on your home computer or laptop. Once the installation is complete you will be brought into the Hyperspace environment. Click on the Hyperspace environment you want to launch and log in.
2 Installing Citrix Receiver on IPAD/IPHONE 1. First you have to install the Citrix Receiver for iPad/iPhone via iTunes store. It is for free! Go to the APP Store on the iPad/iPhone and search for Citrix Receiver. Select install. (You will be prompted for your Apple ID password) 2. Launch the Citrix 3. Add 4. Add username, password, and domain. Receiver app and select add account. in the address. then click save. 5. You will see your published applications once you have been authenticated.