Transcription of Flank Speed Outlook Guide - milcac.us
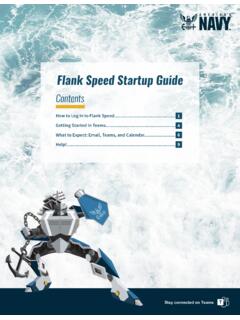
1 Stay connected on Teams Flank Speed Outlook GuideContentsGetting Started in Configuring Global Address List (GAL).. Encrypted NOTE: This content is only relevant for NMCI O365 users that have had their email migrated into Flank Speed . If you are unsure if you have been migrated or not, see Step 1 on page ! You have a new email address and your old account has successfully been migrated to Flank Speed . This means you will no longer have access to your inbox, but all of your emails, calendar invites, contacts, and tasks have been moved to your Flank Speed inbox for you. In addition, forwarding has been set up to direct any new emails or invites sent to your old address to your Flank Speed inbox.
2 Any outgoing messages will be sent from your new order to ensure your mailbox has been moved and get your Outlook client set up for Flank Speed , please follow these steps:Confirm your inbox moved to your Flank Speed account. Log in to your Flank Speed account via (the Edge browser with an "InPrivate" window is preferred). If you have not logged in before, please reference the Startup Guide posted here. If you are unable to access Outlook from the portal, try accessing directly via your email appears at login congrats, you're migrated! You can now use Outlook via your web browser.
3 If you get the 500 error at right, your email has not been migrated yet. If you can't access Flank Speed Outlook Web Access (OWA), DO NOT Started in Outlook1 Flank Speed Outlook GuideSTEP 1 Configure your installed Outlook client for your new Flank Speed account. 1. Click on your computer's Windows icon and go to "Control Panel". Select "Mail (32-bit)".1 STEP 2 JUNE 16, 20212. Select "Show ".223. Select " " to create a new profile. Type in "FLANKSPEED" for the profile name and select "OK". 31. The "Mail" window should still be open. Ensure your Flank Speed account is se-lected under "Always use this profile" and click "Apply" first and then "OK".
4 4. Your old email address will populate in the email address box. Delete it and type in your new email address. Click "Next".45. You should see a screen going through a series of checks, this will take a few minutes. After all three steps have green check marks, select "Finish".563 Open your Outlook client. Your email should now start synchronizing (meaning, you will start to see old emails and invites show up in your Flank Speed inbox). Depending on the size of your inbox, this could take an hour or more. Calendar invites will likely be the first thing to appear. If nothing appears, try going to "Send/Receive" and click "Update Folder".
5 During synchronization, utilize Outlook Web Access via a browser window (see Step 1) to access and use your email . Once you are up and running in Flank Speed Outlook , please reopen Control Panel and repeat Step 2 on page 1 but instead of selecting " " to create a new profile, select "Remove" and remove your old 3 STEP 4 STEP 5 TROUBLESHOOTING: If you see one of these two error messages, please follow these steps to remedy: 1. Verify that you have been migrated (Step 1 on page 1). If you have, continue below. 2. Attempt to sign into Flank Speed Outlook Web Ac-cess (OWA) using a private browser in Edge (click the three dots in the top right of Edge and select "New InPrivate Window").
6 If you can connect in private mode, your non-private browser is caching old sign-in informa-tion and the following steps will clear it. 3. Remove any non- Flank Speed Outlook profiles (follow Step 2 on page 1, but select "Remove" instead of " ").4. Once your old profile(s) are removed, repeat Step 2 on page 1 to add your Flank Speed profile. 5. If this does not resolve the issue, call your Service Desk to confirm you have MAPI enabled. PLEASE NOTE: If you used PSTs with your account you will need to remap them to your Flank Speed Outlook profile. Guidance can be found here on the Microsoft website: "Open and close Outlook Data Files (.)
7 Pst)."Users with shared calendars will need to remove those delegations in support of the mail migration. Re-establishing shared calendars must wait until users are both mail Type in a security settings name (can be anything, ex. "ActiveClientCerts"). Place a check mark in BOTH default security Select Trust Center , then Trust Center Settings .1. Select email Security .Check "Add digital signature to outgoing messages" and then click "Settings".Configuring Outlook4234 STEP 1 setup email Security1. Select "Options".First, in your Outlook client, click "File" on the top Speed Outlook GuideJUNE 16, 2021 Click the first " ".
8 Select the Signature ( email ) certificate. Click "Ok".Click the second " ".In the "Change Security Settings" box, click "Ok".You should only have one choice, select the Encryption certificate. Click "Ok".5567 STEP 2Re-publish your certificates to the GAL1. Remaining in the " email Security" tab, click "Publish to ".2. Click "Ok" on the pop-up. 3. Enter your PIN when requested then click "Ok". 4. Once done, you will see a status message. Click "Ok".1234 Force a GAL sync so that "US Navy" shows up in the Address Book Navigate to the following file using "File Explorer" c:\Program Files (x86)\Microsoft Office\GlobalDirectory\ 2.
9 When at the file location, double click the program and let it run. 3. Close and restart Outlook . To avoid email delivery errors during Flank Speed transition, send all emails to legacy email addresses ( To do that, follow the following steps to get up and running with the US Navy Global Address List (GAL):Method 11. Open your Outlook On the "File" tab, select "Options".3. Select the "Mail" Under "Send Messages", uncheck "Auto-matic name checking". Then select "Empty Auto-Complete List". Then "Yes".Method 2 Start Outlook using the /CleanAutoCompleteCache switch:1. Select "Start", and then select "Run".)
10 2. Type " /CleanAutoCompleteCache".Global Address List (GAL)6222334 STEP 1 STEP 2 Clear your cache via one of the following two Speed Outlook GuideJUNE 16, 2021 Set your default GAL to "US Navy".1. Open your Outlook client and from the "Home" tab click on "Address Book". 2. From the pop-up menu, click on "Tools" then "Options". 3. From the second pop-up menu, click the radio button for "Custom" and select "US Navy". Click the up arrow to the right of the list until it hits the top of the Custom lists. On the last drop-down menu select "US Navy" to instruct Outlook to use the US Navy GAL by default.