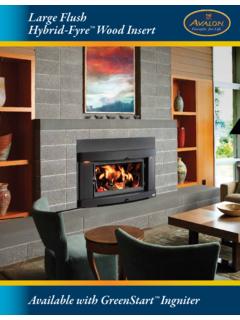
Transcription of Freedom Fireplace Insert - lopistoves.com
1 FreedomOwner'sManual - May, 2001 - MasonryFireplace InsertSAFETY NOTICE:If this appliance is not properly installed, a housefire may result. For your safety, follow theinstallation directions. Contact local building orfire officials about restrictions and installationinspection requirements in your Fireplace Insert10850 117th Place Kirkland, WA 98033 Part # 93508020$ ListedINTRODUCTION & IMPORTANT INFORMATIONPAGE 1 IntroductionWe welcome you as a new owner of a Lopi Freedom wood-burning appliance. In purchasing a LopiFreedom you have joined the growing ranks of concerned individuals whose selection of an energysystem reflects both a concern for the environment and aesthetics. The Lopi Freedom is one of the finestappliances the world over. This manual will explain the installation, operation, and maintenance of thisappliance.
2 Please familiarize yourself with the Owner's manual before operating your appliance andsave the manual for future reference. Included are helpful hints and suggestions which will make theinstallation and operation of your new appliance an easier and more enjoyable experience. We offer ourcontinual support and guidance to help you achieve the maximum benefit and enjoyment from InformationNo other Lopi Freedom appliance has the sameserial number as yours. The serial number isstamped onto the label on the right side of serial number will be needed in case yourequire service of any :LOPI Freedom Serial Number: Purchase Date: Purchased From: Mail your Warranty Card Today, and SaveYour Bill of receive full warranty coverage, you willneed to show evidence of the date youpurchased your appliance.
3 Do not mail yourBill of Sale to suggest that you attach your Bill of Sale tothis page so that you will have all theinformation you need in one place should theneed for service or information 2 SAFETY PRECAUTIONS The viewing door must beclosed and latched duringoperation. Never block free airflowthrough the air vents onthis Gasoline or otherflammable liquids mustnever be used to start thefire or "Freshen Up" thefire. Do not store or usegasoline or otherflammable liquids in thevicinity of this appliance. This appliance is designedand approved for theburning of cord woodonly. Do not attempt toburn any other type offuel other than cord woodin this appliance, it willvoid all warranties andsafety Ashes must be disposed ina metal container with atight lid and placed on anon-combustible surfacewell away from the homeor structure.
4 Do not touch theappliance while it is hotand educate all children ofthe danger of a high-temperature children should besupervised when they arein the same room as " Minimum Keep furniture, drapes,curtains, wood, paper, andother combustibles aminimum of 36" awayfrom the appliance. This appliance must beproperly installed toprevent the possibility ofa house fire. Theinstructions must bestrictly adhered to. Donot use makeshiftmethods or compromisein the Contact your localbuilding officials toobtain a permit andinformation on anyinstallation restrictions orinspection requirements inyour area. Notify yourinsurance company of thisappliance as well. Inspect the chimneyconnector and chimney atleast twice monthly andclean if may build upand cause a house fire. Do not connect thisappliance to any chimneyserving another HTClay Liner This appliance must beconnected to a listed hightemperature (HT)residential type chimneyor an approved masonrychimney with a standardclay tile, or stainless steelliner.
5 Maintain the door andglass seal and keep themin good condition. Avoid placing woodagainst the glass whenloading. Do not slam thedoor or strike the glass. Do not place clothing orother flammable items onor near this PRECAUTIONS (CONTINUED)PAGE 3 Never try to repair orreplace any part of thisappliance unlessinstructions are given inthis manual . All otherwork must be done by atrained technician. Do not make any changesor modifications to anexisting masonry fireplaceor chimney to install thisappliance. Do not make any changesto the appliance toincrease combustion air. Allow the appliance tocool before carrying outany maintenance orcleaning. Overfiring the appliancemay cause a house fire. Ifa unit or chimneyconnector glows, you Do not throw this manualaway. This manual hasimportant operating andmaintenance instructionsthat you will need at alater time.
6 Always followthe instructions in thismanual. Do not use a grate orother device to elevate thefire off of the fireboxfloor. Burn the firedirectly on the bricks. Travis Industries, no warranty,implied or stated, for theinstallation ormaintenance of yourappliance, and assumesno responsibility of anyconsequentialdamage(s).PAGE 4 TABLE OF CONTENTSI ntroduction and Important InformationIntroduction and Important Information .. 1 Safety 2 Features and SpecificationsFeatures and Specifications .. 5 Insert InstallationBefore You 6 Planning The 6 Preparation for Installation .. 6 Insert Installation 6 Optional Equipment Requirements .. 6 Insert Placement Requirements .. 7 Hearth 7 Insert Size Requirements .. 7 Masonry Fireplace Requirements .. 8 Leveling Bolt Installation .. 8 Block-Off Plate 9 INSTALLATION DIAGRAMSI nsert with Positive Connection.
7 10 Insert with Direct Connection .. 10 Insert with Face Seal Connection .. 11 Operating Your ApplianceBefore You 12 Paint Curing .. 12 Location of Controls .. 12 Approximate Air Control Settings .. 12 Bypass Control .. 13 Learning to Burn your 13 How to Start a Hot Fire Quickly .. 13 How to Reload Your Appliance .. 14 How to Adjust the Heat Output Precisely.
8 14 How to Obtain an Overnight Burn .. 15 Good Burning Habits .. 15 Blower Operation .. 16A Word about Wood .. 17 Maintaining Your ApplianceMaintenance 19 Remove Ash From The Firebox (If Necessary).. 19 Clean The Viewing Glass (If Necessary) .. 19 Clean The Brass (If Necessary) .. 19 Check For Creosote Buildup .. 19 Door And Glass Inspection .. 20 Adjusting the Door Cam .. 20 Replacing the Door Gasket.
9 21 Replacing the Glass or Glass 21 Lubricate The Door Hinge .. 21 Touch-Up Paint .. 22 Blower Cleaning .. 22 Firebrick And Baffle Inspection And 22 Firebrick Removal and Replacement Inst.. 23 Baffle Removal and Replacement 23 Secondary Air Tube Replacement Instructions .. 25 Replacement Parts List .. 25 TroubleshootingTroubleshooting Table .. 27 Listing InformationListing 28 Optional EquipmentFlush Kit Installation.
10 29 Surround Panel Installation .. 30 Insulation Installation .. 31 Brass Trim Installation (Optional) .. 31 Front Blower 32 Flue Adapter Installation .. 33 IndexIndex .. 34 FEATURES AND SPECIFICATIONSPAGE 5 Installation Options: Insert into a Masonry FireplaceFeatures: EPA Phase II Approved Cubic Foot Firebox Volume Single, Push/Pull Operating Control Accepts Logs Up to 24" Long Long Burn Time - Up to 12 Hours 5/16" Steel Plate Construction Heavy Duty Refractory Firebrick Optional High-Tech BlowerHeating Specifications:Approximate Maximum Heating Capacity (in square feet)*1,200 to 2,250 (extended)1,200 to 2,000 (with flush kit)Maximum BTU's per Hour (Cord Wood Calculation)73,300 Overall Efficiency (Oregon Method) Burn Time (Hours)12*Heating capacity will vary depending on the home's floor plan, degree of insulation, and the outside temperature.