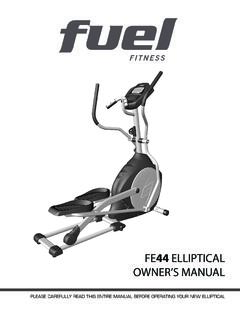
Transcription of FS150 ELLIPTICAL OWNER’S MANUAL - xterrafitness.ca
1 Dyaco Canada Inc 2017 Model: 16604701500 FS150 ELLIPTICAL owner S MANUAL PLEASE CAREFULLY READ THIS ENTIRE MANUAL BEFORE OPERATING YOUR NEW ELLIPTICALPLEASE CAREFULLY READ THIS ENTIRE MANUAL BEFORE OPERATING YOUR NEW ELLIPTICAL Dyaco Canada Inc 2017 TABLE OF CONTENTS Before You Begin .. 3 Important Safety Instructions .. 4 Important Electrical Informations .. 5 Important Operation Instructions .. 5 FS150 Assembly Instructions .. 9 Operation of Your New ELLIPTICAL .. 16 Function .. 17 Program Introduction & Operation .. 18 User Direction .. 23 General Maintenance .. 24 Exploded View 25 Parts List .. 27 Trouble Shooting .. 30 Manufacturer s Limited Warranty .. 37 ATTENTION THIS ELLIPTICAL IS INTENDED FOR RESIDENTIAL USE ONLY AND IS WARRANTED FOR THE APPLICATION. ANY OTHER APPLICATION VOIDS THIS WARRANTY IN ITS ENTIRETY. Dyaco Canada Inc 2017 BEFORE YOU BEGIN Thank you for choosing the Xterra FS150 ELLIPTICAL .
2 We take great pride in producing this quality product and hope it will provide many hours of quality exercise to make you feel better, look better, and enjoy life to its fullest. It's a proven fact that a regular exercise program can improve your physical and mental health. Too often, our busy lifestyles limit our time and opportunity to exercise. The Xterra FS150 ELLIPTICAL provides a convenient and simple method to begin your assault on getting your body in shape and achieving a happier and healthier lifestyle. Before reading further, please review the drawing below and familiarize yourself with the parts that are labeled. Read this MANUAL carefully before using the Xterra FS150 ELLIPTICAL . Although Dyaco Canada Inc. constructs its products with the finest materials and uses the highest standards of manufacturing and quality control, there can sometimes be missing parts or incorrectly sized parts. If you have any questions or problems with the parts included with your Xterra FS150 ELLIPTICAL , please do not return the product.
3 Contact us FIRST! If a part is missing or defective call us toll free at 1 888 707 1880. Our Customer Service Staff are available to assist you from 8:30 to 5:00 (Eastern Time) Monday through Friday. Be sure to have the name and model number of the product available when you contact us. Front Stabilizer Rear Stabilizer Shroud Pedals Upright Console Hand Pulse Grip Swing Arms Dyaco Canada Inc 2017 IMPORTANT SAFETY INSTRUCTIONS WARNING Read all instructions before using this equipment. Do not operate ELLIPTICAL on deeply padded, plush or shag carpet. Damage to both carpet and ELLIPTICAL may result. Before beginning this or any exercise program, consult a physician. This is especially important for persons over the age of 35 or persons with pre existing health conditions. Keep children under the age of 13 away from this machine. There are obvious pinch points and other caution areas that can cause harm. Keep hands away from all moving parts.
4 Never operate the ELLIPTICAL if it has a damaged cord or plug. If the ELLIPTICAL is not working properly, call your dealer. Keep the cord away from heated surfaces. Never drop or insert any object into any openings. Do not use outdoors. To disconnect, remove the plug from the outlet. The hand pulse sensors are not medical devices. Various factors, including the user s movement, may affect the accuracy of heart rate readings. The pulse sensors are intended only as exercise aids in determining heart rate trends in general. Wear proper shoes. High heels, dress shoes, sandals or bare feet are not suitable for use on your ELLIPTICAL . Quality athletic shoes are recommended to avoid leg fatigue or injury. This equipment is not intended for use by persons with reduced physical, sensory or mental capabilities, or lack of experience and knowledge, unless they have been given supervision or instruction concerning use of the equipment by a person responsible for their safety.
5 User weight should not exceed: 265 lbs (120 kgs) SAVE THESE INSTRUCTIONS THINK SAFETY! CAUTION!! Please be careful when unpacking the carton. Dyaco Canada Inc 2017 IMPORTANT ELECTRICAL INFORMATIONS POWER This product uses an external power supply. The adapter must be plugged into the power jack, located on the back of the unit near the stabilizer tube. Next, plug the adapter into the appropriate wall outlet. When not in use, it is recommended to unplug the power supply from the wall outlet. IMPORTANT: If the product has been exposed to cold temperatures, allow the product sit in room temperature to warm up before plugging in the adapter. Failure to do so may result in damage to the display or electronic components. IMPORTANT: Do not operate the product if the power supply, its plug, or its cord has been damaged. WARNING! NEVER remove any cover without first unplugging the adapter. If voltage varies by ten percent (10%) or more, the performance of your ELLIPTICAL may be affected.
6 Such conditions are not covered under your warranty. If you suspect the voltage is low, contact your local power company or a licensed electrician for proper testing. NEVER expose this ELLIPTICAL to rain or moisture. This product is NOT designed for use outdoors, near a pool or spa, or in any other high humidity environment. The operating temperature specification is 40 to 120 degrees Fahrenheit, and humidity is 95% non condensing (no water drops forming on surfaces). IMPORTANT OPERATION INSTRUCTIONS NEVER operate this ELLIPTICAL without reading and completely understanding the results of any operational change you request from the computer. NEVER use your ELLIPTICAL during an electrical storm. Surges may occur in your household power supply that could damage ELLIPTICAL components. Unplug the ELLIPTICAL during an electrical storm as a precaution. Do not use excessive pressure on console control keys. They are precision set to function properly with little finger pressure.
7 If you feel the buttons are not functioning properly with normal pressure contact Dyaco Canada Inc. Dyaco Canada Inc 2017 WARNING DECAL REPLACEMENT The decal shown below has been placed on the ELLIPTICAL . If the decal is missing or illegible, please call our Customer Service Department toll free at 1 888 707 1880 to order a replacement decal. Dyaco Canada Inc 2017 FS150 PRE ASSEMBLYCHECK LIST NO:1NO:2 NO:3NO:22NO:9L/R NO:39NO:13L/R NO:38NO:37L/RNO:21L/RNO:47NO:52NO:54L/RN O:84 Part No. Description Q'ty 1 Main Frame 1 9L/R Pedal Tube (L/R) 1/1 39 Stationary Handlebar 1 2 Rear Stabilizer 1 3 Front Stabilizer 1 13L/R Pedal (L/R) 1/1 38 Computer 1 22 Front Post 1 37L/R Top Handlebar (L/R) 1/1 21L/R Bottom Handlebar (L/R) 1/1 47 Cover for Cross Bar 2 pair 52 Cover for Dual Handle Bar 2 54L/R Cover for Pedal Tube (L/R) 2/2 84 Water bottle holder 1 Hardware Bag 1 MANUAL 1 Dyaco Canada Inc 2017 8 FS150 ASSEMBLY PACK CHECKLIST Part No.
8 Description Q ty 6 Carriage Bolt M10*75 2 7 Curved Washer 8*20* 8 8 Domed Nut M10 2 10 Hinge Bolt (L&R) 1/1 11 Wave Washer 2 12 Flat Washer 2 14 Hex Head Bolt M8*45 4 15 Lock Knob 4 16 Nylon Nut M10 2 17 Flat Washer 22* 10* 2 18 Sleeve 2 20 Hex Head Bolt M10*78 2 23 Allen Bolt M8*16 6 29 Hex head bolt M10*20 2 30 Spring washer 10 2 31 Washer 32* 10* 2 32 D type washer 2 35 Allen Bolt M6*12 4 36 Carriage Bolt M6*20 4 51 Nylon Lock Nut L/R 1/1 25 Spring Washer 8 2 27 Allen Bolt M8*75 2 49 Curved Washer 10* 22 2 87 Box Wrench 2 88 Allen Key 4mm 1 89 Allen Key 6mm 1 90 Allen Key 8mm 1 Note: Above parts are all the parts needed to assemble this machine. Before you start to assemble, please check the hardware packing to make sure they are included. Dyaco Canada Inc 2017 9 FS150 ASSEMBLY INSTRUCTIONS 1 FRONT STABILIZER AND REAR STABILIZER 13684925277 1. Attach the front stabilizer (3) to the front of the main frame (1), fasten with two carriage bolts (6), two curved washers (49) and two domed nuts (8).
9 2. Attach the rear stabilizer (2) to the rear of the main frame (1), fasten with two Allen bolts (27), two spring washers (25) and two curved washers (7). Hardware Step12 Carriage Bolts (#6) 2 Curved Washers (#49) 2 Domed Nuts (#8) 2 Allen Bolts (#27) 2 Spring Washers (#25) 2 Curved Washers (#7) Hardware Step 1 Dyaco Canada Inc 2017 10 2 SUPPORT TUBE 7772323231222826 1. Connect the computer wire (26) from the front post (22) to the lower computer wire (28). Insert the front post (22) into the main frame (1). Secure using four Allen screws (23) and four curved washers (7). Hardware Step 2 4 Allen Bolts (#23) 4 Curved Washers (#7) Dyaco Canada Inc 2017 11 FS150 ASSEMBLY INSTRUCTIONS 3 BOTTOM HANDLEBARS 1334721L29303132525321R29313230334753522 2 1. Attach the left bottom handlebar (21L) to the left side axle of the front post (22). Secure using one D type washer (32), one flat washer (31), one spring washer (30) and one hex head bolt (29).
10 Attach the cover for cross bar (47) onto the left bottom handlebar (21L), secure using two self tapping screws (33). Attach the cover for dual handle bar (52), to the bottom of the left bottom handlebar (21L), secure using one self tapping screw (53). 2. Repeat for the right bottom handlebar (21R) to the right side axle of the front post (22). 2 D Type Washer (#32) 2 Flat Washer (#31) 2 Spring Washer (#30) 2 Hex Head Bolt (#29) Pre-assembled on Covers: 2 Self Tapping Screws (#33) 1 Self Tapping Screws (#53) Hardware Step 3 Dyaco Canada Inc 2017 12 4 PEDAL TUBES 54R1210L11159L13L145554L55562018161721L5 1L24L122 1. Attach the left pedal tube (9L) to the left crank arm (24L). Secure using one left hinge bolt (10L), one wave washer (11), one flat washer (12) and one nylon lock nut (51L). 2. Repeat for the right pedal tube (9R) to the right crank arm. 3. Attach the left pedal tube (9L) to the left bottom handlebar (21L).
