Transcription of GATES MICRO-V MULTI-RIBBED BELTS MENU
1 GATES MICRO-V MULTI-RIBBED BELTS MENU MICRO-V belt installationMicro-V belt troubleshooting guideMore about MICRO-V beltsGATES MICRO-V MULTI-RIBBED BELTS INSTALLATIONStep 1 - Safety firstFirst and foremost, for your own safety, disconnect the car s battery and set the hand 2 - Check belt routing Before removing the old belt on a serpentine drive, look under the bonnet and around the engine compartment for the belt routing diagram. If this information is missing, make a sketch of the belt s path around the pulleys. Put the letter A on the belt for later belt installationStep 3 - Release tensionYou can easily slide the belt off the pulleys, once the tension is new cars use an automatic tensioner which makes servicing easy.
2 Release the tension by means of a spanner or socket wrench and block the tensioner in the retracted position. Other cars use tensioners or accessories which have to be locked down manually to provide the correct tension. These are called locked centre drives. To remove the belt , release the tension by loosening the belt installationStep 4 - Check for misalignmentBefore you take the old belt off, check the alignment of the pulleys as this is a very critical factor for MULTI-RIBBED can cause severe belt wear and damage. It can also create noise or cause BELTS to jump off the can be caused by non-parallel shafts on drive accessories (picture 1) or pulleys located incorrectly on the shafts (picture 2).
3 If misalignment is due to non-parallel shafts, it may be caused by a damaged accessory bracket. Replace the bracket if accessory pulley may be seated too far forward or backward on the shaft. In this case, add or remove metal shims to reposition the pulley or belt installationStep 4 - Check for misalignmentUnfortunately, misalignment is very hard to diagnose due to the tight confines of the engine compartment. If there is enough room and if pulleys are the same, you can check misalignment by holding a ruler along the face of one pulley to the face or edge of the second pulley. Misalignment exists if there is a gap between the pulley face and the belt installationStep 4 - Check for misalignmentNot all pulleys are alike, however, even on the same car.
4 If a ruler cannot be used, try running a tight, fine wire around the first grooves of both pulleys. Place a ruler across the face of one pulley at the level of the wire and observe the distance between the ruler and the wire along its full length. Pulleys are misaligned if both lines are not parallel. MICRO-V belt installationStep 5 - Check belt and pulleys for wear and dirtOnce you have checked alignment, you can remove the belt . Now carefully inspect the entire ribbed area for cracking, chunking and the pulleys and tensioners with a solvent and check them for signs of abnormal wear. Surface finish and dimensional tolerances are much more important for MULTI-RIBBED BELTS than for traditional V- BELTS .
5 To check the condition, press a small amount of plasticine firmly into the grooves. The edges of the impression should be straight and the tips even with no distorted case of excessive wear replace the belt and/or pulley belt installationStep 6 - belt installationOnce you have thoroughly checked the drive, install the belt according to the belt routing diagram. If you reinstall a belt , make sure the letter A is in the legible position. Carefully align the belt ribs with the pulley grooves and check that the belt is square on each pulley. Pulleys that cannot be visually inspected should be felt to ensure proper installation. If not properly installed, the belt can ride up on the pulley or skip grooves resulting in severe belt belt installationStep 7 - Apply correct tensionIf the serpentine drive has an automatic tensioner, slowly release the tensioner and it will automatically apply the right tension.
6 If the car has a locked centre drive, you need to carefully apply the right tension. Too much tension can destroy MULTI-RIBBED BELTS , too little tension can cause noise, belt slippage and pilling. After having tensioned the belt , let the drive run for a few minutes to ensure proper functioning of the belt and even distribution of the tension along the belt s much tension is enough? For locked centre drives, there is a general rule. When installing a new belt , tension should be 13 to 15 kg per rib. Please note that after a run-in period of about three minutes, tension will have dropped and you will have to retension again. BELTS removed for inspection should be retensioned to no more than 10 kg per rib.
7 For drives fitted with an automatic tensioner, proceed the same way to check belt tension. Also, check the tensioner for malfunctioning and replace if belt installationStep 7 - Apply correct tension Use Krikit I & II tension gaugesApplying the correct tension is easy with GATES Krikit tension gauges. Each Krikit tension gauge comes complete with instructions for use and tension values. Use GATES Krikit I for MULTI-RIBBED BELTS up to 4 ribs and Krikit II from 5 ribs on to measure and apply correct the Krikit in the middle of the belt between two pulleys at an area free of overcord splices. Press down gently until the gauge clicks and read the tension at the intersection of the gauge body and the top of the raised arm.
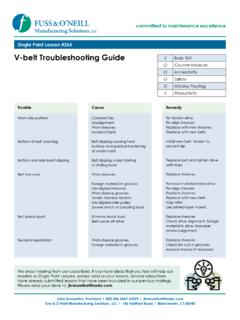
8 Repeat two or three times at the same location to ensure accuracy. The scale indicates the tension in both kg and necessary, apply more torque to the tensioner or accessory, run the engine and test again until the proper tension is distributed around the belt installationThis slide show gave you guidelines on MICRO-V belt installation, routing on serpentine drives and are general guidelines. Always refer to the vehicle manufacturer s recommended procedures for replacement, tensioning and maintenance of MULTI-RIBBED BELTS . Failure to follow these instructions could result in injury or property damage. GATES disclaims all liability due to failure to follow these belt installationGo back to MICRO-V belt menuGATES MICRO-V MULTI-RIBBED BELTSTROUBLESHOOTING GUIDEM icro-V belt troubleshooting guideThe signs of wear as described on the next slides indicate that a MULTI-RIBBED belt needs to be , stress and time affect MICRO-V BELTS .
9 Slipping BELTS cause heat buildup, leading to potential accessory damage and/or overheated single MICRO-V belt breaking on a serpentine drive can be compared to three regular V- BELTS breaking at the same time. With the water pump not functioning, the engine will overheat and quit within a few kilometres. To avoid this unpleasant situation, GATES recommend regular inspection and timely replacement of MULTI-RIBBED cracking across the ribsIn addition to continuous exposure to high temperature, the stress of bending around the pulleys leads to cracking. Cracks begin at the rib top and grow to the cord line. As a rule, if cracks appear 1 or 2 cm apart, 80% of the life is gone and the belt should be of wearMicro-V belt troubleshooting guideChunk outWhen a chunk or section of rib breaks off a belt , the belt can fail at any moment.
10 Chunking can happen when several cracks in one area move parallel to the cord this case replace the of wearMicro-V belttroubleshooting guidePillingPilling happens when material is sheared off the undercord and builds up in the belt grooves. There are numerous causes such as lack of tension, misalignment and/or worn pulleys. Pilling will occur most frequently in diesel engines, but is not isolated to them. When pilling leads to belt noise or excess belt vibration, the belt should be of wearMicro-V belttroubleshooting guideGo back to MICRO-V belt menuMORE ABOUTGATES MICRO-V MULTI-RIBBED BELTS MULTI-RIBBED BELTS are becoming increasingly important on today s cars and light-duty vehicles, offering huge sales the recognised leader in product innovation, quality and application, GATES introduces a new generation of MICRO-V BELTS , matching the capabilities of the original equipment belt following car manufacturers new low-profile MICRO-V construction enhances flexibility and stability, resulting in less vibration and less noise.