Transcription of H1n Operation Manual
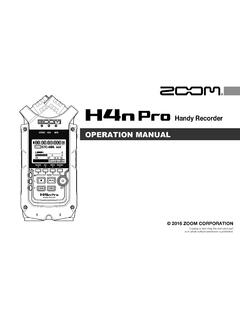
1 Operation ManualYou must read the Usage and Safety Precautions before use. 2018 ZOOM CORPORATIONC opying or reprinting this Manual in part or in whole without permission is and Safety PrecautionsIn this Operation Manual , symbols are used to highlight warnings and cautions that you must read to prevent accidents. The meanings of these symbols are as that could cause serious injury or deathCAUTIONS omething that could cause injury or damage to the equipmentOther symbols usedAn action that is mandatoryAn action that is prohibited WARNING Operation with batteries Use 2 commercially-available AAA batteries (alkaline dry cell batteries, NiMH batteries or lithium dry cell batteries). Carefully study the warning indications of the batteries before use. Always keep the battery and SD card covers closed during use. Alterations Do not open the case or modify the product. CAUTION Product handling Do not drop, bump or apply excessive force to the unit.
2 Be careful not to allow foreign objects or liquids to enter the unit. Battery handling Install batteries with the correct +/ orientations. Use the specified batteries. Do not use new and old batteries together. Do not use batteries of different brands or types together. Remove the batteries when the unit will not be used for a long time. If a leak occurs, thoroughly wipe the battery case and battery terminals to remove the leaked fluid. Operating environment Do not use in extremely high or low temperatures. Do not use near heaters, stoves and other heat sources. Do not use in very high humidity or where it could be splashed by water. Do not use in places with frequent vibrations. Do not use in places with much dust or sand. Volume Do not use at a loud volume for a long time. Interference with other electrical equipmentIn consideration of safety, the has been designed to minimize its emission of electromagnetic waves and to suppress interference from external electromagnetic waves.
3 However, equipment that is very susceptible to inter-ference or that emits powerful electromagnetic waves could result in interference if placed nearby. If this occurs, place the and the other device farther any type of electronic device that uses digital control, including the , electromagnetic interference could cause malfunction, corrupt or destroy data and result in other unexpected trouble. Always use CleaningUse a soft cloth to clean the exterior of the unit if it becomes dirty. If necessary, use a damp cloth that has been wrung out well to wipe use abrasive cleansers, wax or solvents such as alcohol, benzene or paint thinner. Breakdown and malfunctionIf the unit becomes broken or malfunctions, immediately disconnect the AC adapter, turn the power off and dis-connect other cables. Contact the store where you bought the unit or ZOOM service with the following information: product model, serial number and specific symptoms of breakdown or malfunction, along with your name, address and telephone number.
4 Copyrights Windows is a trademark or registered trademark of Microsoft Corporation. Mac OS is a trademark or registered trademark of Apple Inc. iOS is a trademark or registered trademark of Cisco Systems, Inc. (USA). The microSDHC logo is a trademark. Other product names, registered trademarks and company names in this document are the property of their respective : All trademarks and registered trademarks in this document are for identification purposes only and are not intended to infringe on the copyrights of their respective from copyrighted sources, including CDs, records, tapes, live performances, video works and broad-casts, without permission of the copyright holder for any purpose other than personal use is prohibited by Corporation will not assume any responsibility related to infringements of regulation warning (for )This equipment has been tested and found to comply with the limits for a Class B digital device, pursuant to Part 15 of the FCC Rules.
5 These limits are designed to provide reasonable protection against harmful interfer-ence in a residential installation. This equipment generates, uses, and can radiate radio frequency energy and, if not installed and used in accordance with the instructions, may cause harmful interference to radio commu-nications. However, there is no guarantee that interference will not occur in a particular installation. If this equip-ment does cause harmful interference to radio or television reception, which can be determined by turning the equipment off and on, the user is encouraged to try to correct the interference by one or more of the following measures: Reorient or relocate the receiving antenna. Increase the separation between the equipment and receiver. Connect the equipment into an outlet on a circuit different from that to which the receiver is connected. Consult the dealer or an experienced radio/TV technician for EU Countries Declaration of conformity2 IntroductionThank you very much for purchasing a ZOOM Handy Recorder (hereafter, "").
6 The has the following XY micThe 90 XY mic captures three-dimensional images of stereo mic uses a matched pair and can handle a maximum sound pressure of 120 dB SPL, enabling it to record clearly without distortion even during band rehearsals and club interfaceThe input level can be adjusted simply by turning a dial, and recording settings can be changed without compli-cated learning it once, the simple user interface allows settings to be made without with great visibility and language localizationThe full-dot display allows the interface to change as , parameter names, messages and other information can be shown in the set language using the capa-bilities of this audio interface that uses asynchronous transferThe asynchronous transfer system used is not impacted by computer jitter, enabling faithful reproduction of the original recording functions from other modelsThe features include automatic recording that monitors the input level to determine when to start, pre-recording to prevent missing beginnings, and sound marks that are useful for synchronizing with external also has a new self-timer function that is convenient when recording functionNew sounds can be recorded over existing recordings a new file is created and the original file is left unchanged, you can overdub without worrying about playback functionsSpeed adjustment, A-B repeat, playback position skipping and other functions are useful for transcribing, study-ing and learning pieces of music.
7 This recorder is useful even after and Safety Precautions 1 Introduction 3 Names of parts 5 Display overview 8 Preparations 10 Providing power 10 Inserting microSD cards 12 Turning the power on/off 13 Setting the language shown 14 Setting the date and time 15 Preventing misoperation 17 Recording 18 Adjusting input levels 18 Selecting the recording format 20 Reducing noise 21 Setting the limiter 22 Recording 23 Using additional recording functions 24 Adjusting connected equipment levels (playing test tones) 28 Overdubbing 29 Monitoring recording 30 Using external mics 31 Playback 32 Playing recordings 32 Adjusting the volume 33 Using repeat playback 34 Deleting marks 35 Checking file information 36 Using additional playback functions 37 Working with files 42 Deleting files 42 Using USB functions 43 Connecting with other devices 43 Using as a card reader 44 Using as an audio interface 45 Making various settings 48 Opening the SETTING screen 48 Setting the date format 49 Setting the display backlight 50 Adjusting the display contrast 51 Setting the type of battery used 52 Setting the Auto Power Off function 53 Setting how the counter appears 54 Setting how files are named 55 Other functions 56 Formatting microSD cards 56 Testing microSD card performance 58 Checking the versions 62 Restoring default setting values 63 Updating the firmware 64 Adding languages 66 Troubleshooting 68 Specifications 694 Names
8 Of parts Front LIMITER button Built-in XY mic Input volume dial Display LO CUT button AUDIO button REC LED STOP/OPTION button REW button Speaker AUTO LEVEL button REC button PLAY/PAUSE button FF button Built-in XY micThis has two crossing directional mics. This mic can record a three-dimensional sound with natural depth and width. Input volume dialUse to adjust the input level. DisplayThis shows various types of information. AUDIO buttonUse this to operate the function shown 1st from the left at the bottom of the display. LO CUT buttonUse this to operate the function shown 2nd from the left at the bottom of the LIMITER buttonUse this to operate the function shown 3rd from the left at the bottom of the display. AUTO LEVEL buttonUse this to operate the function shown 4th from the left at the bottom of the display. REC LEDThis lights during recording. It blinks rapidly when the input sound level is high. REC buttonUse to start recording.
9 STOP/OPTION buttonUse to stop file playback and show various functions. PLAY/PAUSE buttonUse to start and pause playback of recorded files. REW buttonUse to skip files and search backward to a playback position. FF buttonUsed to skip files and search forward to a playback position. SpeakerSound is output here during file Left and right sides PHONE/LINE OUT jack VOLUME buttons MIC/LINE IN jack microSD card slot TRASH button POWER (HOLD) switch USB port PHONE/LINE OUT jackThis can output sound to headphones or a connected device. VOLUME buttonsUse to adjust the volume. MIC/LINE IN jackA connected mic can be used to record. Mics that require plug-in power can be used with this jack. microSD card slotInsert a microSD card here. TRASH buttonUse to delete recorded files. POWER (HOLD) switch Use this to turn the power ON/OFF and to disable button Operation . USB portConnect this to a computer or iOS device to use the as an audio interface or card overviewRecording Screen Remaining battery charge File name Status icon Level meters Function buttons Counter Clipping indicators File nameThis shows the name of the file being recorded.
10 Status iconThis shows the recording status. Ready Recording Paused Overdubbing ( "Overdubbing") Level metersThese shows the current input levels . Function buttonsThese show functions that can be set on the Recording Screen. From left to right, these correspond to , , and .To change the setting, press the same key again while the parameter appears enlarged. Remaining battery chargeThis shows the remaining battery charge. When the remaining battery charge becomes low, replace the batteries ( "Using batteries") or connect an AC adapter ( "Using an AC adapter"). CounterThis shows either the current elapsed recording time or the remaining available recording time ( "Setting how the counter appears"). Clipping indicatorsThese appear lit when loud sounds are input. If the clipping indicators light, adjust the input level ( "Adjusting input levels ") or set the limiter ( "Setting the limiter").8 Playback Screen Remaining battery charge File name Status icon Number of selected file/total number of files Level meters Progress bar Function buttons Counter Remaining playback time Clipping indicators File nameThis shows the name of the file being played.