Transcription of How To Brew Your Own Beer ebook
1 How To brew your Own beer ebook Intro Make your own beer So, you've considered brewing your own beer but you're not yet willing to drop the cash for the entry level kit just yet. With a few simple pieces of equipment and ingredients here's how you can brew your own batch. In just a couple of weeks you can taste for yourself if homebrewing is a hobby you want to take to the next level. Don't get me wrong, I think the entry level brew kits are a good value. They include some special equipment not used here that will make things easier. But, will you enjoy the beer or find the brewing process rewarding and fun?
2 I think so. This project will allow you to find out for yourself. Here's a picture of the finished quite tasty! step 1 Equipment Note: Sanitation is very important in brewing. * brew pot - any large kitchen pot that will hold a couple of gallons of water with room to spare to avoid boiling over. * Kitchen strainer - to strain grains and hops before going to the fermenter * Kitchen thermometer * Large funnel * Rolling pin - for crushing the grain * 3 gallon container of bottled water - this will provide you with the water to make your beer and serve as your fermentation container * Bottling container - An empty container of at least 3 be another empty water bottle or a clean, scratch-free, food grade plastic bucket.
3 * 3 feet of 3/8" clear poly-vinyl tubing - for siphoning and fermentation air lock * Bottles - there are a lot of options here and I'll cover some of them in the bottling step later Crushed crystal malt step 2 Ingredients Most recipes for the homebrewer are written to make 5 gallon batches. I've simply cut the ingredient list by half for the gallon batch here. You'll need to find a local homebrew supply shop or one of many such shops on the web from which to purchase the ingredients. (See resource in Step 15) Ingredients Simple Ale * 3 lbs light dried malt extract * 8 oz crushed crystal malt * 1 oz Northern Brewer pellet hops * 1 pkg brewers yeast * 3/8 cup sugar for bottling step 3 Crushing the Grain Use a large heavy freezer bag and pour in roughly 8 ounces of the crystal malt a little at a time.
4 Use a rolling pin to crush the grain. You don't want to make flour here just a very course texture of broken grains. Later on, when you decide to get more serious, you may wish to purchase a malt mill designed specifically for this purpose. step 4 Steeping This is the brewing term for the process of extracting the goodness from specialty grains, crystal malt in this recipe. First pour 1/2 gallon of water from your 3 gallon water bottle and place a mark at the 2 1/2 gallon water level. Now pour up to 2 1/2 gallons of the remaining water into your brew pot leaving at least 3 inches to the top of the pot.
5 Add your crushed grains. Turn on the heat to medium high and bring the temperature up to 150 to 155 degrees. Turn off the heat and cover the brew pot to let the magic take place inside for 30 minutes. Use a strainer to remove as much of the spent grain as possible without worrying too much about a few remaining grains. step 5 The Boil Now bring the contents of the brew pot to a boil. Then, remove from heat and stir in the malt extract. Return to heat and again bring to a boil. Be careful here! This is the point where you are at most risk of boiling over.
6 A boil over is something you definitely want to avoid as you'll have quite a sticky mess to clean up if it happens. Once you have a controlled boil add about 2/3 oz of the hop pellets to the boil and maintain the boil for 60 minutes to get the most from the bittering potential of your hops. Submerse your kitchen strainer in the boil for the last 15 minutes to sanitize it for later use. At the end of 60 minutes turn off the heat and add the remainder of the hop pellets. Cover and let the newly added hops steep for 10 minutes. Hops added at this point will contribute some hop flavor and aroma to your finished beer .
7 Step 6 Air Lock This step can be done earlier but I chose to do it during the boil. In any case you'll want to keep one eye on the boil at all times. Did I warn you about boiling over? I used a commercial air lock but you could fashion an air lock from a piece of clear vinyl tubing, one end fitted to the cap and the other end in a cup of water. The commercial air locks are only $1 or so and are included in the starter kits. I drilled a 3/8" hole in the water bottle cap. The air lock fits snugly in the hole. The idea is to let carbon dioxide produced during fermentation escape while keeping air outside from getting in.
8 Step 7 Cooling the Wort Congratulations! At this point you have wort (pronounced wert). Wort is simply unfermented beer . Quicker is better when it comes to cooling. One method for cooling is to create a cold water bath in the sink to partially submerse the brew pot in. Adding ice to the bath will help accelerate the cooling process. Gently swirl the brew pot in the cold bath water. Once the sides of the brew pot become cool to the touch you're ready for the next step but first a word on sanitation. Sanitation is very important in brewing.
9 Anything that comes in contact with your cooled wort must be sanitized else you run the risk of undesireable critters living and multiplying in the wort only to contribute nasty unintended flavors in your beer . You've sanitized your strainer in the boil, right? your fermentation bottle is sanitary because you just opened it and capped it after using water from it, right? your funnel and anything else to come in contact with the wort can be sanitized by soaking in a solution of 1 tablespoon of bleach per gallon of water for 30 minutes. step 8 Gently pour your cooled wort through your sanitized strainer and funnel into the empty fermentation bottle.
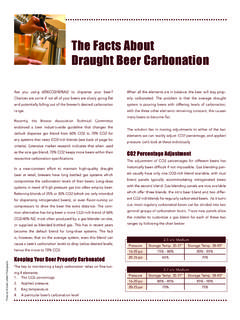
10 You'll want the total volume in the fermenter to be 2 1/2 gallons. If your brew pot was big enough to allow you to boil a full 2 1/2 gallons you'll have to compensate for evaporation that took place during the boil. If you need to add water to reach the 2 1/2 gallon mark made in Step 4 do it now. Tap water is fine. You can use water from the 1/2 gallon you poured off in Step 4 if you saved it to a sanitized container. Bring the total volume up to the mark we made earlier on the bottle. step 9 Pitching the Yeast Pitching yeast is the brewing term for adding yeast to the unfermented wort.