Transcription of How to Make: A Replica Native American Arrow
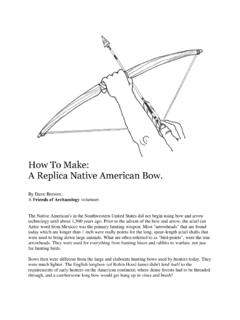
1 How to make : A Replica Native American Arrow By Dave Brewer A Friends of Archaeology volunteer The bow and Arrow were added to the Southwestern hunting kit only about 1,500 years ago. The principle is simple; the energy of a bent bow is transferred to the flight of an Arrow by the bowstring. Arrows are short (compared with spears), straight, and rigid. Two general types of arrows were made : (1) Solid-shaft arrows were made of the shoots of virtually any plant that produced a usable shaft, such as chokecherry, gooseberry, fruitwoods, ash, dogwood, willow, and Apache plume. (2) Cane arrows made use of the light stems of river cane ( Native bamboo) for the main shaft, with a solid wooden tip whittled and inserted into the front end of the cane. Willow is generally available, and I will take you through a step-by-step process in the creation of a willow Arrow . The same process is followed with any solid-shaft Arrow , and the steps can be adapted easily to the making of a cane Arrow .
2 We will use modern tools, 2 but there are ancient analogs for all of the tools (such as a flake of stone instead of a knife; a piece of sandstone instead of sandpaper). Safety Tips! Making an Arrow involves cutting and heating. Both activities require ADULT SUPERVISION to minimize risk of injury or damage to property. Knives are SHARP, and if they aren t used properly and carefully they can cut both people and things. First aid supplies should be handy. Heating is dangerous, both from the source of heat or fire and from the material that has been heated. Heat sources must be monitored so that they are off when not needed and so that they can t accidently catch anything on fire. Heated shafts and pitch can also cause burns if they come in contact with skin, even though they don t look hot. Gloves, hot pads, and tongs can help protect the arrowmaker, but supervision is still needed because these protections can also making handling hot items awkward.
3 Any time fire or heat is used, water or a fire extinguisher should be handy. The best time to harvest willow for Arrow shafts is in February, when the sap is in the roots and the wood is still relatively easy to cut. However, harvesting at other times of year works, even if it is a bit messy due to the sap. Look for stands of willow along creeks, rivers, and irrigation ditches. Always ask landowners for permission to trespass and permission to harvest the shoots. The willow shoots should be between one-fourth and three-eighths of an inch in diameter and have a usable length (within these diameters) of at least 18 inches. Look for the straightest shoots, and trim off all side branches and twigs, but you don t have to have a perfectly straight shoot (I ll show you how to straighten a shaft later). If you aren t in a hurry, you can spread out the shoots on a flat surface in a warm room and allow natural drying to occur.
4 In a month or so, the shoots will have dried out to where the outer bark may be stripped away easily with a pocketknife (see Figure 1). If you are in a hurry, the bark can be carefully whittled or peeled from the shoot, but don t cut deep into the wood. If you ve harvested while the sap is flowing, this process can be sticky, and the peeled Arrow shafts will need to be dried for a few days before it s possible to sand the shafts. 3 After peeling, the usable portions of the shoots will be about one-quarter inch in diameter. The peeled shafts will need to be sanded smooth with a piece of medium-grade sandpaper. You don't need to make the shaft as smooth as a dowel, but you don t want any big bumps or jagged projections on the finished Arrow . Most shafts will require some straightening. Even shoots that were straight when they were harvested can warp after they have dried out. You will need a heat source for the straightening process, either a hot plate, an open flame on a gas stove, or a few charcoal briquettes (heat straightening should be done by an adult or with close adult supervision see Safety Tips!)
5 Wear gloves to grasp the shaft, as the wood can get hot enough to burn your skin. 4 Grasp the shaft, holding it above the heat source so that it doesn't catch on fire (be prepared for accidents with an extinguisher handy). The straightening process is a matter of feel. The idea is to heat the area of the shaft that needs to be bent. Once heated, the shaft should be unbent a little more than straight and held in that position as it cools. The shaft will slowly assume the new shape, but it may take several cycles of heating, bending, and cooling to straighten each segment. Start at one end of the shaft, and don t expect to straighten more than a few inches of the shaft at one time. This takes some practice to master, but it isn t difficult. A patient attitude really helps here. Getting in a rush will only bring grief (and a broken shaft) with it! The shoot can be trimmed to its final length at this point.
6 If the arrows are being made for a specific bow, the shafts only need to be a couple of inches longer than the draw of the bow. If the Arrow is for display, it can be anywhere from 18 to 30 inches long. Another sanding would be a good idea after the Arrow shaft has been straightened, as often, minor discoloration can occur from scorching. The type of point determines the next step. Many arrows were made with a self-point that was created just by sharpening one end of the shaft. In this case, the narrow end of the shaft can be the point, and the wide end of the shaft can be the nock end. If you want to attach a point of a different material (stone, bone, metal, shell, or even plastic), it s often easier if the wide end of the shaft is used for the point and the narrow end for the nock. Care must be taken when cutting the nock not to split the shaft. It can be carefully whittled into the end with a knife, or it can be made with a file or saw.
7 The nock (or notch) doesn t need to be deeper than one-eighth of an inch, but it should be centered and should have a rounded or flat bottom as wide as the bowstring (usually a little less than one-eighth of an inch). Some Arrow shafts are thinned just before the nock. Arrows don t have to have points at all, but even a blunt end can cause injury or damage. If you are creating a self-point, the shaft need only be tapered to a point by carefully whittling the last 3 to 4 inches of the shaft. The point can be sanded smooth. 5 Arrowheads were made from stone, bone, or shell and were fashioned from scrap iron (often cut from barrel hoops) or glass during the historic period. Flaking a stone (or glass) point is called knapping or flintknapping, and it is both a skill and an art. Flintknapping is best taught by a master rather than being learned through experimentation. In addition to the complex skills involved, there is real danger of serious injury to both the flintknapper and bystanders.
8 I have knapped the arrowhead that I will use for this demonstration, but simple arrowheads can be cut and shaped from flat and thin raw materials such as iron or Formica samples. Arrowheads come in many shapes, but they are small (less than one and one-half inches long) and thin. Here, we focus on the base of the arrowhead where it attaches to the Arrow . The base should be two-thirds the thickness of the Arrow shaft or thinner. Notches or tangs on the base of the point make it easier to attach the point to the shaft. Large arrowheads (longer than about 1 inches) are actually knives or spearheads and not arrowheads at all. They were used with a throwing stick called an atlatl (a term from Mexico and a good subject for another How to .. ). 6 A notch needs to be whittled, sawn (a bench jigsaw works well), or filed into the end of the Arrow shaft for the point. The size of the notch (both depth and width) needs to be sized for the point base.
9 The point can spread the ends of the notch apart a little but not a lot, and you may need to have patience preparing a custom notch for each different point. The fit should be close but not too tight. When the notch is complete, the ends of the shaft that embrace the point should be reduced or trimmed by whittling or sanding. If you want the Arrow to look old, a wood stain can be applied to the shaft at this stage. The point is secured in the notch with sinew and pitch (or glue). Native peoples used sinew for permanent nonflexible bindings. Sinew was obtained from deer, elk, or bison tendons that were harvested from freshly killed animals and prepared, dried, and stored for later use. Narrow strips of sinew were softened in water, applied wet as a binding, and allowed to dry tight. A modern substitute is artificial sinew, available at most hobby and craft stores. It is best described as nylon dental tape that has been impregnated with a colored wax, and flat artificial sinew works better than round sinew for arrows.
10 7 Pitch is natural glue that can be found on pine trees where the trees have been wounded in the past. It oozes out of cuts, breaks, or beetle holes and solidifies as a resin. Fresh pitch is a liquid, but it thickens and hardens through time until it is a solid (rosin). If you are just making an Arrow or two, you can hunt and collect a small amount of thick, sticky pitch in a small jar. If you need more pitch, you can gather the full range of lumps, from solid-and-dry pieces to soft-and-sticky pieces. The pitch lumps can then be refined by gently heating everything in a tin can, where the softer lumps melt and dissolve the harder ones. The melted pitch is flammable, can cause burns if spilled, and is very difficult to clean up. Overheating will scorch the pitch, making it unusable. If bark, sticks, bugs, and pine needles contaminate it, you can filter the warm-to-hot pitch through metal plastering lath to remove most of the impurities.


