Transcription of How to Set Up Delivery Instructions
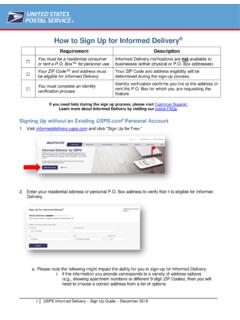
1 How to Set Up Delivery Instructions Solution Eligibility for Delivery Instructions In order to use the Delivery Instructions Service, you and your mail piece must first meet the following requirements: Requirement Further Information You must be a registered user If not already a * account holder, go to , select the Register/Sign In button, and create an account. usps tracking number must be on mail piece / package / receipt Eligible: Package / mail piece has not gone out for Delivery that day. The following items are NOT ELIGIBLE: Insured for $500 or more; International; Military address destinations; Requiring a Delivery signature; Active COD service; Active Hold Mail request Active Hold for Pickup request *Note: To get all the Delivery Instructions options, make sure you sign in to your account NOT your My usps account. Delivery Instructions and Address Verification The following are step-by-step Instructions on how to place a Delivery Instructions request.
2 Locate the tracking number on your mail piece or receipt before going online. 1. Navigate to 2. Enter your incoming mail piece s tracking number and then select the arrow on the right. 3. Select the Delivery Instructions link under Available Actions . If the mail piece is not eligible for Delivery Instructions , the option will not be present. 4. If you are already signed in to , you can skip Steps 4 and 5. Otherwise, select the Sign In button to enter login credentials. (If you don t have a account, this is where the Register now link can be clicked to create one.) 5. Sign in by entering Username and Password in the boxes provided and select the Sign In button to access your account. On this same screen, the system will again remind you to open a If you don t have an account, click the Sign Up Now button and start the account setup process. 6. Read and agree to the Terms and Conditions, and then select the Continue button to begin a Delivery Instructions request.
3 7. Enter the original street address the package was addressed to, and select the Continue button. 8. The system will notify you if the address has been authorized and can accept Delivery Instructions . Not all addresses can accept Delivery Instructions , just yet. 9. If you enter an address / ZIP Code that doesn t match your profile, this error message will display. If you try to redirect a package to a neighbor that is not on your carrier ( Delivery ) route, the error message will display. If you opt to have your package / mail piece delivered to another domestic address that is also not eligible for Delivery Instructions , the error message will also display. 10. Select an option for how the package / mail piece is to be handled. The Continue button will become available once a selection is made. Each of the above options, in addition to upgrading mail service, is further detailed in the next sections.
4 Leave it at the original Delivery address option Leave With a Neighbor option Send to Different Domestic Address option Hold At a Post Office option Upgrade Service Type to PME or PM / Add Extra Services Leave it at the original Delivery address option 1. When selecting the Leave it at the original Delivery address option, you will also need to select a Where location from the dropdown menu. 2. After selecting the Where? location (several options are available), click the Continue button to place the request in the Shopping Cart. 3. Review your Delivery Instructions request, and select the Place My Order button to submit the request. 4. The Order Summary will appear to confirm that your request order has been successfully submitted. Leave With a Neighbor option NOTE: The Neighbor option requires that the neighbor you choose lives in the same ZIP Code and carrier route that you do.
5 1. When selecting the Leave it with a neighbor option, you must provide the street address of the neighbor s home where the package / mail piece will be delivered. Selecting the Continue button places the request in your Shopping Cart. 2. Your order will be placed in the Shopping Cart. If everything looks right, click the Checkout button. 3. Make sure you review the Delivery Instructions request one more time, and select the Place My Order button to submit the request order. 4. Your Order Summary will appear to confirm the request has been successfully submitted. Send to Different Domestic Address option 1. When selecting the Send it to a different domestic address option, you should provide the alternate domestic address where the package is to be delivered. NOTE: This option carries an additional postage cost in order to ship to an alternate domestic location. If the address is not eligible, the system will advise with an error message.
6 2. You should verify that the new address is correct. If so, select the Add to Cart button. If not, they will select the Change Options button. 3. Your order will be placed in the Shopping Cart. Click the Checkout button to proceed to Billing Information. 4. Check the authorization box to allow the usps to charge your credit card for the transaction. After providing your billing information, select the Continue button. 5. You should review the Delivery Instructions request, and select the Place My Order button to submit the request. 6. An Order Summary will appear to confirm that your request has been successfully submitted. Hold At a Post Office option 1. If you select the Hold it at a Post Office option, you must enter the ZIP Code of the Post Office where you would like your package / mail piece to be held, and then select Search . NOTE: When you choose a ZIP Code / Post Office other than your own, there will be an additional cost for the Delivery .
7 If you choose your own ZIP Code / Post Office, there is no fee. 2. Select the Post Office via the list provided for the ZIP Code entered. Selecting the Continue button confirms your selection. 3. Select the Add to Cart button to submit your request. NOTE: In this example, there is a fee, because a different ZIP Code was entered. Remember, if you choose your own ZIP Code, there will be no fee. 4. You should review the Delivery Instructions request, and select the Place My Order button to finalize your request. 5. Your order summary will appear to confirm that your request has been successfully submitted. Upgrade Service Type to PME or PM / Add Extra Services 1. If you want to upgrade your shipment s service type to Priority Mail Express or Priority Mail, a list of service type options will appear after the Send it to a different domestic address option has been selected. 2. Select the Service Type desired from the given list.
8 3. If additional Insurance is desired ($ maximum), you can select the Add more Insurance box. Then, enter the dollar value of your package and click Calculate Price to generate the additional insurance fee. Remember: Priority Mail Express already includes $ insurance and Priority Mail includes $ insurance. 4. If you selected Priority Mail or Priority Mail Express as the service type, then the Extra Services options will be displayed. If you want to add an Extra Service, make a selection from the list. 5. As you add Insurance or Extra Services, the total cost will be dynamically updated. 6. If there are no errors, selecting Add to Cart will take you to your shopping cart where you can pay for your modifications. Selecting the Checkout button takes you to the Billing Information page. 7. Make sure you check the authorization box to allow the usps to charge your credit card for the transaction.
9 Next, provide your billing information and select the Continue button. 8. Review the Delivery Instructions request, and select the Place My Order button to submit your request order. 9. The Order Summary will appear to confirm the request order has been successfully submitted.