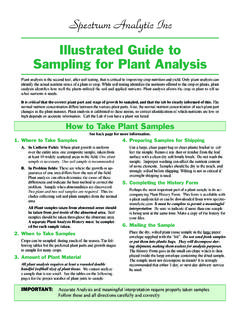
Transcription of Illustrated Guide to Sampling for Plant Analysis
1 Illustrated Guide to Sampling for Plant Analysis Plant Analysis is the second tool, after soil testing, that is critical to improving crop nutrition and yield. Only Plant Analysis can identify the actual nutrient status of a Plant or crop. While soil testing identifies the nutrients offered to the crop or plants, Plant Analysis identifies how well the plants utilized the soil and applied nutrients. Plant Analysis allows the crop or Plant to tell us what nutrients it needs. It is critical that the correct Plant part and stage of growth be sampled, and that the lab be clearly informed of this. The normal nutrient concentration differs between the various Plant parts. Also, the normal nutrient concentration of each Plant part changes as the Plant matures.
2 Plant Analysis is calibrated to these norms, so correct identification of which nutrients are low or high depends on accurate information. Call the Lab if you have a Plant not listed. How to Take Plant Samples See back page for more information. 1. Where to Take Samples 4. Preparing Samples for Shipping A. In Uniform Fields: Where Plant growth is uniform Use a large, clean paper bag or clean plastic bucket to col- over the entire area, one composite sample, taken from lect the sample. Remove any dust or residue from the leaf at least 10 widely scattered areas in the field. One Plant surface with a clean dry soft bristle brush. Do not wash the sample is necessary. One soil sample is recommended. sample. Improper washing can affect the nutrient content of some elements.
3 Samples should be dry to the touch, and B. In Problem fields: These are where the growth or ap- strongly wilted before shipping. Wilting is not as critical if pearance of one area differs from the rest of the field. overnight shipping is used. Plant Analysis can often determine the cause of these differences and indicate the best method to correct the 5. Completing the History Form problem. Sample when abnormalities are discovered. Two Plant and two soil samples are required. This in- Perhaps the most important part of a Plant sample is its ac- cludes collecting soil and Plant samples from the normal companying Plant History Form. This form is available with area. a Plant Analysis kit or can be downloaded from It must be complete to permit a meaningful All Plant samples taken from abnormal areas should interpretation.
4 Be sure to indicate if more than one sample be taken from just inside of the abnormal area. Soil is being sent at the same time. Make a copy of the history for samples should be taken throughout the abnormal area. your files. A separate Plant Analysis History must be complet- ed for each sample taken. 6. Mailing the Sample 2. When to Take Samples Place the dry, wilted Plant tissue sample in the large paper envelope supplied with the kit . Do not send fresh samples Crops can be sampled during much of the season. The fol- or put them into plastic bags. They will decompose dur- lowing tables list the preferred Plant parts and growth stages ing shipment, making them useless for Analysis purposes. to sample for many crops. The History Form goes in the small envelope which is then placed inside the large envelope containing the dried sample.
5 3. Amount of Plant Material The sample must not decompose in transit! It is strongly All Plant Analysis requires at least a rounded double recommended that either 2-day, or next-day delivery service handful (softball size) of Plant tissue. We cannot analyze be used. a sample that is too small. See the tables on the following pages for the proper number of Plant parts to sample. IMPORTANT: Accurate Analysis and meaningful interpretation require properly taken samples. Follow these and all directions carefully and correctly. Proper Plant Tissue Sampling Technique Plant PART. CROP GROWTH STAGE QUANTITY. TO SAMPLE. AGRONOMIC and FORAGE CROPS. Alfalfa At or prior to 5% bloom Entire above ground portion of Plant or 15 to 20 plants top 6 , whichever is smaller.
6 Barley, Oats, a) Feekes Stages 3 through 9 Entire above ground portion of Plant . 30 to 40 plants, Rye, Wheat depending on size (other small grains except b) Feekes Stage 10 Uppermost mature, or Flag leaves. 30 to 40 leaves rice). Seedling to Vegetative Whole Plant 20 to 30 leaves Canola At or prior to full bloom Fully developed leaves on upper portion 20 to 30 leaves of Plant Corn (a) Seedling (6 to 12 ) tall (< V6) Entire above ground portion of Plant . 15 to 20 plants (Field, Pop, and (b) Prior to tasseling, (V7-VT) First fully developed leaf below whorl. 10 to 15 leaves Silage) (c) Silk initiation to brown silk stage Ear Leaves. 10 to 15 leaves (R1-R5). (a) Seedling, 6 to 12 tall Entire above ground portion of Plant 15 to 20 plants Cotton (b) Prior to or at first bloom Youngest fully mature leaves from the (c) When first squares appear main stem of Plant .
7 Discard the petioles. 15 to 20 leaves Cotton When first squares appear to full Petioles from the youngest fully mature 30 to 50 petioles (Petioles) maturity leaves on the main stem of Plant . Grasses Entire above ground portion of Plant or (Hay, Forage or Prior to heading top 6 , whichever is smaller. 25 to 30 plants Pasture). Peanuts (a) Seedling stage Entire above ground portion of Plant . 15 to 20 plants (b) Vegetative to pegging stage Youngest fully mature leaf. No petioles. 20 to 30 leaves (a) Seedling stage Entire above ground portion of Plant . 15 to 20 plants (b) Tillering Entire above ground portion of Plant . 15 to 20 plants Rice (c) 1st Joint-Panicle Initiation Y Leaf / Flag Leaf 20 to 30 leaves (d) Panicle differentiation Y Leaf / Flag Leaf 15 to 20 leaves (e) Flowering-Heading Y Leaf / Flag Leaf 20 to 30 leaves Soybeans (a) Seedling stage (V2 - V5) Entire above ground portion of Plant .
8 15 to 20 plants (b) Vegetative to early pod fill (> V5) Youngest fully mature leaf. No petioles. 20 to 30 leaves Sugar Beets (a) Seedling stage Entire above ground portion of Plant . 15 to 20 plants (b) Vegetative stages Youngest fully mature leaf in the whorl. 10 to 20 leaves Sugar Cane 2 Months to Mature Second fully mature leaf without sheath. 15 to 25 leaves Sunflowers (a) Seedling stage Entire above ground portion of Plant . 15 to 20 plants (b) Vegetative to full bloom Youngest fully mature leaf. No petioles. 15 to 20 leaves Tobacco (a) Seedling (transplants, 2 wks.+) Entire above ground portion of Plant . 15 to 20 plants (b) Vegetative stages Youngest fully developed leaf from top. 10 to 20 leaves See Pictorial Guide For More Information.
9 Plant PART. CROP GROWTH STAGE QUANTITY. TO SAMPLE. VEGETABLE CROPS. Asparagus (a) Spears Entire above ground portion of Plant . 10 to 20 spears (b) Ferns Youngest mature frond (top 24 inches). 10 to 20 fronds Beans (a) Seedling stage Entire above ground portion of Plant . 20 to 30 plants (Field/Dry, Snap, (b) Vegetative to early pod fill Youngest fully mature leaf. No petioles. 20 to 30 leaves Lima, etc.). Beets, Table Vegetative stages. Innermost mature leaf in the whorl. 25 to 50 leaves Broccoli, (a) Seedling stages Entire above ground portion of Plant . 20 to 30 plants Cabbage, (b) Vegetative to heading stages Mature fully expanded wrapper leaf. 15 to 20 leaves Cauliflower Carrots (a) Seedling stages Entire above ground portion of Plant 20 to 25 plants (b) Vegetative stages.
10 Innermost mature leaf in the whorl. 25 to 50 leaves Celery Vegetative stages Petiole of youngest mature leaf. 20 to 25 petioles Collard,Kale, Mustard, Vegetative stages Youngest mature leaf. 15 to 20 leaves Turnip Eggplant Vegetative to full bloom stage. Youngest mature leaf on main stem. 25 to 35 leaves Lettuce, Spinach, Vegetative stages Youngest mature leaf. 20 to 30 leaves Endive Melons (cantalope/. muskmelon, Vegetative to fruiting Youngest fully mature leaf. No petioles. 15 to 20 leaves watermelon). Onion, Garlic, (a) Seedling stages Entire above ground portion of Plant . 30 to 50 plants Leek, Shallot (b) Vegetative stages Entire above ground portion of Plant . 25 to 30 plants Peas (a) Seedling stage (4-17 nodes) Entire above ground portion of Plant .