Transcription of Installation & Instruction Manual - Manaras-Opera
1 Installation & Instruction ManualInstallation & Instruction ManualCommercial & industrial Heavy Duty Jackshaft OperatorCommercial & industrial Heavy Duty Jackshaft Operator(For sectional doors , rolling doors and grilles)(For sectional doors , rolling doors and grilles)Opera-HOpera-H(OPH)(OPH)Opera-JO pera-J(OPJ)(OPJ)Opera-HJOpera-HJ(OHJ)(OH J)Opera-SHOpera-SH(OSH)(OSH)Electro-Mech anical ControlElectro-Mechanical ControlREAD AND FOLLOW ALL instructions . SAVE THESE instructions . GIVE TO # Model # Wiring Diagram # Project #/Name Door #/Name For technical support, please call 1-800-361-2260 or visit for more information2 TABLE OF CONTENTSI nstallation Specifications and Dimensions (OPH / OPJ / OHJ).
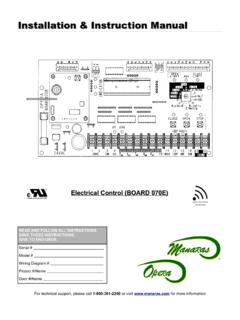
2 42 General Specifications and Dimensions (OSH)..53 Door & Operator of Mounting Mounting , Spreader Bar and Drive Chain Control Hand Chain and Disconnect Switches & Limit Cams: Adjustment & Switch Switch Adjustments: Open and Close Cam Limit Switch Switch Adjustment Using Manual Hand Chain (if applicable).. Switch Adjustment Without Manual Hand Chain (if applicable)..148 Electrical Voltage (Controls) and High Voltage (Power) Power Supply Accessory Circuit Programming (Contactor Circuit).. Mode Site Fix Maintenance Brake Phase Operator Hardwired Phase Operator Hardwired Wiring Exploded Views and Replacement Heavy-Duty Jackshaft General Brake (BRAKE 013).. Control Box - Motors, Transformers, Solenoids, Relays and technical support, please call 1-800-361-2260 or visit for more information3 Installation InstructionsIMPORTANT Installation instructions WARNINGTO REDUCE THE RISK OF SEVERE INJURY ORDEATH TO AND FOLLOW ALL Installation only on a properly operating and balanced door.
3 A door that is operatingimproperly could cause severe injury. Have qualified service personnel make repairsto cables, spring assemblies and other hardware before installing the all pull ropes and remove, or make inoperative, all locks (unlessmechanically and/or electrically interlocked to the power unit) that are connected tothe door before installing the of this door operator must be done by a qualified that the operator is correct for type, size of door and frequency of use per theoperator the door operator at least 8 feet (2,44 m) or more above the floor if the operatorhas exposed moving parts. Covers or guarding, provided by the manufacturer, mustbe installed when the operator is mounted less than 8 feet (2,44 m) above the not connect the door operator to the source of power until instructed to do the control station: (a) within sight of the door, (b) at a minimum height of5 feet (1,5 m) above floors, landings, steps or any other adjacent walking surface sosmall children cannot reach it, and (c) away from all moving parts of the the Entrapment Warning Placard next to the control station in a products having a Manual release, instruct the end user on the operation of themanual you have any questions about the safety of the door operating system, do not installthe operator, contact Manaras-Opera at technical support, please call 1-800-361-2260 or visit for more information41 General Specifications and Dimensions (OPH / OPJ / OHJ)SUPPLY , 230 VAC single-phase, 208, 460, 575 VAC three-phaseCONTROL VAC class 2 transformer, 2 amp fuse type duty 1/2, 3/4, 1 horsepowerOPERATOR OUTPUT RPMNET WEIGHT (Operator only).
4 86 Lbs (39 Kg) for 1/2HP 115V Opera-H modelSTANDARD WIRING (momentary contact to open/stop and constant-pressure-to-close) duty for sectional doors , rolling doors and cycles/hour or 100 cycles/day maximumTable 1 - Operator Selection Guide (OPH / OPJ / OHJ)Maximum Area in Square Feet (general guideline)Rolling DoorsSectional DoorsHPInsulatedSteel16 gaSteelSteel Grilles20 gaSteelAlu. Door22 ga SteelAlu. Grilles24 gaSteelSteel18 ga 20 20 ga,22 & 24 Steel22 & 24 gaFiberGlass 157236260319358196245314343392 2062943584515152703194414905491255358446 574613294392490564613 For technical support, please call 1-800-361-2260 or visit for more informationFigure 1 - Opera-H, Opera-J and Opera-HJ Dimensions52 General Specifications and Dimensions (OSH)SUPPLY , 230 VAC single-phase, 208, 460, 575 VAC three-phaseCONTROL VAC class 2 transformer, 2 amp fuse type duty 1/2, 3/4, 1 horsepowerOPERATOR OUTPUT RPMNET WEIGHT (Operator only)..96 Lbs (44 Kg)STANDARD WIRING (momentary contact to open/stop and constant-pressure-to-close) high-end heavy duty v-belt drive for sectional doors , rolling doors cycles/hour or >100 cycles/dayTable 2 - Operator Selection Guide (OSH)Maximum Area in Square Feet (general guideline)Rolling DoorsSectional DoorsHPInsulatedSteel16 gaSteelSteel Grilles20 gaSteelAlu.
5 Door22 ga SteelAlu. Grilles24 gaSteelSteel18 ga 20 20 ga,22 & 24 Steel22 & 24 gaFiberGlass 157236260319358196245314343392 2062943584515152703194414905491255358446 574613294392490564613 For technical support, please call 1-800-361-2260 or visit for more informationFigure 2 - Opera-SH Dimensions63 Door & Operator Delivery of OperatorUpon delivery of your OPERA jackshaft operator, inspect the unit immediately for any shipping damages. Verify thatyou have received all the hardware parts pertaining to your operator model, as listed in Table 3 and shown inFigure 3. If ordered, other items such as radio controls or other types of optional equipment may be present. If anyitem is missing or if there is evidence of damage, call the transport company or your direct Hardware SuppliedTable 3 - Standard Hardware Parts SuppliedNo QtyDescription11 3-Push-button station (open/close/stop)21 Operator sprocket (1)LxxxxHxxxxGxxxx31 Door sprocket (1)41#41/#50 Drive chain, 4ft (1) (2)51#41/#50 Chain link (1)645/16-18 x 5/16 Set screwHD1-HBAG72 Key 1/4 x 1-1/2 81 Pocket wheel hand chain, 24ft (3) (4)91 Chain keeper for hand chain (4)101 Disconnect chain, 14ft (3) (5)111 Chain keeper for disconnect chain (5)121 Handle for disconnect chain (5)131 Entrapment Warning PlacardNOTE.
6 Install the Entrapment Warning Placard (shown in Figure 4), next to the control station, visible in the area ofthe technical support, please call 1-800-361-2260 or visit for more information(1) Differs according to operator model and door characteristics(2) 5ft for 42/54/60 tooth door sprocket, 8ft for 72 tooth door sprocket(3) Quantity = 2 times door shaft height minus 4ft(4) Only supplied with OMH/OPH/OHJ/OBH/OSH/OGH/MGH/GH(5) Only supplied with OMJ/OPJ/OSH/MGH/GHFigure 3 - Standard Jackshaft HardwareFigure 4 - Entrapment Warning Placard74 Operator Operator Mounting OptionsThe jackshaft operator line has a dual output shaft. These operators may be wall-mounted on either the left hand sideor the right hand side of a sectional door. They can also be hood-mounted, using BRACKET111 (sold separately), orshelf-mounted on either side of the standard jackshaft hoist model comes with a chain hoist located on the right of the operator. If the applicationrequires that the chain hoist be located on the left of the operator (ex: rolling doors , left operator hood mounting), itmust be requested at time of order.
7 Do not attempt to modify the chain hoist yourself. This operator is not intended to be installed on horizontal slide 5 - Right Side Wall Mount(Chain Hoist on Right)Figure 6 - Right Side Hood Mount withBRACKET111 (Chain Hoist on Right) Operator Mounting Holes CAUTIONThe operator has exposed moving parts and to prevent access to the pinch points, the operator must be installedat least 8 feet (2,44 m) or more above the floor. Alternatively, covers or guarding, provided by the manufacturer,must be installed when the operator is mounted less than 8 feet (2,44 m) above the Ensure that the wall or mounting surface providesadequate support for the operator. The surface must berigid enough to prevent any play between the operatorand door shaft. Manaras-Opera recommends the use ofBRACKET111 for hood-mount Locate the four mounting holes, as shown in Figure The optimum distance between the door shaft and theoperator drive shaft is between 12" and 15".
8 4. Secure BRACKET111 to the end bracket of the rollingdoor or mount the operator to the wall with 3/8" thru-bolts. If the wall construction prohibits the use of thru-bolts, then appropriate and sufficiently sized lag boltsand anchors may be Only tighten the bolts after having adjusted tension ofthe drive chain, as shown in section , Ensure that the door and operator shafts are technical support, please call 1-800-361-2260 or visit for more informationFigure 7 - Opera Mounting Sprockets, Spreader Bar and Drive Chain InstallationThe hardware components shown in Figure 8 have been supplied with your the door sprocket loosely on the door the operator drive sprocket on the appropriate side of the operator and align it with the drive sprocket ofthe the operator and door sprockets in place by inserting the keys and tightening their respective the operator drive chain around the door sprocket and the operator sprocket.
9 Shorten the drive chain tothe appropriate length. Use the chain link to attach the operator drive chain the operator to tighten the drive chain and then firmly tighten the mounting the tension on the chain (there should be no more than a 1/4" of slack when the chain is depressedbetween the sprockets). recommends the use of a chain spreader (sold separately).For technical support, please call 1-800-361-2260 or visit for more informationFigure 8 - Hardware ComponentsBolt 3/8-16(To attach chain spreader)5 Set ScrewDoor SprocketSpreader CollarChain SpreaderSpreader CollarOperator SprocketKeyKeyDrive ChainWasher 3/8 Lock Washer 3/8 Nut 3/8-161233467 Door ShaftOperator Shaft95 Operator Control BoxTo open the control box cover, loosen the screw at the base of the cover. If the cover cannot be fully opened, theretaining arm may be used to hold the cover in other positions, see Figure Installation , allow for proper clearance upon opening the control box cover.
10 If the cover is obstructed fromopening, it is possible to remove the cover by unscrewing it from the box, see Figure close the cover before operating the technical support, please call 1-800-361-2260 or visit for more informationFigure 10 - Unscrewing Screws from Control Box CoverFigure 9 - Open Control Box CoverScrewsRetaining Arm106 Manual Hand Chain and Disconnect Hoist (Opera-H / SH / HJ)Before pulling the hand chain through the pocket wheel, pull the limitcam's retaining bracket back. Turn the cams to the center of the limitshaft to be sure that they are not being mechanically driven throughtheir normal limit switch end the hand chain through the pocket wheel and throughthe chain guide, see Figure both ends of the chain to hang down toward theground until both ends are approximately 2 feet ( m) fromthe floor. Cut the hand chain if both ends of the hand chain Chain (Opera-J / SH) the disconnect chain to the hook located at theextremity of the operator's disconnect mechanism, seeFigure the handle under the chain keeper to facilitatehandling of the the handle, make a knot in order to fasten the end ofthe Egress (Opera-HJ)This operator is built to receive a quick disconnect in case of anemergency the cable housing (from the emergency egresscontrol)