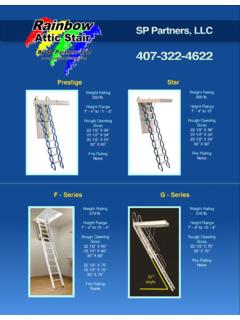
Transcription of INSTALLATION GUIDE Prestige - Rainbow Attic Stair
1 SP Partners, LLCINSTALLATION GUIDE Prestige IMPORTANT READ THIS FIRST Inspect Stair for any damage prior to INSTALLATION . Stair is NOT to be installed while home is under construction and used as a construction Stair . Correct number of treads for floor-to-ceiling height MUST be attached. See TABLE A. Adjustment Screw on stabilizer arm MUST be set before climbing Stair . This adjustment provides structural support necessary for use. See page 8. Failure to follow any or all of these guidelines can result in damage to the Stair and will void the warranty.
2 If you have any problems or concerns with Stair , call SP Partners LLC immediately at 877-369-6996 Page 1 February 2011 Drill, tape measure, 1/4 wood drill bit, hammer, crescent wrench, wood shims, ladder , lumber with same dimensions as joists, keyhole saw or utility knife to cut ceiling material. Page 2 February 2011 (8) 3/8 Hex Nut (4) 3/8 Threaded Rod (4) Joist Hanger (10) 3 Lag Screw (1) Door Hook (1) Wood Pole (2) Extra Steps (Only 1 extra step for Model # M2254H & M3060H) Parts Included Tools / Materials Required (2) 1/2 Wood Screws For attaching hook to pole MODEL # COLOR ROUGH OPENING SIZE FRAME DIMENSIONS TREAD WIDTH FLOOR TO CEILING HEIGHT RANGE NUMBER OF STEPS PROJECTION LANDING SPACE M2236 - as assembled WHITE 22 1/2 x 36 22 X 35 1/2 12 7 -4 to 8 - 2 9 24 45 - Add one step Over 8 - 2 to 9 - 0 10 30 47 - Add two steps Over 9 - 0 to 9 10 11 35 49 M2254 - as assembled YELLOW 22 1/2 x 54 22 x 53 1/2 12 7 -4 to 8 - 2 9 8 50 - Add one step Over 8 - 2 to 9 - 0 10 12 53 - Add two steps
3 Over 9 - 0 to 9 10 11 16 57 M2254H - as assembled ORANGE 22 1/2 x 54 22 x 53 1/2 12 9 - 10 to 10 - 8 12 24 61 - Add one step Over 10 - 8 to 11 - 6 13 28 65 M2554 - as assembled BLUE 25 1/2 x 54 25 x 53 1/2 14 7 -4 to 8 - 2 9 8 50 - Add one step Over 8 - 2 to 9 - 0 10 12 53 - Add two steps Over 9 - 0 to 9 10 11 16 57 M3060S - as assembled GREEN 30 x 60 29 1/2 x 59 1/2 16 7 -4 to 8 - 2 9 2 50 - Add one step Over 8 - 2 to 9 - 0 10 6 53 - Add two steps Over 9 - 0 to 9 10 11 10 57 M3060H - as assembled RED 30 x 60 29 1/2 x 59 1/2 16 9 - 10 to 10 - 8 12 19 61 - Add one step Over 10 - 8 to 11 - 6 13 23 65 xThis stairway is for residential use only.
4 XMaximum capacity is 350 lbs. xInstaller should be experienced in the construction or modification of structural framing supports. Improper INSTALLATION can result in Stair collapse and bodily injury. xDetermine location of electrical lines or plumbing before cutting ceiling. WARNING Read instructions carefully and completely before beginning INSTALLATION . Table A Page 3 February 2011 Stairs must have the correct number of treads for ceiling heights shown for each model above. Stair angle is fixed. Do not add or remove treads solely for changing the angle of the Stair .
5 This will cause an unsafe condition and damage Stair . out the rough opening size for your unit according to TABLE A. Note that the finished metal trim extends about 2 beyond the rough opening when the unit is installed (Figure 2). Allow clearance for this on all four sides. the rough opening through the ceiling material. Determine whether the chosen location allows sufficient projection and landing space for your unit. See Figure 1 and TABLE A. Figure 1 Figure 2 Locating the Stair Preparing the Opening Page 4 February 2011 Figure 3 Figure 4 HEADERS JOIST BRACE HEADERS JOIST BRACE Most Attic stairs will be installed parallel to the ceiling joists (Figure 3).
6 In cases where they are installed perpendicular to joists (Figure 4), some joists will need to be cut and tied-in to other joists with 2 x 6 or 2 x 8 headers . These headers will form the box frame into which the Stair will be secured. xBefore cutting any joists, watch out for electrical wiring. xIf your Attic is constructed using trusses, DO NOT CUT CEILING JOISTS WITH-OUT CONSULTING AN ENGINEER AND OBTAINING APPROVAL. WARNING Framing the Opening Insert hex nuts provided into slot in metal frame corner and insert threaded rod into channel. Thread rod into nut as far as possible.
7 Repeat process for all corners. See Figure 5. Figure 5 Preparing the Stair Page 5 February 2011 Figure 6 HEADERS 1/2 SLACK in Attic should have the four joist hangers and hex nuts ready. two additional helpers below lift the Stair straight up into the framed opening until the tops of the threaded rods clear the top of the frame opening headers. at one end, slide a joist hanger onto the threaded rod and thread nut down until there is only about 1/2 slack. Do not tighten fully. Turn joist hanger at a 45 degree angle to span the frame cor-ner. Figure 6. Repeat the process until all hangers are installed.
8 With hangers holding Stair in place, helpers can let go. Stair to frame. Try to maintain an even gap all around between Stair and headers. nuts in stages all around. Do not over-tighten as this may distort metal trim on ceiling side. door opening hook to wood dowel using (2 ) 1/2 wood screws. Figure 7. can now be opened but DO NOT EXTEND OR STAND ON Stair YET. Note: Rainbow Prestige stairs are designed to be installed with both steel joist hangers a n d l a g b o l t s . D o n o t i n s t a l l w i t h l a g b o l t s a l o n e.
9 XBe sure that there is adequate light in the Attic since the Stair will block any light from the room below when raised into place. xMake sure door is closed and latch is engaged xDUE TO ITS WEIGHT, TWO ADDITIONAL HELPERS MUST BE USED TO SAFELY RAISE Stair INTO OPENING AND HELD FOR A FEW MOMENTS UNTIL TEMPORARILY ANCHORED BY INSTALLER ABOVE. WARNING Figure 7 Page 6 February 2011 Installing the Stair Page 7 February 2011 Before the Stair can be climbed on, two critical adjustments must be made as shown in the following steps. Failure to follow these guidelines will result in damage to the Stair and void the manufacturer s warranty.
10 WARNING 1. Insert hook provided into receptacle on door and pull door down until fully open. 2. Grab yellow pull bar with hook. 3. Pull slowly to extend Stair 4. When Stair is within reach, continue pulling slowly by hand to unfold. Final Adjustments Figure 8 Figure 9 Determine the correct number of steps required for your floor-to-ceiling height (See Table A on page 3). If no additional steps are needed, skip this section. 1. With Stair fully extended to floor, detach bottom step by removing the four bolts, washers and sleeves. Figure 8. This tread will be added back at the end.