Transcription of Installation Manual - Compustar
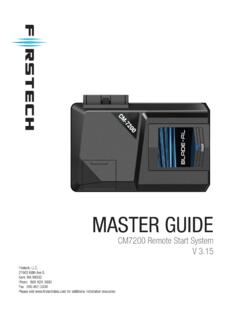
1 Installation Manual By Firstech LLC, Version: Applicable to the following remote start system: CM-900 Auto Only Starter Control Module This device complies with Part 15 of the FCC rules. Operation is subject to the following conditions; (1) This device may not cause harmful interference. (2) This device may accept any interference received, including interference that may cause undesired operation. CAUTION: Changes or modifications not expressly approved by the party responsible for compliance could void the user s authority to operate this device.
2 Table of Contents Introduction .. 3 Kit Contents .. 3 Installation Basics .. 4 Key Points to Consider Before Installation : .. 4 Remote Code Routine(s) .. 5 Placement and Use of Components .. 5 Common 6 Valet 6 Jumper Settings .. 6 Tachless Sensing Default Setting on Option 2-10 .. 7 Alternator Sensing Option 2-10 Setting 3 .. 7 Assumed Timed Crank Option 2-10 Setting 4 .. 8 Diesel 8 CM-900 Wiring Schematic (Remote Start) .. 9 Option Programming Tables .. 12 Option Menu Descriptions .. 15 Option Programming .. 26 Option Programming Using the 26 Option Programming Using Compatible Remotes.
3 27 28 Remote Start Error 28 Frequently Asked Questions .. 28 Technical Support 313 Introduction Thank you for purchasing a Firstech remote start system for your vehicle. The following Installation Manual is intended for experienced and authorized remote start technicians. This is not a tutorial on how to install. We highly recommend that you contact your local Firstech dealer and seek professional Installation . Call 888-820-3690 or visit our website at to locate your nearest dealer. Caution: The Manufacturer s warranty will be void if this product is installed by anyone other than an authorized dealer.
4 Firstech reserves Installation support services to authorized dealers only. Kit Contents The CM-900 Series Kits include all your basic components for basic install. - Starter Only Control Module CM-900 - 1 x Hood Pin - Pack of Wiring Harnesses4 Installation Basics If you are new to installing Firstech remote start units, we highly recommended that you review this Manual in its entirety prior to installing your first unit. Key Points to Consider Before Installation : The two remotes are preprogrammed to the unit Page 5 This system is designed for ease of Installation and the two included remotes are preprogrammed.
5 In the event you may need to program new remotes cycle the ignition ON / OFF five times within seven seconds and tap the Lock button (half second) on the first remote, and then tap the Lock button (half second) on the second remote. This system is only compatible with Automatic transmission vehicles Unlike other Firstech remote start systems the CM-900 is only compatible with Automatic transmission vehicles. Manual transmissions are not supported by this unit. New Valet Procedure Page 6 To place the system into Valet, you must hold the foot brake and cycle the ignition 5 times.
6 To place the system into Valet using the remote you must turn the ignition on and then tap the Lock and Trunk buttons. System comes in Tachless Sensing Mode The CM-900 comes preprogrammed in Tachless Sensing Mode. You do not need to connect the Yellow/Black Tach/Alternator sensing wire to remote start the vehicle. Tach learning procedure Page 6 To Learn Tach: STEP 1. Start the vehicle with the key and allow it to idle down STEP 2. Press and hold the foot brake STEP 3.
7 While holding the foot brake, hold the remote start button on the remote for 3 seconds One parking light flash indicates that the vehicle tachometer signal has been successfully learned. Three parking light flashes indicate that the control module failed to learn the tachometer signal New Option Menus Page 12 The new option menu differs completely from other Firstech systems. It is important to familiarize yourself with these as it will save time in most applications.
8 Option Programmer (OP500) Page 26 Most options on this unit can be programmed with the remote(s) as well as the Option Programmer (OP500). Please note the system must be disarmed before connecting the OP500. Otherwise, an ERROR message will show on the display of your Remote Code Routine(s) IMPORTANT: The remotes are preprogrammed to the control module. If you need to program the remotes, follow the instructions below. Programming the Remote STEP 1: Activate Programming mode by turning the ignition key on and off (between the Acc & On positions) five times within 10 seconds.
9 The vehicle s parking lights will flash once with the successful completion of this step. STEP 2: Within a second after cycling the ignition the 5th time, tap the Lock button on the remote for a half second. The parking lights will flash once to confirm the transmitter has been coded. Programming Multiple Remotes: After the confirmation flash given in STEP 2, you can code additional remotes by tapping the Lock button on the remote(s). The parking lights will flash once confirming each additional remote. The CM-900 can store up to 4 remotes.
10 Exiting Programming: Programming is a timed sequence. The parking lights will flash twice signaling the end of programming mode. Remote programming procedure: PTS (Push to Start Vehicles) Application STEP 1: Set the vehicle to the ignition or ON position STEP 2: Within 5 seconds push to the OFF position STEP 3: Within 5 seconds set the vehicle to the ignition or ON position (do not start) STEP 4: Step on the foot brake 3 times within 5 seconds *parking lights will flash 1 time to indicate remote programming is enabled STEP 5.