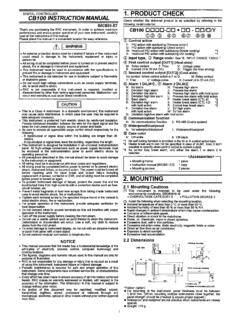
Transcription of Instruction Manual - FM FRANKLIN
1 SD16 SeriesDigital IndicatorInstruction ManualThank you for purchasing the shimaden SD16 Series. Please check that the delivered product is the correctitem you ordered. Please do not begin operating this product until you have read this Instruction manualthoroughly and understand its contents. NoticePlease ensure that this Instruction Manual is given to the final user of the 2001- 2 - PrefaceThis Instruction Manual is meant for those who will be involved inthe wiring, installation, operation and routine maintenance of theSD16 Manual describes items concerning safety cautions,installation, wiring, functions and operating method for SD16series. Always keep this Manual close at hand when handling observe the descriptions in this Manual whenever you usethis of attention concerning safety, damages on machines andequipment, additional explanations and commentaries aredescribed under the following concerning matters that may lead to an accident involvinghuman injury or death, if the warning is not concerning matters that may lead to an accident involvingdamages to machines or equipment, if the caution is neglected.
2 NoteAdditional explanations and symbol expresses the terminal of protective make sure to arrange wire connection for grounding. Safety CautionsSD16 series indicator is designed to indicate temperature,humidity and other physical data of general industrialequipment. Do not apply this instrument to other objects in away that may give grave effects on safety of human life. Forsuch uses involving possible risks, proper safety measures haveto be provided. In case of an accident by operation withoutsafety countermeasures, sellers shall not take avoid damage to the connected equipment, facilities or theproduct itself due to a fault of the product, safety countermea-sure must be taken before usage, such as proper installation ofthe fuse and the overheating protection device. No warranty,express or implied, is valid in the case of usage without havingimplemented proper safety countermeasures. Regarding the alert symbol mark on the plate attachedto this instrument:On the terminal nameplate attached to the case, an alertsymbol is printed.
3 This is to give a caution not totouch the electrical charging part when power is beingsupplied so as to avoid the risk of electrical shock. Install a switch or breaker on the external source powercircuit connecting to the source power terminal as a meansof shutting down the switch or breaker should be installed adjacent to theinstrument at a position which allows easy access of theoperator. Put up a sign indicating that this switch is forshutting down the power of the the fuse:Since this instrument has no built-in fuse, make sure toinstall a fuse in the electric circuit connecting to the sourcepower the fuse at a position between the switch or breakerand the instrument and attach it to the L side of the sourcepower Rating: 250V AC (T), Low-breakingcapacity (L)Use a fuse which meets the requirements of IEC127. The load of voltage and current to be applied to the outputterminal (analog output) and the alarm terminal have to bewithin the rated range.
4 If the range is exceeded, theinstrument will overheat and, as a result, there is a risk ofthe instrument being damaged and the life for the rating, please refer to "7. Specification" on unit connected to the output terminal should conform tothe requirements of IEC1010. Do not apply over-rated voltage or current to the inputterminal. There is a risk of the instrument being damagedand the life for the rating, please refer to "7. Specification" on case the input type is voltage (mV or V) or current (4 ~20mA), the unit connected to the output terminal shouldconform to the requirements of IEC1010. The instrument has a ventilating hole for heat care to prevent metal or other foreign matter fromobstructing it. It will cause damages to the instrument andmay even result in fire. Do not block the ventilating hole. Also avoid dustaccumulation. Any rise in temperature or insulationfailure may result in a shortening of the life of productand/or problems with the product.
5 As for the clearancespace for installing the instrument, refer to "2-3 Externaldimensions and panel cutout" on page 4. Repeating withstanding tests on voltage, noise, surging maylead to deterioration of the instrument. Please be careful. Strictly refrain from remodeling and using the using this product, be certain to house it, for example, in a control panel so that the terminals cannot come into contact with not take this instrument out of the case or put your hand or any conductor inside the case. Such conduct may lead to an accident which endangers life or causes serious injurydue to electric not fail to ground the earthing terminal in 3 - CONTENTSPage1. 31-1. Check before 31-2. Caution for 32. Installation and wiring .. 32-1. Installation site (environmental conditions) .. 32-2. 32-3. External dimensions and panel 42-4. 42-5. Terminal 42-6. Terminal arrangement 43. Instruction for front 43-1.
6 Front illustration and the name of 43-2. Instruction for front 44. Explanation of each 54-1. List of screen 54-2. Mode 0 screen 64-3. Mode 1 screen 64-4. Table of measuring range 74-5. Table of alarm type code .. 74-6. Method of shifting screens .. 75. Supplementary 75-1. Display update cycle (Screen ).. 75-2. Alarm output action (option).. 75-3. Analog output action (option) .. 75-4. Auto-return 76. Error 77. Specification .. 81. Introduction1-1. Check before useThe instrument passes thorough quality checks before the instrument is delivered, please confirm the type codenumber, then check the external conditions and the list ofaccessories. Make sure that there are no apparent damages of the type code: Collate the type code printed on thelabel attached to the packing case with the following schema andconfirm that the delivered goods meet your 8 90- 0 0 0 0 ItemReference code and contents1.
7 SeriesSD16 : 48 96 DIN size Digital Indicator2. Input8: Multi-input, thermocouple, ,Voltage (mV, V), Current (mA)3. Power supply 90-: 100 240V AC 10% (50/60Hz)08-: 24V AC (50/60Hz)/DC 10%4. Alarm (option) 0: None1: Alarm output5. Analog output (option)0: None3: 0~10mV DC (output resistance 10 )4: 4~20mA DC (load resistance 300 max.)6: 0~10V DC (load current 1mA max.)6. Communication (option)0: None5: RS-4857: RS-232C7. Remarks 0: Without 9: WithAccessory list check: Instruction Manual 1 copyUnit decal1 sheetCommunication Instruction Manual 1 copy(In case of optional communication selected)Note:Contact our representative concerning any problemswith the product, accessories or related Caution for use(1) Avoid operating keys of the front panel with hard or sharpobjects or motions. Lightly touch the operating keys withfinger tip for operation.(2) When cleaning, do not use solvent like thinner.
8 Wipe theinstrument with dry cloth Installation and wiring2-1. Installation site (environmental conditions)Do not install the instrument at a place of environmentalconditions as listed below. Otherwise, it will cause damagesto the instrument and may even result in fire.(1) Where flammable or corrosive gas, oil soot or dust thatdeteriorates insulation is generated or abundant.(2) Where ambient temperature is below 10 C or above 50 C.(3) Where ambient humidity is higher than 90% RH, or below dewpoint.(4) Where strong vibrations or impact is generated or transferred.(5) Where there is a high-tension electrical circuit in theneighborhood, or induction interference.(6) Where under exposure to direct sun light or dew drops.(7) Where the elevation is higher than 2000m.(8) OutdoorsNote:The environmental conditions belong to the installationcategory II of IEC 664 and the degree of pollution is Mounting(1) Cut a fitting hole by referring to the panel cutout plan in item2-3.
9 (2) Applicable thickness of the panel is ~ (3) The instrument has catching claws to fix it in position. Just push it in from the front :SD16 is a panel installation type indicator. When theinstrument is used, make sure to mount it on a - 4 -2-3. External dimensions and panel cutoutSD16 External dimensionSD16 Panel cutout2-4. Wiring When making wire arrangement, be sure to cut the powersupply OFF. There is a risk of electric shock. Make sure the protective conductor terminal () isgrounded. Otherwise, a serious electric shock may result. After completing wiring arrangement, do not touch theterminals and electrically charged parts while power is ON.(1 )Arrange wiring according to the terminal layout in item 2-5and the terminal arrangement table in item 2-6. Confirmthat all connections are made correctly.(2 )Use crimp-style terminals of 7mm or narrower width to screws.(3 )In case of thermocouple input, use a compensation wire withthe type of thermocouple selected.
10 The external resistanceshould be100 or less.(4 )In case of input, the resistance value per lead wireshould be 5 or less and all the 3 wires should have the sameresistance value.(5 )Avoid arranging the input signal line to pass through in thesame conduit or duct with high-tension circuit.(6 )Shield wire (one-point grounding ) is effective to eliminatethe electrostatic induction noises.(7 )An effective way of eliminating the magnetic inductionnoises is to twist the input wire in short and equal intervals.(8 )For source power connection, use wire or cable having across section of 1mm2 or larger and performance capacityequivalent to 600V vinyl insulation wire.(9 )Grounding wire should have a cross section of 2mm2 orlarger and the grounding work should ensure groundresistance of 100 or less.(10 )Screw up the terminal connection torque m (10kgf cm)(11 )Noise filterIn case the instruments are affected by the power supplynoise, install a noise filter to avoid operation the noise filter on the grounded panel and connect thenoise filter output and the power supply terminal of theindicator with shortest possible distance.