Transcription of Instructions for Button Clutch Assembly & Disc Pack
1 Instructions for Button Clutch Assembly & Disc PackWe here at Ace extend our thanks for purchasing the Ace Racing of our Ace Racing Circle Track Clutches utilize a one piece forged design provides superior structural integrity, lower moment of inertia andcleaner running. The following Instructions will help in your installation of ourquality racing regular intervals:A. Inspect the flywheel, ring gear and all Clutch parts for Ace Racing clutches will perform optimally with up to .035 total wear in the diskpack. The discs measure new .103 (racing).Replace the drive discs when friction area thickness is less than:Single Disc Double Disc Triple Disc Check the drive discs for flatness with a straight edge and a feeler gauge.
2 Any discwhich is out of flat by more than .005 needs Check for signs of excessive heat. This is indicated by discoloration in thepressureplate, floater discs and the diaphram spring retainer plate. If the diaphram springsremain flat or loose when the Clutch is removed, it has been Check the pressure plate and floater plate for flatness. Replace any part which ismore than .005 .E. Examine the diaphram spring for excessive wear at the contact surface of the Inspect the Clutch release bearing and replace if Clean all Clutch components (using brake cleaner or acetone) and blow out dust fromthe cover Assembly with compressed air prior to You should have a minimum of .100 clearance between the release bearing and theclutch fingers.
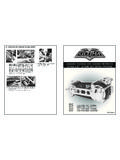
3 Install a return spring on the Clutch linkage. This will keep the releasebearing from riding on the Clutch fingers. You should also install a positive stop on theclutch pedal to limit Clutch pedal travel. Overtravelling the diaphram spring will shortenthe life of the Clutch and also lead to premature failure of the engine thrust Racing Series Clutches are designed to be used with a heavy duty radius face releasebearing. Do NOT use a flat face release bearing!I. General maintenance of your Ace Racing Series Clutch will last you for many seasonsto any problems or questions, please contact your nearest Ace Racing PRESSURE PLATE END DISC FLOATER PLATE CENTER DISC Button FLOATER PLATE END DISC RACING SERIES INSTALLATION Instructions Clutch INSTALLATION Install the cover and Assembly as shown above.
4 Check to make sure that the bolts fit freely into the Clutch cover. Severe damage to the Clutch will occur if these bolts bind in any way! ACE RACING 3 DISC Clutch We here at Ace extend our thanks for purchasing the Ace Racing Clutch . All of our circle track clutches utilize a one piece forged cover. This design provides superior structural integrity, lower moment of inertia and cleaner running. The following Instructions will help in your installation of our Clutch . INSPECTION OF PILOT BEARING Make sure a new pilot bearing is installed. INSPECTION OF BELLHOUSING ALIGNMENT 1. Check that the transmission face of the bellhousing is square to the crankshaft face within .002 total indicated runout. If the measurement is not within this specification, have the bellhousing machined flat to bring the mounting surfaces parallel.
5 2. The transmission receiver hole of the bellhousing should be concentric to the crankshaft within .006 total indicated runout. If the measurement is not within this specification, you will need to relocate the dowel pins in the engine block. 3. Checking these things will help prevent spline wear on the input shaft, Clutch disc hub and other types of serious Clutch damage that could occur. INSPECTION OF THE INPUT SHAFT Inspect the input shaft of your transmission for any possible signs of bending or twisting. Make sure that the Clutch disc or discs slide the entire way onto the input shaft without binding. Make sure not to use any type of lubricants on the splines of the input shaft, including anti-sieze lubricants.
6 FLYWHEEL INSTALLATION Bolt the flywheel to the crankshaft and torque it as required. The use of medium strength thread locking compound is rec-ommended. Do NOT use star washers! Clutch pack and Floater Plate InstallationsOne Disc ClutchesInstall the Clutch disc against the flywheel with the rivet heads facing the Disc ClutchesThe end Clutch disc has a hub which protrudes from only one side of the the Clutch pack and Floater Plate in this order:1. Install either one of the Clutch discs against the flywheel with the rivet heads facing Install the floater plate (either direction).3. Install the second Clutch disc with the rivet heads facing the Disc ClutchesExamine the Clutch discs carefully. Two of the Clutch discs are identical, they are referred to as end discs.
7 The otherclutch disc is called a center disc. It has a hub that is flat on both the Clutch pack and Floater Plates in the following order:1. Install a Clutch disc against the flywheel with the rivet heads facing the Install a floater plate (either direction).3. Install the center disc (either direction).4. Install the other floater plate (either direction).5. Install the other end Clutch disc with the rivet heads facing the Plate and Clutch Cover InstallationWith the Clutch and floater plate or plates in position, install the pressure plate into the housing with the flat sideagainst the Clutch disc. Align the Clutch discs with a good input shaft and torque the nuts or bolts to for BearingOur Racing Series clutches are designed to be used with heavy-duty radius face release bearings.
8 NEVER use a flatface release bearing in this application. You should have a minimum of .100 clearance between the release bearingand the Clutch fingers. Install a return spring on the Clutch linkage. This will keep the release bearing from riding onthe Clutch fingers. Also install a positive stop on the Clutch pedal to limit Clutch pedal travel. Overtraveling thediaphram spring or Clutch fingers will shorten the life of the Clutch and also lead to premature failure of the enginethrust VISIT OUR WEBSITE AT.