Transcription of INTRODUCTION TO SURGE BRAKING
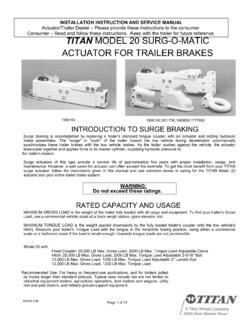
1 TITAN MODEL 10 SURG-O-MATIC ACTUATOR FOR TRAILER BRAKES INSTALLATION INSTRUCTION AND SERVICE MANUAL Actuator Trailer Dealer - Please provide these instructions to the consumer. Consumer - Read and follow these instructions. Keep them with the trailer for future reference. INTRODUCTION TO SURGE BRAKING SURGE BRAKING is accomplished by replacing a trailer's standard tongue coupler with an actuatorand adding hydraulic brake assemblies. The " SURGE " or "push" of the trailer toward the towvehicle during deceleration automatically synchronizes these trailer brakes with the tow vehiclebrakes. As the trailer pushes against the vehicle, the actuator telescopes together and appliesforce to its master cylinder, supplying hydraulic pressure to the trailer's brakes.
2 SURGE actuators of this type provide a service life of approximately five years with properinstallation, usage, and maintenance. However, a well cared-for actuator can often exceed this estimate. To get the most benefit from your TITAN SURGE actuator, follow the instructions given in this manual and use common sense in caring for the TITAN Model 10 actuator and your entire trailer brake system . WARNING:Do not exceed these ratings. RATED CAPACITY AND USAGE10,000 POUNDS MAXIMUM GROSS LOAD (weight of trailer fully loaded with all cargo and equipment). To find your trailer's Gross Load, use a commercial vehicle scale at a truck weigh station, grain elevator, etc.
3 800 POUNDS MAXIMUM TONGUE LOAD (weight applied downwards by the fully loadedtrailer's coupler onto the tow vehicle's hitch). Measure your trailer's Tongue Load with the tongue inthe horizontal towing position, using either a commercial scale or a bathroom scale if the load issmall enough. Upwards tongue loads are not permissible. The MODEL 10 actuator is intended for use on heavier recreational and light industrial trailers. The actual in-service rating is limited to that of the ball and hitch being used or the trailer manufacturer's shown on the certification label, whichever is lower.
4 TITAN A Titan Wheel Company 2345 East Market Street Des Moines, IA 50317 Ph: 800-832-8781 Fax: 515-265-9201 Page 1 of 12 WARNING: DO NOT submerge the actuator. Internal corrosion may result and cause brake failure. Salt water, granular fertilizers, and other corrosive materials are destructive to metal. To minimize the damaging effect of corrosion on a BRAKING system used under corrosive conditions, we recommend that the actuator be externally flushed after use with a high pressure water hose. Be sure to lubricate all moving parts after the unit has dried.
5 Whenever the unit will be out of service for an extended period of time, or after hard use, remove the brake drums and clean inside the brakes. Pack wheel bearings with grease before the drum is installed. Failure to properly and adequately grease and maintain the actuator could weaken it and/or cause it to fail and result in serious injury and/or property damage. INSTALLATION *The MODEL 10 Actuator is completely assembled and ready to bolt or weld into place onto straight three inch wide trailer tongues. Welding will make repair or replacement difficult butmay be preferred.
6 If the actuator must be painted for aesthetic reasons, then TITAN recommends painting ONLY the outer case and disassembling the unit prior to painting. Application of heavy coats of paint may interfere with component operation. If the actuator is welded on, then be sureto weld in a well ventilated area. Confirm the coupler and breakaway mechanisms work properly before operation. Store actuators indoors and in their original shipping carton until the time ofinstallation. 1. For bolt on applications, bolt the actuator to the tongue using three 1/2 inch by 4 inch grade 5 or better bolts, nuts, and lockwashers if using outer case #16568 or #24777 <46>.
7 Figure 1 shows the two standard mounting patterns used on three inch wide trailer tongues. If outer case #16855 or #24782 <47> is used, then the use of two 5/8 inch by 4 inch grade 5 or better bolts nuts and lockwashers is recommended. Using a torque wrench, tighten mounting bolts to eighty (80) foot-pounds Install the hydraulic brakes and brake lines on the trailer as described in the installationmanual supplied with the brakes. TITAN recommends 3/16 inch brazed double wall tubing per J527 for use with all our actuator and brake products. Use forty-five degree (45 ) double-flare tube ends per J533.
8 DO NOT remove or modify the orifice connector <23>at the rear of your actuator's master cylinder. It connects directly to the brake tubing and ensures proper fluid flow characteristics. FLEXIBLE BRAKE LINE HOSE MUST BE USED to connect the orfice connector at the master cylinder to the hydraulic brake line on the is necessary because the master cylinder is spring mounted to provide overload protectionand thus moves relative to the outer After installation of the actuator, brake, and brake lines as described above, proceed immediately to the "BRAKE FLUID FILLING AND BLEEDING" instructions.
9 WARNING: Failure to complete the BRAKE FLUID FILLING AND BLEEDING procedures promptly after installation may result in internal master cylinder corrosion and cause brake 2 of 12 BRAKE FLUID FILLING AND BLEEDING 1. After completing the "INSTALLATION" instructions, remove the master cylinder's cap and fill the reservoir to three-quarters full with DOT-3 or DOT 4 brake fluid. DO NOT allow brake fluid to contact painted surfaces since it will damage the finish. Wipe up any spills immediately and wash the area with water. WARNING: Use only fresh brake fluid from a sealed container. DO NOT reuse fluid.
10 After filling and bleeding, remember to refill the actuator. Failure to maintain an adequate fluid level may cause brake failure. 2. Bleed the brake system either manually or with a pressure bleeder. Pressure bleeding equipment simplifies the process, and is available at your local automotive supply store. Use the instructions provided with the pressure bleeder. If you chose to manually bleed the system , an assistant is required. Use the following steps to manually bleed the brake system : A. Disconnect the trailer from the tow vehicle and jack the trailer's tongue until it is horizontal.