Transcription of Introduction to The Greasy Hands Garage Guide to ...
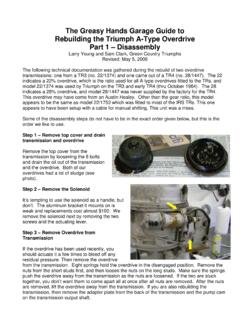
1 Introduction to The Greasy Hands Garage Guide to rebuilding the triumph TR Transmission and overdrive Larry Young and Sam Clark, Green Country Triumphs Revised: May 5, 2006 The following documentation was gathered during the rebuild of the three transmissions shown below: (1) TR3 s/n TS24066 with overdrive model 22/1374 (2) TR4 s/n CT21820 with overdrive model 28/1447 and (3) TR6 s/n CC109568 without overdrive . These transmissions encompass most of the variations throughout the productions of the triumph TR2-6. They are also typical of the rebuilds we encounter at the Greasy Hands Garage . The TR3 tranny came from a parts car that our club purchased from an estate. It had several large holes drilled in the main housing, so we used a replacement housing TS65635. Those from the TR4 and TR6 were donated to the club by members. The overdrive unit from the TR4 must have come originally from an Austin Healey, since triumph never fitted this model at the factory.
2 I should make a statement about our qualifications. We don t have any, other than that we ve rebuilt about a dozen transmissions and worked on a half dozen or so overdrives. We make no claims about any of this material. These methods work for us. Outline of Procedure We will not discuss the removal and installation of the transmission in the car. Once removed, the process of rebuilding an overdrive and transmission is as follows: 1. remove overdrive from transmission 2. disassemble transmission and overdrive 3. inspect and evaluate, then order parts 4. reassemble the overdrive first, then the transmission 5. mate overdrive to transmission Of course, if you don t have an overdrive , you will skip those steps. The manuals call for a dummy mainshaft when rebuilding the overdrive . Since you re not likely to have a dummy shaft, you will use the actual mainshaft. Thus, the overdrive must be reassembled first. Tools When the transmission in my TR250 went out in 1970, I pulled out my workshop manual (reference 3).
3 It states Out of 14 special tools, the manufacturers consider 5 to be essential for working on the gearbox. If the owner has any doubt on his ability to strip and reassemble the gearbox he is advised to take it to a suitably equipped agent. On that advice, I had the transmission rebuilt by the dealer for $300, which was a lot of money in 1970. Actually, this advice is quite wrong. If you ve got some experience working on cars and have a reasonably well equipped Garage , you can rebuild your transmission and overdrive without special tools. These are the tools you need in addition to basic hand tools: large bearing separator type puller snap ring (circlip) pliers some angle iron for pullers (1 inch) some 1 inch pipe for driving on bearings some inch rod (for TR3 loose needle bearings) These additional tools will make the job easier or more thorough: hydraulic press compressed air 50 lb scale (detent release force) Churchill tool for 3rd gear circlip bushing driver set (for shell needle bearings) pilot bearing puller (for shell needle bearings) dial indicator and base ( overdrive ) pressure gauge with overdrive fitting overdrive test stand You will tend to adapt your methods to use the tools that you have.
4 I was surprised to learn from Bob Kramer that he does not use a press when rebuilding a transmission; instead he drives all the bearing with a piece of pipe. When I asked him why he didn t use his press, he said that when he first rebuilt transmissions he did not have a press, and he never changed his methods. The photo shows a homemade tool for holding the rear flange and a bearing puller with a homemade plate. The long pieces of all thread are needed to reach the middle transmission bearing. You might want to have a second pair which is shorter. Since some of the tools must be purchased and/or made, this is an excellent opportunity for some collaboration with other members of your local triumph club. For example, two members of the Green Country Triumphs have the Churchill circlip tool. There is one pressure gauge and overdrive test stand within the club. These tools are available to all club members. Note about removing and installing bearings When pulling or installing the large ball bearings in the transmission and overdrive , keep the following in mind.
5 The outer edges of the bearings are an interference fit in the aluminum housings and should move readily unless they are stuck. If they re stuck they should free up by lightly tapping with a brass punch. In a worst case, you may need to apply a little heat to the housing with a propane torch. IF YOU HAVE TO USE A LOT OF FORCE, STOP, BECAUSE SOMETHING IS WRONG! One of our favorite mistakes is to try removing the input shaft before the counter shaft has been dropped to the bottom of the case. Your gears will break if you applying a lot of force when the gears are binding. The fit of the bearings on to the shafts is a press fit and should be removed with a bearing puller or press. Use common sense, not a bigger hammer. The ball bearings are not designed to carry a side load. When you press a bearing on a shaft, press on the hub of the bearing not on the outer edge. If you drive it on, use a piece of pipe with an ID which is a bit larger than the shaft (standard 1 inch pipe for most bearings).
6 References The following references have been used during the preparation of these articles. 1. triumph TR2 and TR3 Service Instruction Manual, from Standard- triumph 2. Haynes Owners Workshop Manual for the TR 2,3,4 and 4A. 3. Autopress Workshop Manual for the triumph TR5, TR250 and TR6 4. Service Instruction Manual for the Laycock de Normanville overdrive , from Standard- triumph We ve also looked at later versions of manuals 1 and 2, official workshop manual for the TR250 and TR6 (Bentley manual) and the Haynes manual for the TR250 and TR6. They have similar information to the earlier manuals; however, there are variations in some of the specifications and tolerances. Acknowledgements We would like to thank the following people for assisting in this effort. 1. Nelson Reidel for his wonderful set of articles. If they were still available, there would have been no reason to write these. 2. Dave at Crossroads Auto for helping us through our first rebuilds.
7 Crossroads is now close and we understand Dave is somewhere in Florida. 3. Everyone that has given tips on the net and in the various discussion groups 4. Mark Bradakis facilitator of the discussion groups


