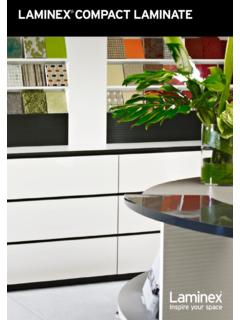
Transcription of LAMINEX WALL PANEL - Benchtops
1 LAMINEX WALL PANELLAMINEAXLFABRICATION AND INSTALLATION GUIDEIMPORTANT NOTES1. Suitable for internal use only2. Failure to install or maintain this product in accordance with applicable building codes, regulations, standards and LAMINEX s instructions may lead to personal injury, affect system performance, violate building codes and void the product LAMINEX will only warrant the system when used with tested and approved LAMINEX decorative panels. For LAMINEX panels not featured in the matrix, refer to your LAMINEX Representative for more The strength of the system is dependant on the installer ensuring that all fasteners are firmly screwed to All panels should be pre-conditioned on-site for 48 hours before specifier or person responsible for the project must ensure that the details in this instruction are appropriate for the intended application and that additional detailing is performed for details that are not specified in these tolerances must be within 3mm over any 3000mm length of the frame.
2 Frame must be square, straight and frames must be constructed in accordance with AS/NZS 1684 and be 35mm or wider. Ensure that all fasteners used penetrate framing by at least frames must be constructed in accordance with NASH standard Part 1. Using Button-Fix over existing internal liningsEnsure that all fasteners used penetrate existing linings and are firmly screwed into studwork by at least 30mm. LAMINEX recommends that wooden battens of 35mm x 45mm pine or 16mm MDF are used over existing plaster or masonary wall Button-Fix is not suitable for the provision of any bracing load IT WORKSATTACHING THE BUTTONC hoose an appropriate 5mm counter sunk screw to provide >30mm engagement into the supporting structure.
3 NOTE: Plasterboard is not strong enough to support a LAMINEX Decorative PANEL with Button-Fix. Secure Buttons into studwork or battens : The integrity of the LAMINEX Wall PANEL Solutions system is dependant on the installer providing a sound support to the system such as stud work, framing or battens. TYPE 2 FIXThe Type 2 Fix connects panels at 90 with a simple push/pull fit. It is ideal for applications where the emphasis is more on ease of fit and less on strength. Unlike Type 1, the Type 2 Fix does not require a 15mm dropdown 1 FIXThe Type 1 Fix connects parallel panels and is ideal for applications where strength and security are the Buttons in the Fixes and slide the PANEL down by 15mm until Button-fix goes click.
4 The Type 1 Fix can also be configured for sideways surface-mounted, the Type 1 Fix creates an 8mm gap between the two attaching , you can rebate the Type 1 Fix, to reduce the gap between the two attaching panels to only not use the REBATE method with Compact Laminate as this reduces the systems tolerance to changes in PANEL dimensions as humidity changes. 5mm pan head wood screws for surface-mounted Fix15mm fall to engage panelPanel drilling countersunk wood screws for rebated Fix Lime green Button for use with 5mm countersunk wood screw Orange Button for use with Varianta Euro screw pan head wood screws for Fix 5mm pan head wood screws for surface-mounted Fix15mm fall to engage panelPanel drilling countersunk wood screws for rebated Fix Lime green Button for use with 5mm countersunk wood screw Orange Button for use with Varianta Euro screw pan head wood screws for
5 Fix 5mm pan head wood screws for surface-mounted Fix15mm fall to engage panelPanel drilling countersunk wood screws for rebated Fix Lime green Button for use with 5mm countersunk wood screw Orange Button for use with Varianta Euro screw pan head wood screws for Fix 5mm pan head wood screws for surface-mounted Fix15mm fall to engage panelPanel drilling countersunk wood screws for rebated Fix Lime green Button for use with 5mm countersunk wood screw Orange Button for use with Varianta Euro screw pan head wood screws for Fix 5mm pan head wood screws for surface-mounted Fix15mm fall to engage panelPanel drilling countersunk wood screws for rebated Fix Lime green Button for use with 5mm countersunk wood screw Orange Button for use with Varianta Euro screw pan head wood screws for Fix 5mm pan head wood screws for surface-mounted Fix15mm fall to engage panelPanel drilling countersunk wood screws for rebated Fix Lime green Button for use with 5mm countersunk wood screw Orange Button for use with Varianta Euro screw pan head wood
6 Screws for Fix 5mm pan head wood screws for surface-mounted Fix15mm fall to engage panelPanel drilling countersunk wood screws for rebated Fix Lime green Button for use with 5mm countersunk wood screw Orange Button for use with Varianta Euro screw pan head wood screws for Fix 5mm pan head wood screws for surface-mounted Fix15mm fall to engage panelPanel drilling countersunk wood screws for rebated Fix Lime green Button for use with 5mm countersunk wood screw Orange Button for use with Varianta Euro screw pan head wood screws for FixTHE SECRET FIXING FOR PANELSThe Button-fix range of fasteners and accessories is:BUTTONS1.
7 Lime green Button for countersunk (5mm) wood Orange buttons for Euro screws/varianta. (Diameter countersunk).FIXES3. Type 1 Fix for connecting parallel panels. (Diameter 5mm pan head for face fixing. Diameter countersunk for rebated fixing.)4. Type 2 Fix for connecting 90 panels. (Diameter pan head.)MARKER ACCESSORIES5. Button marker accessory for use with Type 1 Fix marker accessory for use with Type 2 Fixes (and can also be used with Type 1).Marker accessories need to be ordered separately from the ACCESSORIES7.
8 Security cord accessory for use with Type 2 Router jig for use when recessing Type 1 accessories need to be ordered separately from the MARKERThis re-usable accessory helps to accurately align the Buttons with Type 1 Fixes. Snap a marker into each Fix, then position the second PANEL and press firmly. The markers will leave indents in the PANEL surface, which can be used as pilot guides for the CORD ACCESSORYThis accessory should be installed with the Type 2 Fix in situations where safety is an issue. On a vertical PANEL install two Security Cords, one to each Fix in the top additional Button is used to capture the loop on the Security Cord, installed adjacent to the fixing Button.
9 To remove the PANEL completely, ease the loop on the Security Cord off the note that accessories must be ordered separately from the MARKERThis re-usable accessory helps to accurately align Type 2 Fixes. The marker is assembled onto the Fix and used to position the Button from the PANEL edge. After fixing the Button, position the second PANEL and press firmly. The marker will leave indents in the PANEL surface, which can be used as guides when drilling pilot holes for the Fix. The marker can be used for internally mounted panels, but must be assembled in the opposite orientation, as shown on the right.
10 Tip: use some adhesive tape to stop the marker and Fix assembly rotating on the FOR USE TYPE 1 FIX SETSB utton-fix is designed for furniture construction and interior fittings. Provided that the screws and substrate are properly matched, a vertical PANEL fixed with four Type 1 Fixes can safely weigh 200kg. For critical applications it is essential to perform your own any contact with aggressive solvents and cleaning LAYOUT MDF, PB & PLYWOODAs an approximate guide, we suggest that Button-fix centres are no greater than 1000mm apart and no closer than 35mm to the edge of the remember to allow at least 15mm clearance for the removable PANEL to 3mm space minimum between LAYOUT COMPACT LAMINATE As an approximate guide.