Transcription of Light Gauge Metal Roof and Wall Panels
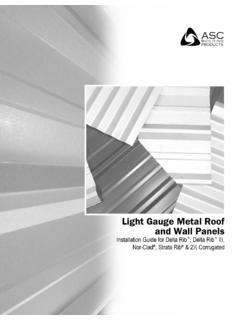
1 Light Gauge Metal roof and Wall PanelsInstallation Guide for Delta Rib , Delta Rib III,Nor-Clad , Strata Rib & 21 2 CorrugatedASC Building ProductsA Division of ASC Profiles LLCL ight Gauge Metal roof and Wall Panels Installation Guide August 2018 1 Table of Recommended Tools & Equipment ..2-3 Delivery, Handling & Storage ..3 Safety Considerations ..3 roof Preparation ..4 Map of Typical roof Locations ..6 Fastener Installation ..8 Hip/Ridge Ridge Termination ..10 Vented Ridge Ridge Termination ..12 Valley Termination ..14 Eave and Vented Eave Flashings ..15 Eave Flashing and Vented Gutter Flashing.
2 17 Gable Corner at Eave ..19 Gable Flashing Preparation ..20 Gable Flashing Preparation at Flashing ..24 Vented Endwall Flashing ..25 SectionSlope Transition - High to Low Transition - Low to High Gable Flashing ..28 Adjustable Gable Flashing Installation Procedure..31 Skylight Flashing ..32 Skylight Flashing (Side) ..32 Skylight Flashing (Uphill Side)..33 Skylight Flashing (Downhill Side) ..34 Procedure for the Installation of Skylight Flashings ..35 Skylight Flashing Flashing (Side) ..38 Chimney Flashing (Uphill Side) ..39 Chimney Flashing (Downhill Side)..40 Valley Top End Lap.
3 43 Sealing End Laps & Lapping the Trim Corner Wall Trim, Wall Step, Panel Top Wall Detail ..46 Inside Corner Wall Corner Wall Gauge Metal roof & Wall PanelsLight Gauge Metal roof and Wall Panels Installation Guide for Delta Rib , Delta Rib III, Nor-Clad , Strata Rib & 2 Corrugated2 August 2018 ASC Building addition to weather tightness, long life, good looks and economy, ASC Building Product s Light Gauge roof and Wall Panels are designed with ease of installation as a primary consideration. This guide is intended to help the installer achieve a high level of quality in the finished product.
4 Please do not hesitate to contact an ASC Building Products representative for NoticeBe sure to read this manual in its entirety before beginning manual is provided to the customers of ASC Building Products as a guide to assist in the installation of Light Gauge Metal roof and Wall Panels . Use for any other purpose is prohibited. This manual remains the property of ASC Building instructions contain suggested application procedures only and cannot replace the need for good common sense and experience. Responsibility for conformance to state and local building codes, as well as any other ap pli ca ble project requirements rests with the installer, as does the responsibility to observe reasonable safety Building Products assumes no responsibility for any problems which might arise as a result of improper installation or any personal injury or property damage that may occur with the product s Gun: Clutch type screw gun with depth locating nose piece allowing variable torque settings is recommended to insure proper installation of the screws.
5 The following sockets will be required: 1 4" and/or 5 16" : For miscellaneous panel and flashing cutting requirements. Three pairs of snips will be required for left edge, right edge, and centerline Metal Shears: Used for general Metal cutting, such as at the hips and valleysNote: Some erectors prefer to use circular power saws with Metal cutting abrasive blades. While the use of power saws may be faster, there are some disadvantages that must be considered: (1) The edges of Metal that have been saw cut are jagged and unsightly, and are more likely to rust than sheared edges. (2) Saw cutting will leave small particles of Metal on the panel surface that will rust and damage the panel finish if not completely Line: Used to assist in the alignment of Panels , flashings, etcNeoprene Mastic Tape: 1 16" x 1 4" roll of tape used for installation of inside and out-side profile closures and panel side Mastic Tape: 1 16" x 1 2" roll of tape used for prevention of water infiltra-tion in flashing to sheet Metal : Butyl or urethane sealant used to inhibit water Gun: For miscellaneous caulking and sealing to inhibit water Rivet Hand Tool.
6 Used for miscellaneous flashing and trim Tools: Indelible markers, pencils, or scratching Recommended Tools & EquipmentNote: It is recommended that Light Gauge roofing be applied on roofs with a minimum slope of 3 inches per foot (3:12). * The details contained in this guide are shown over a plywood substrate. Details remain the same for either a solid substrate (plywood/OSB or steel decking), spaced framing or intermittent support conditions with only the fastener type changing. Where spaced framing is used, perimeter supports for flashings must be considered.** Each flashing part in this guide has been assigned a part number.
7 Each part number contains one or two letters followed by one or two numbers, for example: (EW17). These part numbers have been provided for you to make ordering these flashing parts quick and Building ProductsA Division of ASC Profiles LLCL ight Gauge Metal roof and Wall Panels Installation Guide August 2018 3 Minimum Recommended Tools & Equipment (Con t)Scratch Awl: Used to mark the Knife: Used for miscellaneous Drill: Used to drill holes such as those required for rivet Line: Used for general alignment and Measure: 25 foot minimum (another 50 ft. is handy).Locking Pliers: Standard and Duckbill style for miscellaneous clamping and bending of parts.
8 Delivery, Handling and Storage Always check the shipment upon delivery. Check for damage and check material quantities against the shipping list. Note any damaged material or shortages at the time of delivery. Handle panel bundles and individual Panels with care to avoid damage. Longer bundles and Panels may require two or more pick points properly spaced to avoid damage that can result from buckling and/or bending of the Panels . Request a copy of the Long Length Handling Instructions and diagrams from ASC Building Products customer service as required. Store the Panels and other materials in a dry, well ventilated area and away from traffic.
9 Elevate one end of the bundle so that any moisture that may have accumulated during shipping can run off. Be sure that air will be able to circulate freely around the bundles to avoid the build-up of moisture. Never store materials in direct contact with the ground. Wear clean cotton gloves when handling unpainted ZINCALUME -coated Panels or flashings to avoid discoloration. Rollforming die marks (which appear black), particularly at bends, will be visible. Wear clean, non-marking, soft soled shoes when walking on the Panels to avoid shoe marks or damage to the finish. Do not step on the panel seams or ribs.
10 Step only in the flat area of the Considerations Never use unsecured or partially installed Panels as a working platform. Do not walk on Panels until they are in place on the roof and all of the fasteners attaching the Panels to the roof have been installed. Metal roofing Panels are slippery when wet, dusty, frosty or oily. Do not walk on a Metal roof when any of these conditions are present. Wearing soft soled shoes will help minimize slipping and help prevent damage to the painted surfaces. Do not walk on the panel seams or major ribs. When walking on the fully installed roof Panels , be sure to step only in the flat areas of the Panels .