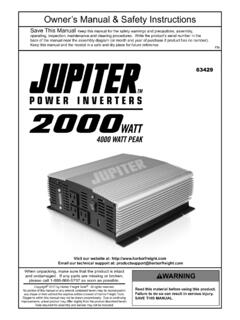
Transcription of LOW VOLTAGE TRANSFORMER POWER PACK
1 Visit our website at: our technical support at: VOLTAGE TRANSFORMER POWER PACK Owner s Manual & Safety InstructionsSave This Manual Keep this manual for the safety warnings and precautions, assembly, operating, inspection, maintenance and cleaning procedures. Write the product s serial number in the back of the manual near the assembly diagram (or month and year of purchase if product has no number). Keep this manual and the receipt in a safe and dry place for future reference. 21eWhen unpacking, make sure that the product is intact and undamaged. If any parts are missing or broken, please call 1-888-866-5797 as soon as 2020 by Harbor Freight Tools . All rights reserved. No portion of this manual or any artwork contained herein may be reproduced in any shape or form without the express written consent of Harbor Freight Tools.
2 Diagrams within this manual may not be drawn proportionally. Due to continuing improvements, actual product may differ slightly from the product described herein. Tools required for assembly and service may not be this material before using this product. Failure to do so can result in serious injury. SAVE THIS 2 For technical questions, please call 57998 IMPORTANT SAFETY INFORMATION Read all safety warnings, instructions, illustrations and specifications provided with this POWER tool. Failure to follow all instructions listed below may result in electric shock, fire and/or serious WARNING: Risk of Electric Shock: When used outdoors, install only to a covered Class A GFCI protected receptacle that is weatherproof, marked Wet Location , with the POWER unit connected to the receptacle. If one is not provided, contact a qualified electrician for proper installation.
3 Ensure that the POWER unit and cord do not interfere with completely closing the receptacle cover. 2. WARNING: Risk of Electric Shock: Install POWER unit 5 feet ( ) or more from a pool or spa and 10 feet ( ) or more from a fountain. Where the POWER unit is installed outdoors, connect POWER unit to a receptacle protected by a GFCI Suitable for outdoor use Not for use with Mount at least 1 foot (30cm) above Do not connect two or more POWER supplies Do not use extension For use with low VOLTAGE landscape lighting systems Use only with maximum 120W lamp load. 10. Mount the POWER unit in or on non-combustible mounting surfaces Main secondary wiring is intended for shallow burial - less than 6 inches (152mm).12. Not suitable for use with submersible luminaries and Do not repair or tamper with the cord or Do not submerge POWER unit in Do not connect light fixtures with POWER Assemble only according to these instructions.
4 Improper assembly can create Wear ANSI-approved safety goggles and heavy-duty work gloves during Keep assembly area clean and well Keep bystanders out of the area during Do not assemble when tired or when under the influence of alcohol, drugs or This product is not a toy. Do not allow children to play with or near this Use as intended Inspect before every use; do not use if parts are loose or Maintain product labels and nameplates. These carry important safety information. If unreadable or missing, contact Harbor Freight Tools for a replacement. SAVE THESE 3 For technical questions, please call 57998 SymbologyVVolts~Alternating CurrentAAmperesWARNING marking concerning Risk of Eye Injury. Wear ANSI-approved safety the manual before set-up and/or marking concerning Risk of Fire. WARNING marking concerning Risk of Electric Shock.
5 GroundingTO PREVENT ELECTRIC SHOCK AND DEATH FROM INCORRECT GROUNDING WIRE CONNECTION: Check with a qualified electrician if you are in doubt as to whether the outlet is properly grounded. Do not modify the POWER cord plug provided. Never remove the grounding prong from the plug. Do not use the POWER unit if the POWER cord or plug is damaged. If damaged, have it repaired by a service facility before use. If the plug will not fit the outlet, have a proper outlet installed by a qualified CordsNote: Extension cords must not be used with POWER Rating120 VAC / 60Hz / Rating12 VAC / 10 AMax Lamp120 WWire16/2 16 AWG/2-Conductor Low VOLTAGE LandscapePage 4 For technical questions, please call 57998 FunctionsPhoto SensorDisplayFunction ButtonsInstallation InstructionsRead the ENTIRE IMPORTANT SAFETY INFORMATION section at the beginning of this document including all text under subheadings therein before set up or use of this OF ELECTRIC SHOCK: When used outdoors, install only to a covered Class A GFCI protected receptacle that is weatherproof, marked Wet Location , with the POWER unit connected to the receptacle.
6 If one is not provided, contact a qualified electrician for proper installation. Ensure that the POWER unit and cord do not interfere with completely closing the receptacle cover. Do not plug in POWER Cord until installation is Wire SelectionThis data is provided as a general guideline. 12 VOLT TAPWire LengthTotal Fixture Wattage0 - 50 feet51 - 100 feet101 - 150 feet0-60 Watts18 AWG16 AWG14 AWG61 - 120 Watts16 AWG14 AWG12 AWGC alculate Lamp WattageThe POWER Pack s 120W circuit will POWER up to 96 watts of wattage of individual light fixtures and add all wattage together. Do not exceed 96W total. Page 5 For technical questions, please call 57998 InstallationWARNING! TO PREVENT SERIOUS INJURY: Verify that installation surface has no hidden utility lines before installing light Place POWER Pack close to GFCI outlet.
7 It must receive maximum sunlight in order for photo sensor to work properly. 2. Lay POWER Pack on its back on a sturdy surface. Do not plug in POWER Connect Wires to POWER Packa. Split conductors 2 , strip 3/4 of insulation, twist strands Loosen screws. Insert each conductor under one screw. Screw connections must be tight. Do not mix solid and stranded type wires under one screw. Make sure insulation clears Pressure Mount POWER PackWARNING! TO PREVENT SERIOUS INJURY: Verify that installation surface has no hidden utility lines before drilling or driving Using included template, mark and drill mounting Insert two included anchors into the holes and two included screws into the anchors leaving about 1/4 of threads Place large center of keyholes on back of POWER Pack over screw heads and pull down gently to lock screws into keyholes.
8 Do not plug in POWER Install Light Fixturesa. Lay out light fixtures in desired locations. The first light fixture must be installed at least 10 feet from POWER Pack. b. Lay out Landscape Wire from POWER Pack along path of light fixtures. c. Install light fixtures, then connect to wire according to light fixture s instructions. d. Bury wire no deeper than 6". 6. Plug in POWER Cord. Do not use an extension Press Up/Down buttons to scroll through A = Auto - Dusk to 1 -9 = Hours on after O = Manual - On until manually turned 6 For technical questions, please call 57998 Maintenance Procedures not specifically explained in this manual must be performed only by a qualified PREVENT SERIOUS INJURY FROM ACCIDENTAL OPERATION: Unplug the POWER Pack from its electrical outlet before performing any procedure in this CLEAN PERIODICALLY with a damp towel.
9 Do not clean with chemicals, solvents or harsh abrasives. Do not put too much pressure on the display or buttons while WARNING! TO PREVENT SERIOUS INJURY: If the plug or the supply cord is damaged, it must be replaced only by a qualified service CausesProbable SolutionsLights will not turn on1. No POWER . 2. Bad connection at POWER Pack. 3. Short in landscape wire. 4. POWER Pack overloaded. 5. Circuit Check that POWER Pack is connected to 120 VAC GFCI Check for loose connection at screw Replace shorted wire with 16/2 16 AWG/2-Conductor Low VOLTAGE Landscape Remove some lights or replace with wire with heavier Check circuit some Lights work1. Bad connection at Light. 2. Faulty Check that connector pins have pierced the landscape wire Replace do not turn off at dawnDirty Photo CellUse soft cloth to clean photo cell.
10 Follow all safety precautions whenever diagnosing or servicing the tool. Disconnect POWER supply before 7 For technical questions, please call 57998 Record Serial Number Here: Note: If product has no serial number, record month and year of purchase : Replacement parts are not available for this product. Refer to UPC Agoura Road Calabasas, CA 91302 1-888-866-5797 Limited 90 Day WarrantyHarbor Freight Tools Co. makes every effort to assure that its products meet high quality and durability standards, and warrants to the original purchaser that this product is free from defects in materials and workmanship for the period of 90 days from the date of purchase. This warranty does not apply to damage due directly or indirectly, to misuse, abuse, negligence or accidents, repairs or alterations outside our facilities, criminal activity, improper installation, normal wear and tear, or to lack of maintenance.