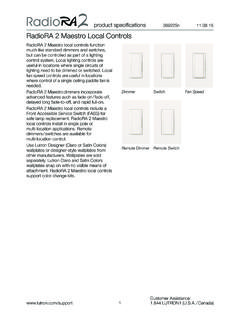
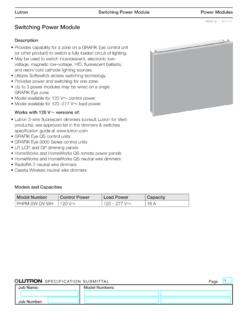
Transcription of Lutron® roller 100™/roller 150™ Dual Mount Chassis
1 !!!ceilingretaining screw AlignWith EdgeOf in(19 mm).75 in(19 mm)System WidthShade Width Lutron roller 100 / roller 150 dual Mount chassisInstallation Guide (please read before installing)EnglishBox Contents: CAUTION: Notes: Lutron systems are intended for use with only Lutron hardware, controls, and power supplies. Codes: Install in accordance with all local and national electrical codes. Environment: Ambient operating temperature: 32 F - 104 F (0 C - 40 C), 0 - 90% humidity, non-condensing. Indoor use only. Maintain sufficient clearance between the moving shade and any of falling objects.
2 Securely install the roller shadesystem per the mounting instructions. Failure to do so could result in minor or moderate for the shade5 Turn leveling screwto raise or lower idlerside of shade until roller 100/ roller 150 dual Mount Chassis Installation Guide is a complement to the enclosed Basic Wiring and Setup Guide. The Chassis Installation Guide describes the mechanical installation. The Basic Wiring and Setup Guide describes the wiring and setup for proper function of the roller sub-brackets2 Use alignment holes to position the sub-bracket right to left. The alignment holes will line up with the outside edge of the shade Determine where to drill for cable access.
3 See options below. Cable should exit from wall, ceiling or jamb on Drive side of system. Note: Leave 12 to 18 in (305 to 457mm) of cable and secure the shade4 Move the shade leftor right until that sub-brackets areoriented correctly. Hanging features should be on the side opposite the shade projectionfrom window so that itclears any window trim orhardware when (8) Mounting screws(#8x1-3/4 in)(2) Lutron roller 100/ roller 150 shades(2) dual sub-bracketsLeft and right side shade brackets (attached) Note: Orient sub-bracket for installation as shown to right. The shade and sub-brackets Mount to the inside surface of the dual that is OPPOSITE the glass.
4 The fabric drop should be closest to the glassglassglassglassnon-glass sidenon-glass sideWallDrill for cables to in(38 to 64 mm) from top to in (38 to 64 mm)from end of for cables to in (38 to 89 mm) from back and to 2 in (32 to 51 mm)from end of for one cable to in (64 to 89 mm) from top and to in (38 to 64 mm) from end of the system. Drill for second cable to in (165 to 190 mm from top and to in (38 to 64 mm) from end of for cables to 6 in(133 to 152 mm) from backand to 5 in (108 to 127 mm) from top of sub-brackets using appropriate : Risk of minor or moderate injury from falling heavy object.)
5 The sub-brackets for each shade tube must be mounted to support a weight of at least 300 lbs (136 kg). Mount Top Shade first, to sub-bracket NOTICE: Shades wider than 4 ft ( m) require two people to retaining screws from shade : Leave protective wrapping on shade during the lip of each shade bracket onto the top of each shade down until bottom of shade brackets rest against and outside the : Ensure cable is keptoutside the shade cable wires from wall, ceiling or jamb between the shade bracket and the sub-bracket being careful not to pinch wire. Insert and tightenretaining screws onBOTH shade bracketsto secure the shadeinto position.
6 Screwsshould be tighteneddown all the : Risk of minor or moderate injury from falling heavy the shade bracket is securely attached to the required: Tape Measure 1/4 in Hex-Head Driver Power Drill Level #2 Phillips Screwdriver! CAUTION: Notes: Lutron systems are intended for use with only Lutron hardware, controls, and power supplies. Codes: Install in accordance with all local and national electrical codes. Environment: Ambient operating temperature: 32 F - 104 F (0 C - 40 C), 0 - 90% humidity, non-condensing. Indoor use only. Maintain sufficient clearance between the moving shade and any of minor or moderate injury from falling heavy install the roller shade per the mounting second (bottom) shade to sub-bracket Note: If the limits for first (top) shade are being set from the Drive, skip to steps 8 and 9 before hanging second (bottom) shade.
7 The second shade will block access to the Drive on the first steps 3 through 5 to hang second (bottom) : Remove protective wrapping from first shade before installing the second (bottom) and basic setup7 Refer to the Basic Wiring and Setup Guide included with the roller Shade System for wiring instructions and setup including setting open and close of fabric telescopingtape(shim)Shim will correct telescoping by moving fabric this wayCheck shade for telescoping8 Use the programming stylus to run the shade up and down using the adjustment buttons (), re-level if : Moniter fabric as it rolls up on the tube to ensure that it does not telescope excessively to one side or the telescoping is normal.
8 However, if the shade is telescoping severely to one side and it is level, press the Close Limit Button ( ), and lower the shade all the way down using the adjustment buttons (). Place a piece of tape on the side of the tube that the fabric is telescoping away from when finished press the Close Limit Button ( ) once. This technique is referred to as SHIMMING . The shade will always track towards the side with the tape (shim). For more information see: is not the brackets are mounted levelFabric is not centered over the brackets are centeredShade does not move the shade fabric is not obstructed by the side channels or any other objectShade will not move to full open or full closeVerify that open and close limits are set correctlyVerify that shade fabric is not obstructed or caught on somethingSCOPEThis limited warranty ( Warranty ) covers the Lutron supplied (a) Sivoia QS Shade System ( Sivoia QS Shade System ), (b) Sivoia QEDTM Shade System ( Sivoia QEDTM Shade System ), (c) manual shade system and (d)
9 Alternating current or a/c shade system (each of the foregoing being a System ). Customer acknowledges and agrees that use of the System constitutes acceptance of all terms and conditions of this WARRANTYS ubject to the exclusions and restrictions described below, Lutron warrants that each System will be free from manufacturing defects from the date of shipment by Lutron for a period of (a) one year as to the wall controls, interfacesand system accessories of the Sivoia QS Shade System ( External Sivoia QS Components ) and (b) eight years as to the other Systems and the roller Shade EDU, shade fabric and shade hardware of the Sivoia QS Shade System.
10 If anymanufacturing defect exists in the External Sivoia QS Components, so long as Customer promptly notifies Lutron of the defect within the one year warranty period and, if requested by Lutron, returns the defective part(s), Lutron will, at its option, either repair the defective part(s) or providecomparable replacement part(s). If any manufacturing defect exists in any of the components of a System other than the External Sivoia QS Components, so long as Customer promptly notifies Lutron of the defect within the eight year warranty period and, if requested by Lutron, returns the defective part(s), Lutron will, at its option, either repair the defective part(s) or issue a credit to the Customer against the purchase price of comparable replacement part(s) purchased from Lutron as provided below.
