Transcription of MAINTANENCE MANUAL TRIPLEX PUMP WS …
1 WHITE STAR PUMP CO. MAINTAINENCE MANUAL WSM-05-1 1 MAINTANENCE MANUAL TRIPLEX PUMP WS-1300/1600 White Star Pump Co. 22718 Commercial Lane, Tomball, Texas 77375 2005 WHITE STAR PUMP CO. MAINTAINENCE MANUAL WSM-05-1 2 - CONTENT PAGE SECTION 1 GENERAL 3 SECTION 2 INSTATLLATION 5 SECTION 3 LUBRICATION SYSTEM 11 SECTION 4 INSPECTION AND MAINTEANCE 15 SECTION 5 FLUID END REPAIR 17 SECTION 6 POWER END REPAIR 31 WHITE STAR PUMP CO.
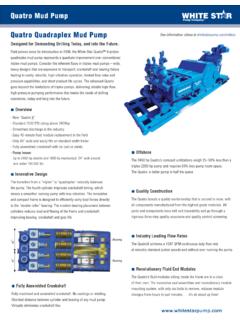
2 MAINTAINENCE MANUAL WSM-05-1 3 - SECTION 1. GENERAL This section contains the instructions for the installations and startup of the pump at the drilling site. The instructions presented in this section should be followed for the initial Installation and startup of the pump, whenever the pump has been moved to a new location, or whenever major repairs have been made. Fig 1-1. White Star TRIPLEX Pump with One Piece Module WHITE STAR PUMP CO. MAINTAINENCE MANUAL WSM-05-1 4 - WARNINGS NEVER REACH INSIDE OPERAING PUMP.
3 NEVER RUN PUMP AGAINST CLOSED VALVES (ALL DISCHARGE VALVES CLOSED). STOP PUMP OPERATION BEFORE ATTEMPTING REPAIRS. PROPERLY LOCK-OUT OR DISCONNECT MAIN POWER SOURCE TO THE PUMP BEFORE CONDUCTING INSPECTION, maintenance OR REPAIR. COMPLETELY BLEED ALL PRESSURE FROM FLUID END BEFORE ATTEMPTING maintenance OR REPAIR. CAUTIONS A CHARGING PUMP IS ESSENTIAL FOR PROPER OPERATION. FAILURE TO USE A CHARGING PUMP WILL VOID THE PUMP WARRANTY. INSTALL A SUCTION DESURGER TO MINIMIZE MUD CAVITATION. Fig 1-2 Fluid End WHITE STAR PUMP CO. MAINTAINENCE MANUAL WSM-05-1 5 - Figure 1-1-1 White Star TRIPLEX Pump with Split Modules Figure 1-2-1 Fluid End with Split Modules WHITE STAR PUMP CO.
4 MAINTAINENCE MANUAL WSM-05-1 6 - SECTION 2. INSTALLATION PUMP 1. Be sure that the pump foundation is level and able to support the weight of the pump. 2. Install the pump as close as possible to the mud tank or pit to reduce drop in suction line. SUCTION SYSTEM 1. The diameter of the suction line must be equal to or exceed the diameter of the pump suction connection. 2. Use as short a suction line as possible. 3. Install the suction line in as straight a line possible. If turns are necessary use long radius ells. 4. Install a section hose in the suction line to isolate vibration. 5. Be sure there are no air traps or air leaks in the suction line.
5 6. Install a charging pump in the suction line. (See CHARGING pumps .) 7. Install a suction desurger to prevent mud cavitation. (Refer to FLUID END ACCESSORIES in Section 4 of this guide.) 8. Fully open all valves in the suction line before operating the pump. DISCHARGE SYSTEM WARNING THE DISCHARGE SYSTEM IS SUBJECT TO HIGH PRESSURES. FAILURE TO FOLLOW APPROVED WELDING PROCEDURES ON ANY OF THE DISCHARGE PIPE MANIFOLDING; OR, PIPING BEYOND MANIFOLDING SUBJECTED TO INTERNAL PRESSURES FROM PUMP OPERATION COULD RESULT IN PIPING FAILURE CAUSING EQUIPMENT DAMAGE OR PERSONAL INJURY. 1. Install a pressure relief valve in the discharge system. Be sure there are no valves or restrictions, including the strainer assembly, between the pump and the relief valve. WHITE STAR PUMP CO. MAINTAINENCE MANUAL WSM-05-1 7 - CAUTION THE PRESSURE SETTING OF THE VALVE MUST NOT EXCEED THE PRESSURE RATING OF THE LINER SIZE INSTALLED IN THE PUMP.
6 NOTE: The pressure ratings for the liners are listed in the specification charts at the back of this guide. They are also indicated on the pump serial number plate. 2. Install a pulsation dampener in the discharge system to reduce vibration and increase component service life. (Refer to FLUID END ACCESSORIES in section 4 of this guide.) NOTE: The standard WHITE STAR strainer assembly has an API 4 5000 psi WP RTJ flange for dampener installation. DIRECTION OF THE PUMP ROTATION 1. Be sure that the pump is set to rotate in the direction indicated by the arrow in the picture below the (Figure 1 3) 2. Do not rotate the pump in the opposite direction of the arrow unless the oil pump suction and discharge lines have been reversed. 3. If it becomes necessary to use the back side of the gear teeth (because of normal wear), turn the pinion and crankshaft assemblies end for end and move the oil pump to the opposite side of the crankcase.
7 Fig. 1-3 Direction of Rotation WHITE STAR PUMP CO. MAINTAINENCE MANUAL WSM-05-1 8 - INITIAL OPERATION Take special care when operating the pump for the first time or after major repairs have been made. Refer to the caution remarks under STARTUP, Page 1-4 CAUTION pumps ARE SHIPPED FROM THE FACTORY WITHOUT LUBRICANT. BE SURE THE PUMP IS PROPERLY LUBRICATED BEFORE OPERATING. PREPARATION 1. If the pump was not completely assembled at the factory, complete the assembly as required.
8 2. Check to be sure the suction and discharge systems have been properly installed. (SEE INSTALLATION) 3. Remove the cover plates from the power end. 4. Inspect the power end for contamination. Clean as required. 5. Drain all condensation from the power frame (Figure 1-4). Fig. 1-4 Power end drain plug Do not attempt to drain condensation from power frame if unit has been filled with lubricant. (why?) 6. Install cover plates. 7. Check that crankcase drain plug is installed and tight. 8. Fill the power end with correct lubricant. DRAIN PLUG WHITE STAR PUMP CO. MAINTAINENCE MANUAL WSM-05-1 9 - NOTE: Lubricant specifications and quantities for the pump are listed in LUBRICATION section of this guide and on the pump name plate.
9 9. Check and lubricate grease fittings on piston wash system. 10. Make sure all covers are installed and all nuts and bolts are tightened to the torque specifications listed at the back of the guide. 11. Fill piston wash system with water and / or coolant. a. Slide reservoir cover open to fill reservoir. b. Replace cover. NOTE: Add anti-freeze to piston wash system if there is a possibility of freezing. CAUTION IF THERE ARE UNUSUAL NOISES OR OTHER INDICATIONS THAT THE PUMP IS NOT OPERATING CORRECTLY, STOP THE PUMP IMMEDIATELY AND CORRECT THE PROBLEM BEFORE CONTINUING OPERATION. IF OIL PRESSURE EXCEEDS 40 PSI OR FALLS BELOW 5 PSI STOP THE PUMP IMMEDIATELY AND CORRECT THE PROBLEM BEFORE CONTINUING. 1. Operate pump slowly, 50 strokes per minute maximum, for 5 minutes with no fluid end pressure. 2. Be sure that the oil pressure gauge indicates between 5 and 40 psi (Figure 1-5) Fig.
10 1-5 Oil pressure gauge WHITE STAR PUMP CO. MAINTAINENCE MANUAL WSM-05-1 10 - 3. Check each liner to ensure that the position wash system is operating properly. 4. After 5 minutes of slow speed operation, stop the pump. Allow 10 minutes for oil to return to the crankcase and check the lubricant level. If required, add oil until the level reaches the FULL mark on the dipstick. (Refer to the LUBRICATION section of the guide.) 5. Restart the pump. With no pressure on the fluid end, gradually increase the speed until the normal operating speed is reached. CAUTION IF THERE ARE UNUSUAL NOISES OR OTHER INDICATIONS THAT THE PUMP IS NOT OPERATING CORRECTLY, STOP THE PUMP IMMEDIATELY AND CORRECT THE PROBLEM BEFORE CONTINUING.