Transcription of Matrix - California Regional Multiple Listing Service
1 MatrixProspect and Client ManagementFor Support: (800) 925-1525 Support Hours:M-F 8:30 AM 9:00 PMSat-Sun: 10:00 AM 3:00 rights reserved. No part of this publication may be reproduced, stored in a retrieval system, or transmitted in any form or by any means, electronic, mechanical, photocopying, recording, or otherwise, without the prior written permission of California Regional Multiple Listing Services, Inc. 2011 California Regional Multiple Listing Services, Inc. 6/11 Contents1 ContentsManaging Contacts .. 3 Adding Contacts.
2 3 Importing Multiple Contacts .. 4 Viewing Contacts .. 6 Managing Contacts .. 8 Customizing Email Settings .. 9 Creating an Email Signature .. 9 Customizing Your Header/Footer .. 10 Emailing Listings Directly .. 13 Emailing Listings for Display in the Client Portal .. 13 Emailing listings as a PDF Report .. 15 Saving Searches .. 18 Saving a Search .. 18 Managing Saved Searches .. 19 Emailing Listings Automatically .. 21 Creating an Auto Email .. 21 Creating Auto Emails from Saved Searches .. 24 Managing Auto Emails.
3 28 Auto Email Concierge .. 30 Creating a Concierge Auto Email .. 30 Filtering Listings in the Concierge .. 32 Enabling Concierge Mode for Existing Auto Emails .. 34 Disabling Concierge Mode for an Auto Email .. 36 Auto Email Icons and Displays for Concierge Mode .. 38 Viewing Sent Email History .. 39 Viewing Email History .. 39 Viewing Your Client s Auto Email Portal .. 422 ContentsMatrix Anti Spam Feature .. 44 Unsubscribe from Direct Emails .. 44 Agent Notification .. 45 Reverse Prospecting .. 46 Carts.
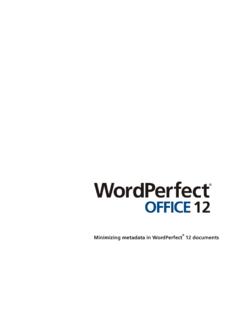
4 48 Adding Listings to a Cart .. 48 Accessing Carts .. 50 Accessing a Cart from the Home Tab .. 50 Accessing a Cart from the Search tab .. 50 Accessing a Cart from the Search Results Page .. 51 Accessing a Cart from the My Matrix Contacts Page .. 52 Removing Listings from Carts .. 53 Contacting CRMLS Customer Support .. 54 Managing Contacts3 Managing ContactsFollow the steps in these sections to add and manage contacts in the CRMLS Matrix Platform: Adding Contacts below Viewing Contacts on page 6 Managing Contacts on page 8 Adding ContactsFollow the steps below to add contacts to the CRMLS Matrix Click the Contacts link on the My Matrix Click Add to add a new :To add Multiple contacts at once, see Importing Multiple Contacts on page Multiple Contacts3.
5 Enter your client s contact information in the available fields. Required fields are highlighted in :To add a contact s home address, business address, or to add notes about the contact, click Show All Click Save to save your client s contact Multiple ContactsBefore you begin, make sure that you ve exported your contacts from Microsoft Outlook in Comma Separated Values (Windows) format. Then follow the steps below to import your :Contacts that do not contain a first name, last name, or email address will not be Click the Contacts link on the My Matrix Multiple Contacts52.
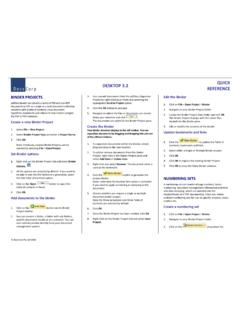
6 Click Click Browse to locate the CSV file that you exported from Microsoft :To update existing contacts with the information in your CSV file, click the Update existing contacts with imported information Click Import to import your When the import is complete, you see the results of the import. Click Done to return to the Contacts ContactsViewing ContactsTo view your contacts, click the Contacts link on the My Matrix view a contact s details, click the triangle next to the contact s sort your contacts alphabetically, click the Name search for a contact, type a name in the Search narrow down your contacts, select one of the following options in the Filter Contacts drop-down menu.
7 With active auto emails displays all contacts with active auto emails with inactive auto emails displays all contacts with inactive auto emails with no auto emails displays all contacts that do not have an auto email who have visited their portal displays all contacts that have visited their client portal who have not visited their portal displays all contacts that have not visited their client portal I haven t worked with displays all contacts that you haven t worked with for a specific amount of time who have saved searches displays all contacts that have a saved search assigned to them who have no saved searches displays all contacts that do not have a saved search assigned to themViewing Contacts7 For a list of contact icons and their descriptions, refer to the table below:IconDescriptionDisplays which contacts have active Auto which contacts have Saved the date that you last worked with a client in the CRMLS Matrix Platform.
8 Displays the date that your Contact opened their Auto Email or direct the number of listings in the client s the number of Favorites your client has the number of listings your client selected as the number of listings that were Discarded by your ContactsManaging ContactsFrom the Contacts page, click the triangle next to a contact to view items assigned to your you can do the following: Click the Edit Contact button to update the selected contact s :To update the contact s home address, business address, or notes about the contact, click the Show All Fields button in the Personal Information window.
9 Click the triangle next to Auto Emails to view and edit auto-email settings for your client. (See Managing Auto Emails on page 28 for details.) Click the triangle next to Saved Searches to view and edit previously saved searches. (See Managing Saved Searches on page 19 for details.) Click the triangle next to CMAs to view, edit, and delete previously saved CMAs. Click the triangle next to Sent Email to view Direct Email, Auto Email and CMAs along with their respective view history and content. (See Viewing Sent Email History on page 39 for details.)
10 Click the checkbox next to a contact and click Delete Contact to remove the selected contact. Click the checkbox next to a contact and click the Set Active or Set Inactive button to change the selected contact s status to Active or Email Settings9 Customizing Email Settings Before you send emails to your clients, you should create an email signature and customize your header/footer for the Client Portal and printed reports. Follow the steps in these sections to get started: Creating an Email Signature on page 9 Customizing Your Header/Footer on page 10 Creating an Email SignatureWhen you send an email from the CRMLS Matrix Platform, your email signature will appear at the bottom of the email.