Transcription of MECHANICAL TESTS - Rodacciai
1 TESTM agnitudeSymbolMeasurement unitDescriptionTensile strengthRmMPa (N/mm2)it is the ratio between the maximum applied force and the original cross-sectional area of the specimenUpper yield strengthRsMPa (N/mm2)it is detectable only when the material has the yield phenomenon (it doesn t exist for the cold drawn and the stainless steels)Yield pointRpMPa (N/mm2)it is detectable on cold drawn and stainless steel, in place of R5Rp(0,2)MPa (N/mm2)load corresponding to a no proportional charge equal to a 0,2% of length L0Rp(1,0)MPa (N/mm2)load corresponding to a no proportional charge equal to a 1% of length L0 ElongationA%permanent elongation of length L0, expressed in per cent of length L0A5%permanent elongation for proportional specimens with length L0 equal to 5 times diameterA4%permanent elongation for proportional specimens with length L0 equal to 4 times diameterA0%permanent elongation for proportional specimens with length L0 equal to 100 mm (used for diameter lower than 4mm)
2 Reduction areaZ%Ratio between the maximum variation of area of transverse section and area of initial section S0, expressed in per centThis test measuresthe load, applied by MECHANICAL or hydraulic test equipment, necessary to rapture a specimen. The test is performed at room specimen properties and the procedures for testing are defined in the standard EN 10002-1and ASTM A370. After testing, the relevant results are are obtained by machining specific sample shapes from product to be tested, or in case of bar up to certain diameters and wire testing is carried out without the specimen has a round cross section, but hexagon and square profiles not machined are tested in their section as proportional specimen have a starting lenght L0 according to the European norm, proportional to starting section S0:L0 = S0 For diameters lower than 4 mm (L0 < 20 mm) 100 mm length no proportional specimens are used, independently by starting section TENSION TEST IS POSSIBLE TO DETERMINATE THE FOLLOWING MACHANICAL PROPERTIES.
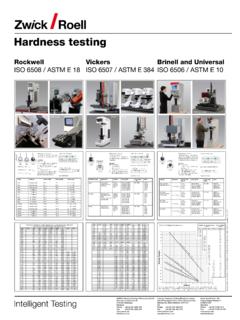
3 MECHANICAL TESTSMECHANICAL TESTSrev. 11 TESTH ardness testand reference standardSymbol and examplesDescriptionBrinellUNI EN ISO 6506-1 HBa penetrator (carbide ball with diameter D ) is pressed into the surface of a specimen under a load F (in Newtons). After removal of the load , the diameter d of the indentation is measured. The hardness is proportional to the ratio between indentation surface (spherical cap pressed area) and applied load according to formula:HB=0, D (D- D2-d2)in case of steels, the ratio between load and sphere diameter shall satisfy the following condition:0,102F=HBDthe depth indentations h is also proportional to its diameter:h=D - D2- d22HB 10/3000 Brinell hardness measured with 10 mm diameter ball and with load of 29,42 kN (equal to 3000 kgf)HB 2,5/187,5 Brinell hardness measured with 2,5 mm diameter ball and with load of 1,839 kN (equal to 187,5 kgf)VickersUNI EN ISO 6507-1.
4 99 HVa pyramidal diamond penetrator (square base & vertex angle of 136 ) is pressed into the surface of a specimen under a load F (in Newton). After removal of the load, the diagonal dimension d of the indentation is measured. The hardness is proportional to the ratio between indentation surface (spherical cap pressed area) and applied load according to formula:HV= 0,1891Pd2it s possible to apply a very low load on surface polished, up to measure the hardness of single constituents of structuresHV30 vickers hardness measured by load of 294,3 N (equal to 30 kgf)HV1 vickers hardness measured by load of 9,81 N (equal to 1 kgf)HV 0,1 vickers hardness measured by load of 0,98 N (equal to 0,1 kgf)RockwellUNI EN ISO 6508-1.
5 99 HRa penetrator (diamond cone of 120 or steel ball of 1,5875 mm diameter) is pressed in two stages of into the surface of a specimen under a total load (preload F0 and final load F1) of F (in Newtons). The depth difference h between the penetration under the preload to the depth under the final load is measured. The hardness is proportional to the difference between a costant number N (depending on scale used) and the difference h following to formula:HR= ,02 HRCR ockwell hardness made with diamond cone and total load F of 1471 N (150 kgf). Used from 20 to 70 HRCHRBR ockwell hardness made with diamond cone and total load F of 980,7 N (100 kgf). Used from 20 to 100 HRBHRAR ockwell hardness made with diamond cone and total load F of 588,4 N (60 kgf).
6 Used from 20 to 88 HRAThe hardness can be definied like the resistance opposed bu material to penetration of a body. The hardness TESTS are different in the shape of penetrator, the applied loads and the procedures of measurement: the details are descrbed on the relevant hardness TESTS are carried out on a float specimen surface, after appropiate surface preparation. The indentations shall have a minimum distance from the edge of the specimen and between TESTSMECHANICAL TESTSrev. 11 IMPACT TESTSYMBOLNameSpecimen geometryL (mm)T(mm)H(mm)BCRDKVC harpy V551010845 R0,2555101080,80,2545 KCUC harpy U5510510R155101050,51-IZODIzod V101022245 45 28130 min282888R 0,25R 0,251075(1 notch)100(2 notches)130(3 notches)101080,80,2545-Mesnager552210108 55101080,81-The impact strength is the material s capability to resist impacts.
7 The test is a dynamic test in which a notched specimen (see table below) is struck and broken by a single blow of a freely swinging pendulum. The pendulum is standardized (most are used in accordance to European - EN - and American - ASTM - standard) able to generate an energy generally equal to 300 test is made at room temperature or often at low temperature to verify if in that condition the material has brittle behavior. The test result is expressed as absorbed energy (J) during the stroke to break the to considerable effect of test parameters on impact strength, the values conversion obtained by several kind of specimen is very empirical (it is supposed that fracture behavior is the same) and is used only for qualitative.
8 L = length - T = thickness - H = height - B = height section no notched - C = nominal test section (cm2) - R = notch radius - D = notch anglevalues expressed in Joule (J)IMPACT TEST VALUES CONVERSIONKVKCUIzodMesnager9213547302050 6751396587724880107935795127114661101471 357512516715684140187 KVKCUIzodMesnager17793155207198102170227 2191111852472401202002672611292152872821 38230307303147245327---- MECHANICAL TESTSMECHANICAL TESTSrev. 11 AMONG hardness VALUES OBTAINED FROM DIFFERENT SYSTEMA mong the different hardness scales it is possible to establish only a rough and empirical comparison, except for a connection between Brinell and vickers hardness . Also the comparisons between hardness and tensile strength are any case, the table below reports these comparisons, as result of various historical tables and of TESTS made in our.
9 This table is not applicable to austenitic stainless steelsCONVERSION TABLE (mm)HB3000 HVHRBHRCRm (MPa)5,2013113874-4405,18132139--4455,15 13414175-4505,13135142--4555,0913714476, 5-4605,0813814577-4655,0414014777,5-4705 ,03141149--4754,9914315078,5-4804,981441 52--4854,9514615379,5-4904,9314715580-49 54,9214815681-5004,88150158--5054,871511 5981,5-5104,84153161--5154,8315416282,5- 5204,80156164--5254,7815716683-5304,7515 9167--5354,7416016984,5-5404,7116217085- 5454,7016317285,5-5504,67165173--5554,66 16617586-5604,63168176--5654,6216917886, 5-5704,5917117987-5754,58172181--5804,57 173183--5854,5417518488-5904,53176186--5 954,5117818789-6004,50179189--6054,47181 19089,5-6104,46182192--6154,4418419390-6 204,43185195--625 (mm)HB3000 HVHRBHRCRm (MPa)
10 6,677579--2506,637680--2556,567882--2606 ,527984--2656,45818541-2706,428287--2756 ,35848845-2806,32859048-2856,25879149-29 06,228893--2956,16909451-3006,13919652-3 056,07939754-3106,049499--3155,999610156 -3205,9697102--3255,919910458-3305,88100 10559-3355,8510110760-3405,80103108--345 5,7810411062-3505,73106111--3555,7010711 363,5-3605,66109114--3655,6311011664,5-3 705,59112118--3755,5611311966-3805,52115 12167-3855,5011612267,5-3905,46118124--3 955,4411912569-4005,39121127--4055,37122 12870-4105,3312413071-4155, ,2612813573-4305,24129136--435 MECHANICAL TESTSMECHANICAL TESTSrev. 11 TABLE (mm)HB3000 HVHRBHRCRm (MPa)4,4018719691-6304,39188198--6354,37 19020091,5-6404,36191201--6454,341932039 2-6504,33194204--6554,3119620692,5-6604, 30197207--6654,2919820993-6704,272002109 3,5-6754,26201212--6804,24203213--6854,2 320421594-6904,21206217--6954,20207218-- 7004,1820922095-7054,1721022195,5-7104,1 5212223--7154,1421322496-7204,12215226-- 7254,11216227--7304,09218229--7354,09219 23196,5-7404,07221232--7454,0622223497-7 504,05223235--7554,0322523797,5-7604,022 26238--7654,0122824098207704,00229241--7 753,98231243-217803,97232244--7853,96234 24699-7903,95235248--7953,9323724999,522 8003,93238251--8053,91240252--8103,90241 254--8153,89243255-238203,88244257--8253 ,86246258--8303,86247260-248353,85248261 --8403.


