Transcription of Microscope Parts and Functions - WPMU DEV
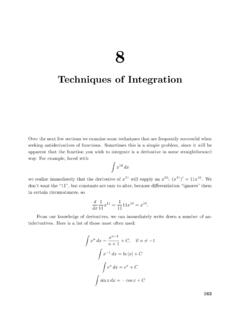
1 8/7/2018. Microscope Parts and Functions Microscope One or more lenses that makes an enlarged image of an object. 1. 8/7/2018. Simple Compound Stereoscopic Electron Simple Microscope Similar to a magnifying glass and has only one lens. 2. 8/7/2018. Compound Microscope Lets light pass through an object and then through two or more lenses. Stereoscopic Microscope Gives a three dimensional view of an object. (Examples: insects and leaves). 3. 8/7/2018. Electron Microscope Uses a magnetic field to bend beams of electrons instead of using lenses to bend beams of light. Click on Me Click on Me Click on Me Click on Me Click on Me Click on Me Click on Me Click on Me Click on Me Click on Me Click on Me Click on Me Click on Me Click on Me 4. 8/7/2018. #9 Eye Piece The part you look at with your eye.
2 Usually 10 X magnification. Click Here to Return to the Main Slide #10 Arm Used to safely transport Microscope Click Here to Return to the Main Slide 5. 8/7/2018. #11 Stage Slides are placed on this Click Here to Return to the Main Slide #12 Coarse Adjustment . Used to make large changes in focus. NOTE Never use this when viewing on high power Click Here to Return to the Main Slide 6. 8/7/2018. #13 Fine Adjustment . Used for small adjustments of focus Click Here to Return to the Main Slide #14 Base Used to safely transport the Microscope Click Here to Return to the Main Slide 7. 8/7/2018. #1 Body Tube Reflects light up to the viewers eye Click Here to Return to the Main Slide #2 Nose Piece Allows for quick change of objectives Click Here to Return to the Main Slide 8. 8/7/2018.
3 #3 Low Power Objective . The first lens you use when doing proper Microscope work. Usually 4 X. Click Here to Return to the Main Slide #4 Medium Power Objective The second lens you use when doing proper Microscope work. Usually 10 X. Click Here to Return to the Main Slide 9. 8/7/2018. #5 High Power Objective The highest magnification used. Usually 43 X. NEVER use the course adjustment when using this lens. Click Here to Return to the Main Slide #6 Stage Clips Used to keep the slide in place. Click Here to Return to the Main Slide 10. 8/7/2018. #7 Diaphragm Used to vary the amount of light passing through the slide. Usually it is better if the amount of light is low. Click Here to Return to the Main Slide #8 Light Source Sends light up through the diaphragm and through the slide for viewing Click Here to Return to the Main Slide 11.
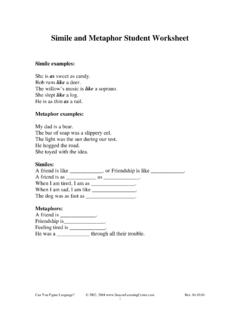
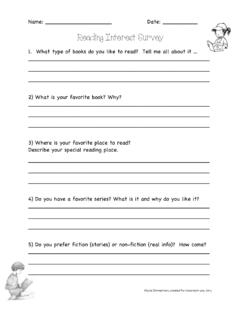
4 8/7/2018. Ocular lens (Eyepiece). Body Tube Nosepiece Arm Objectives Stage Stage Clips Coarse Adjustment Diaphragm Fine Adjustment Light Base Always carry a Microscope with one hand holding the arm and one hand under the base. Carrying a Microscope A B. 12. 8/7/2018. What's my power? To calculate the power of magnification, multiply the power of the ocular lens by the power of the objective. What are the powers of magnification for each of the objectives we have on our microscopes? Comparing Powers of Magnification We can see better details with higher the powers of magnification, but we cannot see as much of the image. Which of these images would be viewed at a higher power of magnification? 13. 8/7/2018. Storing The Microscope Return the lowest power objective in place and lower base Wrap the cord around the base Turn power off Using the Microscope Always observe using the LOWEST POWER objective first.
5 Focus using the COARSE ADJUSTMENT KNOB to bring the object into focus. Bring the object into sharp focus by using the fine adjustment knob. Focus, and then move to a higher power objective, if needed. Use only the FINE ADJUSTMENT KNOB when using the HIGHEST (longest) POWER OBJECTIVE. Keep both eyes open to reduce eyestrain. Determine total magnification of the object by multiplying the power of the ocular (10x) the power by the power of the objective. 14. 8/7/2018. How to make a wet-mount slide . 1 Get a clean slide and coverslip from your teacher. 2 Place ONE drop of water in the middle of the slide. Don't use too much or the water will run off the edge and make a mess! 3 Place the edge of the cover slip on one side of the water drop. 4 - Slowly lower the cover slip on top of the drop.
6 Cover Lower slowly Slip 5 Place the slide on the stage and view it first with the red-banded objective. Once you see the image, you can rotate the nosepiece to view the slide with the different objectives. You do not need to use the stage clips when viewing wet-mount slides! 15.