Transcription of Microsoft Excel 2007 Basics For Windows
1 Copyright 2009 by Massachusetts Institute of Technology All Rights Reserved Printed on 12/8/09 Microsoft Excel 2007 Basics For Windows Microsoft Excel 2007 Basics for Windows Copyright 2009 Massachusetts Institute of Technology All Rights Reserved 2 of 41 Table of Contents Table of Contents .. 2 Module 1 Getting Started .. 5 Starting Microsoft Excel .. 5 Creating and Opening Workbooks .. 5 Creating a new workbook .. 5 Opening an existing workbook .. 6 Workbooks and Worksheets .. 6 Elements of a Window .. 7 Title Bar and Menu Bar .. 7 Standard and Formatting Toolbars .. 9 Zoom Control .. 9 Active Cell .. 9 Cell Address .. 9 Horizontal and Vertical Scroll Bars .. 10 Name Box and Formula Bar .. 10 Row and Column Headings .. 11 Sheet Tabs and Tab Scrolling Buttons .. 11 Status Bar .. 12 Exercise - Module 1 .. 13 Module 2 Saving .. 14 Naming workbooks .. 14 Saving an unnamed workbook .. 14 Saving an existing workbook .. 14 Saving a copy of a workbook .. 14 Saving a workbook to a new location.
2 15 Saving a workbook with a new name and to a new location .. 15 Exercise - Module 2 .. 16 Module 3 Entering and Editing .. 17 Entering Worksheet Data .. 17 Enter numbers, text, a date, or a time .. 17 Ready and Edit modes .. 17 Enter and edit the same data on multiple worksheets .. 18 Enter the same data into several cells at once .. 18 Automatically fill in data based on adjacent cells .. 18 Microsoft Excel 2007 Basics for Windows Create a Custom List .. 19 Import an existing Custom List .. 19 Editing Worksheet Data .. 19 Edit cell contents .. 19 Cancel , undo or redo an entry .. 20 Clear contents, formats, or comments from cells .. 20 Exercise - Module 3 .. 21 Module 4 Selecting and Navigating .. 22 Selecting .. 22 Grouping Worksheets .. 22 Navigating .. 23 Using the scroll bars [see page 9, Figure 7] .. 23 Using the keyboard .. 23 Exercise - Module 4 .. 24 Module 5 - Creating Formulas .. 25 How formulas work .. 25 How operators work .. 25 Creating a simple formula .. 25 Using functions.
3 26 Automatically sum a range of cells .. 27 Sum multiple rows and columns .. 27 Naming a cell or a range, or cells .. 27 To name a cell or a range: .. 27 Absolute versus relative values .. 28 Exercise - Module 5 .. 30 Module 6 Formatting .. 31 Basic Worksheet Formatting .. 31 Applying Borders and Shading .. 31 Number Formatting .. 31 AutoFormat .. 31 Using Styles .. 32 Format Painter .. 32 To apply the formatting to adjacent cells: .. 32 Copyright 2009 Massachusetts Institute of Technology All Rights Reserved 3 of 41 Microsoft Excel 2007 Basics for Windows Copyright 2009 Massachusetts Institute of Technology All Rights Reserved 4 of 41 To apply the formatting to non-adjacent cells: .. 32 Exercise Module 6 .. 33 Module 7 - Printing .. 34 Before you print .. 34 Modify the layout of the printed worksheet .. 34 Change the worksheet area that appears on a printed page .. 34 Print Preview .. 34 Print the active sheets, a selected range, or an entire workbook .. 34 Create custom headers and footers.
4 35 Change the font in header and footer text .. 36 Print titles .. 36 Rows to Repeat at Top of Each Worksheet Page .. 36 Columns to Repeat at Left of Each Worksheet Page .. 36 Page Break .. 36 Exercise Module 7 .. 38 Module 8 Getting Help .. 39 When you have a question .. 39 Office Assistant tool .. 39 Dialog Box Screen Tips .. 39 Toolbar Screen Tips .. 39 MIT Computing Help Desk .. 39 MIT Excel User Group .. 40 Exercise - Module 8 .. 40 Microsoft Excel 2007 Basics for Windows Module 1 Getting Started Starting Microsoft Excel There are several ways to start Excel . Here are a few. Double-click the Excel program icon or an existing Excel worksheet. Excel 2007 program icon Choose Microsoft Excel from the Microsoft Office Manager. Click on the Windows XP Start button, choose Programs, MS Office, MS Excel Start button Creating and Opening Workbooks Creating a new workbook 1) On the Office button menu, click New. 2) In the New Workbook dialog box, click Create.
5 3) It s much faster to click on the New Workbook tool on the Quick Access toolbar. Copyright 2009 Massachusetts Institute of Technology All Rights Reserved 5 of 41 Microsoft Excel 2007 Basics for Windows Opening an existing workbook 1) Click the Open tool on the Quick Access toolbar. The Open dialog box appears. 2) In the Open dialog box, you can navigate through the drop-down list in the Look in section, or use the icons in the sidebar to get to a location. 3) Once you find the workbook, double-click on it to open. Tip: To open a workbook you've used recently, click its name in the Recent Documents list of the Office button. Workbooks and Worksheets In Microsoft Excel , a workbook is the file where you work and store your data. Because each workbook can contain many sheets, you can organize various kinds of related information in a single file. In other words, a workbook is a collection of worksheets. Worksheets are for listing and analyzing data. You can enter and edit data one worksheet or on several worksheets simultaneously and perform calculations based on data from multiple worksheets.
6 You can add chart sheets to chart your worksheet data, and modules to create and store macros for special tasks you want to perform in the workbook. The names of the sheets appear on tabs at the bottom of the workbook window. To move from sheet to sheet, you click the sheet tabs ( , Sheet1, ) and the name of the active sheet is always highlighted and bold. You can rename the sheets, add and delete sheets, and move, copy or link sheets within a workbook or to another workbook. You can also group worksheets. Each Excel workbook by default has 3 worksheets, but you can change the default to a higher or lower number. Each sheet contains 1,048,576 rows and 16,384 columns that s over 17 billion cells! Later on you will learn how to navigate in a very large worksheet. To understand the distinction between a workbook and worksheet, think of an Excel workbook as a book containing many chapters. Although the worksheets in a workbook look like only one page, they can contain many pages of data.
7 Therefore, the sheets are more like individual chapters in a book. Copyright 2009 Massachusetts Institute of Technology All Rights Reserved 6 of 41 Microsoft Excel 2007 Basics for Windows Elements of a Window Title Bar and Ribbon The Title Bar is at the top of every window in Windows (Workbook and Application can reside on one title bar) and identifies the name of the program (in this case, Microsoft Excel ) and/or workbook ( , Book1). If your window is not maximized, you click and hold the left mouse button while dragging the title bar to move the window to a different location. The Office Button is located on the top left section of the Title Bar and Ribbon. From the Office Button you can select the appropriate command, such as choosing New, Open, Save, Print, and Close. Note: that each menu item has one character underlined. This is so that you can use the keyboard rather than the mouse to access menus and menu commands. By pressing the [Alt] key, you place Excel in a keyboard mode, and you would be able to type the specified letter of a menu and menu command.
8 For example, if you wanted to choose Open from the File menu without using the mouse, you would press the [Alt] key, followed by F and O. The Open dialog Copyright 2009 Massachusetts Institute of Technology All Rights Reserved 7 of 41 Microsoft Excel 2007 Basics for Windows Copyright 2009 Massachusetts Institute of Technology All Rights Reserved 8 of 41 box would appear so that you could navigate to the workbook you d like to open. Microsoft Excel 2007 Basics for Windows Home Tab The Standard and Formatting toolbars from older version of Excel are now included on the Home Tab in the Ribbon. Quick Access Toolbar There is only one toolbar in Excel 2007, and by default, it appears above the ribbon on the Title bar. This is the only customizable toolbar in 2007. You can place it below the ribbon, add tools to it from a drop down list on the right end of the toolbar, right-clicking on any tool on the ribbon, and by going into the Customize section in Excel Options.
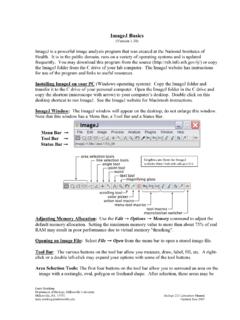
9 Zoom Control Zoom Control is a tool on the Status bar at the bottom right side of the application window. This feature enables you to see your worksheet in larger or smaller views without having to change the font size. It is also where the page view buttons are. Active Cell When you start entering data, it will go into the active cell. When you are not entering data, the active cell will have a bold outline around it. When you have selected a range of cells, the active cell will be white, whereas the other cells in the selected range will be highlighted. Only one cell can be active at a time. Cell Address Each cell is referenced by a column letter and row number ( , B3). The active cell address is referenced in the Name Box (described below). Cell Address Active Cell Copyright 2009 Massachusetts Institute of Technology All Rights Reserved 9 of 41 Microsoft Excel 2007 Basics for Windows Horizontal and Vertical Scroll Bars Excel has two scroll bars which enable you to navigate around your worksheet.
10 The vertical scroll bar on the right side of the worksheet moves up or down the worksheet. The horizontal scroll bar is located on the bottom of the worksheet and allows you to navigate to the left or right. The size of the scroll button is an indicator of how close; or far, in proximity to what you are currently viewing that you will have to scroll to see more cells with data in them. Vertical scroll bar Horizontal scroll bar Name Box and Formula Bar The Name Box (see Figure 8 below) is part of the Formula Bar; it has several functions: to reference the active cell ( , A1) to go to a specific cell address to select a range of cells to name a cell or range of cells Name Box Formula Bar Copyright 2009 Massachusetts Institute of Technology All Rights Reserved 10 of 41 Microsoft Excel 2007 Basics for Windows The Formula Bar shows the data you have typed into the active cell, and is used to edit the data you enter. Later on you will learn how to edit data in the formula bar, as well as from within a cell.