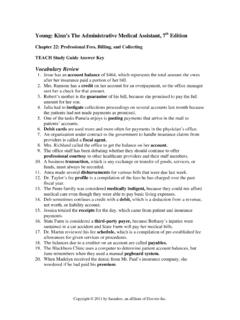
Transcription of MOAC Access 2013 FINAL - Quia
1 157 Create Reports 6 Gorfer/iStockphotoLESSON SKILL MATRIXS killExam ObjectiveObjective NumberCreating ReportsCreate new reports in Design a ThemeApply with ReportsSort sort KEY TERMS record source report Lesson 6158 Alpine Ski House is a small mountain lodge that features cross- country skiing in the winter and hiking in the summer. As an administrative assistant for Alpine Ski House, you take care of many of the adminis-trative duties for the innkeepers, including reservations, billing, and re-cord keeping. You have recently started using Access to keep track of customers and reservations at the lodge. In this lesson, you learn three different ways to create reports for the lodge, how to apply auto formats to reports, and how to sort and fi lter report data.
2 Gorfer/iStockphoto CREATING REPORTS A report is a database object that is used to organize and display data pulled from tables and queries. You can create a report using the Report button, the Report Wizard button, Report Design button, and Blank Report button, depending on the amount of customization desired. You can also create labels using the Labels button. After creating a report, you can instantly apply a Theme to create a professional look. You can also sort and fi lter data in a report to display the records to suit your needs. Creating a Simple Report and Deleting a Report You can use Access 2013 to create simple or complex reports. When creating a complex report, you might spend quite a bit of time choosing which fi elds you want to include from various tables or queries.
3 That is fi ne when you need such a report, but when you need a simple display of all the fi elds in a table or query, you can use the Report button to create a simple report. You can also delete a report to remove it permanently from the database. In this exercise, you use the Report button to create a simple report and delete a report by using the Delete command. The Bottom Line SOFTWARE ORIENTATION Reports Group The Reports group is located on the CREATE tab in the Ribbon, as shown in Figure 6-1. Figure 6-1 Reports group Use the Reports group of commands to create reports. Creates asimple reportCreates a blankreport in Design viewCreates a blankreport in Layout viewStarts theReport WizardStarts theLabels WizardCreate Reports159 Reports are commonly used as formatted hard copies of table or query data.
4 You can modify a report s design, but you cannot add or edit data in a report. The purpose of a report is to allow users to view data, not edit it. For example, a supervisor might ask you to create a sales report that is fi l-tered to show only one region s sales. The supervisor does not need to edit the data, just view it. A report s record source is the table or query that provides the data used to generate a report. Before you can create a report, you need to defi ne the record source by clicking in the Navigation Pane on the table or query on which you want to base the report. Then, click the Report button and a report is automatically generated based on the table or query you selected. You can modify a report s design, print, or save and close a report.
5 You should save a report s design if you are likely to use it again. To save a report, click the Save button on the FILE tab or in the Quick Access Toolbar. If you click the Close button without saving, Access will display a dialog box asking if you want to save it. Once it is saved, the report is listed in the Navigation Pane. You can open it and modify it in the future or create a new report based on the original. The next time you run the report, the design will be the same, but the data will be different if the data in the table or query has been updated. You can also permanently delete a report from the database by using the Delete command in the Records group on the HOME tab. You can delete a report if you erroneously created it or simply want to unclutter the database by removing pre-existing reports you no longer use.
6 STEP BY STEP Create and Delete a Report GET READY . Before you begin these steps, be sure to turn on and/or log on to your computer and start Access . 1. OPEN AlpineSkiHouse from the data fi les for this lesson. 2. SAVE the database as AlpineSkiHouseXXX (where XXX is your initials). 3. In the Navigation Pane, click the Rooms table to select it. This is your record source. 4. On the CREATE tab, in the Reports group, click the Report button. The report appears in Layout view (see Figure 6-2). Notice the Report Layout tools that appear in the Ribbon. Figure 6-2 Simple reportLesson 61605. Click the Room ID header to select it. Position the pointer over the right border until you see a double-sided arrow. Click and drag to the left, resizing the column to remove excess white space.
7 6. Resize the other columns until your screen looks similar to Figure 6-3. 7. Click the Save button on the Quick Access Toolbar. The Save As dialog box appears with Rooms in the Report Name box. Click OK . Notice that the Rooms report is listed in the Navigation Pane. 8. Click the Close button to close the Rooms report. 9. In the Navigation Pane, click the Reservations report to select it. 10. On the HOME tab, in the Records group, click the Delete button arrow and then click the Delete command on the menu that appears. 11. Click Yes on the dialog box asking you if you want to permanently delete the Reservations report. The report is now permanently deleted from the database. PAUSE. LEAVE the database open to use in the next exercise. Using the Report Wizard You are probably already familiar with the way a wizard works.
8 The Report Wizard displays a series of questions about the report you want and then it creates the report for you based on your answers. The Report Wizard knows what makes a good report, so the questions are designed to help you create a professional report with little effort. The Report Wizard is usually the easiest way to create a report when you want to choose which fi elds to include. It guides you through a series of questions and then generates a report based on your answers. If you want to skip steps such as Sorting or Grouping in the Report Wizard, click the Next button to go to the next screen. You can click the Finish button anytime it is available to create the report with the choices you have specifi ed. In this exercise, you use the Report Wizard to create a report based on the Rooms table.
9 Another WayYou can also delete a report or any other object by right-clicking it in the Navigation Pane and choosing Delete from the shortcut menu that appears, or clicking the object and just simply pressing the Delete key on the keyboard. How do you create new reports? do you delete reports? 6-3 Report with resized columnsCreate Reports161 The Report Wizard allows you to include fi elds from more than one table or query. You can click the double right arrow button ( .. ) to include all the fi elds in the report or click the single right arrow button ( . ) to move them one at a time. Likewise, you can click the double left arrow button ( , , ) to move all the fi elds out of the report or the single left arrow button ( , ) to move them one at a time.
10 You can specify group levels, such as grouping all of the fi rst-fl oor rooms together and all of the second-fl oor rooms together if creating a room report. You can also choose up to four fi elds on which to sort data in ascending or descending order. On the layout screen, you can choose from various layouts such as stepped, block, or outline, all of which indent fi elds and records in dif-ferent ways to make the report clearer to read. You can also choose to display the report in portrait or landscape orientation. Access provides a wide variety of design styles from which to choose. On the last screen of the Report Wizard, you can key a name for the report and choose to preview or modify the report. You learn more about grouping in Lesson 11. STEP BY STEP Use the Report Wizard USE the database you used in the previous exercise.