Transcription of Model 121 Regulators - Tri-State Meter
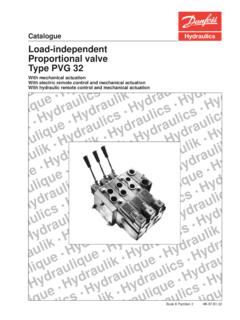
1 *This document replaces RM-1328-R10IN-G-REG-13-28-1112-02-A*Mode l 121 RegulatorsInstallation and Maintenance InstructionsIntroductionThe Model 121 Regulator represents a combination of capacity, performance and value Streamlined body passages provide large capacity. An external control line is required from lower case to control piping. The 121 has a fast speed of response, yet is stable in operation. Soft seats assure positive tight shutoff. Orifi ces are replaceable. Springs are color coded. It is also available as a zero governor or atmospheric regulator, a relief valve or backpressure regulator, and a vacuum regulator or vacuum Examine the regulator for shipping Check nameplate data. Be sure regulator conforms with what was Inside of regulator and piping must be clean and free of dirt. Remove all dirt and debris before installing regulator. Failure to remove dirt/debris could result in regulator damage or Remove all shipping screens and covers from the regulator.
2 Do not let dirt get inside the Install the regulator. Make sure the inlet and outlet are correctly connected. High pressure connects to the inlet. The fl ow arrow must point Screwed connections must conform with good piping practice free of excess thread engagement per ANSI Apply pipe joint compound to male threads The Model 121 Regulator is usually right side-up as shown on the Typical Installation drawing (See Page 2.) It may, however, be installed upside down. When inverted it may be necessary to readjust the set-point. Caution: Do not install sideways. The diaphragm should be Install the control line. Connect it into the outlet piping at least 8-10 pipe diameters downstream from the regulator. Cautions:a. On backpressure Regulators and relief valves the external control line connects into the inlet piping, 5 pipe diameters upstream from the Do not install any automatic shutoff device that closes completely between the regulator and the control line connection into the piping.
3 To avoid excessive turbulence, the connection should be clean and smooth on the inside and be located in straight pipe clear of valves and fi ttings. Keep the inside of the control line clean and protect it from corrosion. Pitch it away from the regulator and avoid moisture pockets. It must be strong ( " for 121-8 and 121-12, " for 121-16, or larger steel tubing or pipe is preferred). It must be well protected against breakage. Regulator will open wide if the control line On indoor installations requiring venting outdoors, run the vent piping as short and direct as possible with minimum bends and elbows. Use the same size or larger pipe as the vent connections on the regulator. With natural gas, or any other hazardous gas, vent to a safe place outdoors in case gas should accidentally be discharged. Screen and protect the opening outdoors to guard against water, ice, dirt, debris or insects. 10. Make sure the regulator is correctly connected and adequately supported.
4 Ensure all pipe joints are tight. Start-UpA. The inlet and outlet shutoff valves should both be closed. If a by-pass is used, the by-pass valve should also be Note the set-point (set-point is the outlet pressure the regulator is adjusted to deliver). Regulator is factory adjusted to the set-point specifi ed on the order. Caution: This caution applies where the piping downstream of the outlet shutoff valve is pressured. That pressure must not exceed the regulator set-point by more than the pressure noted (see Maximum Emergency Pressures , Page 21).C. Slowly and carefully open the inlet shutoff valve just enough to allow inlet pressure to build up slowly in the regulator until it is fully pressured. Caution: During start-up a pressure gauge must be used on the regulator outlet pressure and carefully watched. While inlet pressure builds up, outlet pressure must not exceed set-point by more than 1 psi. If outlet pressure begins to exceed set-point by more than 1 psi, close the inlet shutoff valve.
5 This indicates the regulator is not closing properly. Check and make necessary corrections before proceeding with start-up. If regulator outlet pressure exceeds set-point by more than the pressure noted, refer to Maximum Emergency Pressures , Page 21 for Check installation for Slowly open the outlet shutoff valve to allow a small fl ow (approximately 1000 SCFH). Make sure the fl ow of gas does not create a hazard. NOTE: If piping downstream of outlet shutoff valve is pressured, see Caution under With gas fl owing, check for correct inlet and outlet pressures. It may be necessary to further open the inlet shutoff valve to maintain full inlet Make sure the regulator closes tight (tight lock-up). To do this, reduce fl ow to zero by slowly closing the outlet shutoff valve. Outlet pressure should not exceed set-point by more than 6" Fully open inlet and outlet shutoff valves slowly and carefully. Watch pressure Complete start-up by making sure there are no leaks.
6 NOTEDo not exceed the regulator's pressure ratings. The regulator outlet has a lower pressure rating than the inlet. Do not expose the regulator outlet or control line to inlet pressure. Regulator with external control may be used as an upstream monitor or upstream regulator in a monitor set. The control line must connect into the outlet piping downstream of the downstream the regulator is to be moved to another location, make sure its construction is compatible with the pressure and fl ow 121 Regulators Installation and Maintenance Instructions2 Typical InstallationTemperature LimitsThe Model 121 Regulator can be used for fl owing temperatures from -20 F to 150 ServiceThe Model 121 Regulator is not recommended for buried service. Set-Point Adjustment (see parts diagrams on pages 5 & 6)A. The 121 is factory adjusted as specifi ed on the order. To change the set-point, readjust as follows: 1. Remove top cap Adjust set-point with adjustment button 3 or 3a. Turn clockwise to increase and counterclockwise to decrease the outlet pressure.
7 NOTE: a. Only make this adjustment when gas is actually fl owing through the regulator. The fl ow should be small (approximately 1000 SCFH). Do not adjust when the regulator is closed and there is no fl ow. b. Do not increase the set-point beyond the upper limit of the outlet pressure range for the spring 9 (refer to spring tables, Page 3). c. Always check the outlet pressure with a pressure gauge while adjusting the set-point. 3. When adjustment is complete, replace top cap 1. Screw it securely into place. Failing to replace cap could cause unstable regulator is the user's responsibility to assure that all regulator vents and/or vent lines exhaust to a non-hazardous location away from ANY POTENTIAL sources of ignition. Where vent lines are used, it is the user's responsibility to assure that each regulator is individually vented and that common vent lines ARE NOT Change Spring (see parts diagrams on pages 5 & 6)The outlet pressure ranges of spring 9 are given in the tables on Pages 3 and 4.
8 1. Remove top cap Unscrew and remove adjustment button 3 or 3a by turning counterclockwise, and remove spring Insert new spring. Make sure it is positioned correctly at the bottom before replacing adjustment button 3 or Adjust for the desired outlet pressure per previous section Set-Point Adjustment. 5. When adjustment is complete, replace top cap 1. Screw it securely into place. Failing to replace cap could result in unstable regulator New spring range should be marked on regulator. If old spring range appears on regulator, it should be diaphragm case vent must be positioned to protect against fl ooding, drain water, ice formation, traffi c, tampering, etc. The vent must be protected against nest building material, bees, insects, etc. to minimize the chances for foreign material from collecting in the vent side of the regulator and take the regulator out of service: 1. Carefully close the inlet stop valve. 2. Close the outlet stop valve.
9 Before working on regulator, read the next section General Servicing Instructions and the applicable servicing gas on very slowly. If an outlet stop valve is used, it should be opened fi rst. Do not overload diaphragm with a sudden surge of inlet pressure. Monitor the outlet pressure during start-up to prevent an outlet pressure Servicing InstructionsA. Before any disassembly of the regulator, ensure it is completely depressured. Pressure must be fully released from the inlet, the outlet and the control line connection. Failure to adequately depressure could result in serious personal Carefully note the location and position of all disassembled parts to be certain reassembly is correct. Inspect each part carefully and replace any that are worn, damaged or otherwise Upon completion of servicing, make certain the regulator installation is entirely free of are pressure control devices with numerous moving parts, subject to wear and dependent upon particular operating conditions.
10 To assure continuous satisfactory operation, a periodic inspection schedule must be adhered to with the frequency of inspection determined by the severity of service and applicable laws and Vent (If Required)Control LineControl ConnectionOutletBypass (If Required)Vent CapMODEL 1215 Pipe DiametersInlet1" NPT Vent " NPT (121-8 & 121-12) " NPT (121-16)8 10 Pipe Diameters3 Model 121 Regulators Installation and Maintenance InstructionsOutlet Pressure Ranges and SpringsSizeOutletPressure RangeSpring ColorSpringPart NumberMaximumInlet PressureNominalDiaphragm Size ", 1" and 1 " ** Model 121-81 " to 3 " " to 3 " " to 12" " to 12" " to 6 " " to 8 " " to 14" " to 28" psi to 2 psi2 psi to 4 psiBlue-BlackBlack-RedGreen-BlackBlack-R edRed-BlackBlue-BlackGreen-BlackGreen (2" )Orange (2" )Black143-82-021-01 (main spring)121-10-021-50 (counterspring)143-82-021-02 (main spring)121-10-021-50 (counterspring)143-82-021-00143-82-021-0 1143-82-021-02143-16-021-05143-16-021-06 143-16-021-0760 psi8" ", 1" and 1 " ** Model 121-8HP3 psi to 6 psi6 psi to 10 psi6 psi to 10 psiCadmium*Cadmium*White143-16-021-08143 -16-021-08 (outer)143-16-021-13 (inner)60 psi8"1 ", 2" and 2 " Model 121-121 " to 3 " " to 3 " " to 12" " to 12" " to 6 " " to 8 " " to 14" " to 28" psi to 2 psi1 psi to 3 psiRed Maroon Red (2" )Blue (2" )Green (2" )Orange (2" )BlackCadmium143-16-021-03 (main spring)120-10-021-10 (counterspring)121-42-021-00 (main spring)120-10-021-10 (counterspring143-16-021-03143-16-021-04 143-16-021-05143-16-021-06143-16-021-071 43-16-021-0860 psi12"1 ", 2" and 2 " Model 121-81 psi to 2 psi2 psi to 4 psiOrange (2" )Black143-16-021-06143-16-021-0760 psi8"1 ", 2" and 2 " Model 121-8HP3 psi to 6 psi6 psi to 10 psi6 psi to 10 psiCadmium*Cadmium*White143-16-021-08143 -16-021-08 (outer)143-16-021-13 (inner))