Transcription of Model DPM Digital Potential Meter Reference …
1 Model DPM Digital Potential Meter Reference manual Part # 4110 Miller Co., Inc 11640 Highway 1, Sebastian, FL 32958 Telephone: 772 794 9448; Website: Digital Potential Meter 2 Operating manual For Digital Potential Meter Model DPM Catalog No. 4110 Digital Potential Meter 3 Table of Contents Warranty Miller Co., Inc. warrants each new instrument manufactured and sold to be free from defects in material, workmanship, and construction except for batteries, which may be contained therein. When used in accordance with this Operating manual , the unit will perform to applicable specifications for a period of one year after shipment. If examination by Miller Co., Inc. discloses that the product is defective, then its obligation is limited to the repair or replacement of the defective unit or its components at the option of Miller Co.
2 , Inc. Miller Co., Inc. is not responsible for products, which have been subject to misuse, alteration, accident, or for repairs not performed by Miller Co., Inc. Instruments must be returned properly packed with the transportation charge prepaid to: Miller Co., Inc. 11640 Highway 1 Sebastian, FL 32958 Topic Page Warranty 4 Description 5 Preparing Meter & Reference 7 Electrode for Use Maintaining & Checking 10 Your Reference Electrode Structure-To-Soil 12 or Water Potentials Structure-to-Structure Potentials 14 Applications for DPM 16 Maintenance of Meter 18 Installing New Battery 20 Trouble Shooting 23 Precautions 26 Specifications 27 May 2007 Digital Potential Meter 4 Return transportation charges will be factory. No parts shall be returned without prior authorization, which shall be furnished upon request. The foregoing warranty constitutes Miller Co., Inc.'s sole liability and is in lieu of any other warranty of merchantability or fitness.
3 Miller Co., Inc. shall not be responsible for any incidental or consequential damages arising from any breach of warranty. Description The MCM Digital Potential Meter is a very simple-to-operate Meter designed for one handed operation under almost any climatic conditions in which it is feasible to perform indoor or outdoor corrosion or cathodic protection tests. It is equally useful in difficult environments such as on a pipeline right-of-way underneath high voltage power lines or in marine environments. If accidentally dropped overboard, your Digital Potential Meter will float, even with a completely filled Reference electrode attached. The DPM Meter comes complete with Reference electrode, test lead, manual , and a padded carrying case. The DPM is an indicating type Meter and does not store readings of any kind. Since Potential measurements are by far the most common measurement made by the corrosion engineers, you will find the DPM to be extremely useful for a large number of applications as outlined below.
4 It is both accurate and highly sensitive. BOTTOM VIEW OF Meter CASE Digital Potential Meter 5 A 2V RANGE PUSH BUTTON SWITCH B 20V PUSH BUTTON RANGE SWITCH (Must be pressed along with 2v Range Switch button to get 20v) C Red (Positive) Input Banana Jack D Black (Negative) Input -20 Female Thread Preparing Meter & Reference Electrode for use Your new Meter will have a 9v battery already installed. Press and hold the 2v range button. The display window should immediately show .000 or .001 or should become either of these values within several seconds. If there is no number displayed or if a battery symbol is displayed, the battery is weak, dead or has become disconnected. See Installing New Battery below. As received from the factory, a new copper sulphate Reference electrode will be dry but some blue copper sulphate crystals should be visible in the transparent window of the electrode tube.
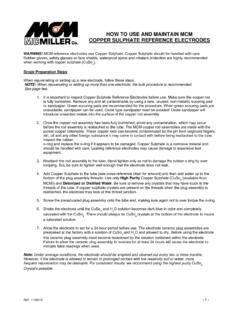
5 To prepare the electrode for use, unscrew the top end of the electrode and fill to top with distilled or demineralized water. If electrode is to be used or stored below 32 F (0 C), substitute MCM s Electrode Anti-Freeze Solution for the water. With top end of electrode securely tightened, shake the electrode a few times to help the copper sulphate crystals to dissolve. Wait several minutes and check inside of tube to make sure that there are some undissolved crystals visible in the tube. This is to insure that the solution is saturated. If there are no crystals remaining after shaking the tube, open up the tube and add more copper sulphate crystals. Don t worry, you can t get to many crystals in the tube, but you must have some crystals remaining undissolved at all times. Digital Potential Meter 6 Unscrew the knurled thumb nut from end of the electrode and screw electrode into the threaded recess in the bottom of the body of the Meter .
6 Place the banana plug of the red test lead (supplied with Meter ) into the red banana jack in the bottom of the body of the Meter . Remove and save the orange plastic protective cap from the bottom end of the electrode tube. This will expose the porous ceramic plug of the Reference electrode so that it can be placed in contact with soil or water. By this time the porous plug should feel slightly moist. Meter and electrode are now ready for use. Model RE-5 Reference Electrode A Knurled Brass Thumb Nut B Electrode tube filled with distilled water or MCM s Anti Freeze Solution. C Copper Sulphate Crystals must always show some visible in the tube. D Porous ceramic tube E Orange plastic Protective Cap (remove when taking readings) Digital Potential Meter 7 Maintaining & Checking Your Reference Electrode After a period of use, it is possible for your Reference electrode to become contaminated as a result of osmosis through the porous plug.
7 This is especially true if many readings are taken in areas where salt may be present. For this reason, it is wise to check your Reference electrode periodically against another Reference electrode which has been used only as an office Reference and has never been used out in the field. This is most easily accomplished by putting the two electrodes in a non-metallic container with a little tap water and measure the voltage between them. Hopefully this value will be less than 10MV. If the voltage is greater than 10MV, rinse out the field electrode and replace with new copper sulphate crystals and distilled water (or MCM s electrode anti-freeze solution). Do NOT use a knife blade, file or emery cloth to clean the copper rod. Use a 3M green abrasive pad. This will do the job without contamination to the copper rod. NOTE: If all or nearly all of your measurements will be made in sea water or brackish water, you should consider using a silver-silver chloride Reference electrode in place of the copper sulphate Reference electrode which is normally supplied with the Model DPM.
8 Call Miller Co. for details, or check out our Web site at Before taking a Potential reading, always make sure that there is at least enough solution remaining in the electrode tube to touch the copper rod and that there are some undissolved copper sulphate crystals in the bottom of the tube. The orange protective cap supplied with your electrode serves to prevent evaporation of the electrode solution and provide some mechanical protection to the porous plug. Replacement electrode parts, copper sulphate crystals, as well as other electrode accessories are available through the Co. Inc. Digital Potential Meter 8 Measuring Structure-to-soil or Structure-to-Water Potentials Assuming that you have prepared both Meter and Reference electrode as detailed previously, measuring a Potential is very easy. Remove the orange protective cap from the Reference electrode.
9 Place the lower end of the Reference electrode (the porous ceramic plug) in solid contact with soil or water at desired location. For best results, there should be no vegetation between electrode and the soil. Connect the clip end of the test lead onto the metallic structure being tested. Make sure that the contact point with structure is clean and shiny. Press and hold the 2V range pushbutton. Read and record the voltage value obtained, unless the Meter indicates 1. , this indicates an overrange condition. Switch Meter to 20V range by pressing and holding both pushbuttons. If the Meter again indicates an overrange, the input voltage exceeds 20V and cannot be measured by this Meter . IMPORTANT: The polarity of a reading is a vital part of the reading and should always be recorded along with the numerical value on your data sheet. NOTE: Most Potential readings will normally be negative and therefore display will show a (-) minus sign. If there is no minus sign displayed then the reading is positive, but no positive sign will be displayed.
10 See Applications section below. STRUCTURE-TO-SOIL Potential USING DPM Meter A DPM with Protective Cover Digital Potential Meter 9 B Wire Connection to Structure C Porous Plug in Contact with Ground (Vegetation Removed) STRUCTURE-TO-STRUCTURE POTENTIALS This type of measurement will require the use of two leads. One test lead will have to terminate in a banana plug in order to fit into the positive (red) banana jack on the bottom of the body of the Meter . In order to make use of the threaded negative input terminal of the Meter , you will need to insert the threaded adapter (which is supplied with the Meter ). Now you can connect test clip or banana plug of a test lead onto this adapter. See Applications below. USING TWO Reference ELECTRODES A Intermediate Electrode Extension CAT # 16203 B Electrode Extension CAT # 16101 C Reference Electrode RE-5 or RE-5C Either CAT # 15108 or 15210 D Interconnection Wire Meter to Other Reference Electrode Digital Potential Meter 10 APPLICATION FOR DPM There are a number of logical applications for the DPM in the field of corrosion and cathodic protection measurements as follows: Testing insulation on buried metallic piping, such as transmission lines, service lines, Testing buried or underground duct installations of metallic sheathed power or communications cable.