Transcription of must be installed correctly in STOP - 2011-2016 …
1 Copyright 2017, FCA US LLC, All Rights Reserved (tdb) November 2017 Dealer Service Instructions for: safety recall T59 / NHTSA 17V-572 Brake Booster Water Shield FIGURE 1 Brake Booster Water Shield STOP Brake booster water shield must be installed correctly in order to function properly. 1 2 Tab edges must be flush with edges of the brake booster. Tabs must be positioned at three o clock and nine o clock positions with booster installed in vehicle. Refer to the instructions in recall document T59 for further detail. CCOORRRREECCTT CCOORRRREECCTT IINNCCOORRRREECCTT STOP safety recall T59 Brake Booster Water Shield Page 2 2011 - 2014 (WD) Dodge Durango (WK) jeep Grand Cherokee NOTE: This recall applies only to the above vehicles built through September 08, 2013 (MDH 090804).
2 The brake booster water shield on about 647,000 of the above vehicles may have been incorrectly installed during completion of safety recall P14 (NHTSA 14V-154). An incorrectly installed brake booster water shield may be less effective in diverting water away from the brake booster, creating the possibility for corrosion and subsequent water intrusion of the brake booster. Water intrusion of the brake booster in a cold climate may lead to freezing and limit the braking ability of a vehicle. Limited braking ability can cause a vehicle crash without prior warning. For customers who have not had campaign number P14 performed on their vehicles, this campaign T59 replaces P14 on those vehicles.
3 All involved vehicles must have the brake booster water shield inspected for proper installation. If the brake booster water shield is found to be missing or incorrectly installed , the brake booster must be vacuum tested. Brake boosters that do not pass the vacuum test must be replaced. If the brake booster water shield is installed correctly , the water shield and brake booster do not require replacement. At the conclusion of this recall , the brake booster must be equipped with a properly installed water shield to protect the brake booster crimp joints from water exposure. A digital image of the properly installed water shield will be required with recall claim submission.
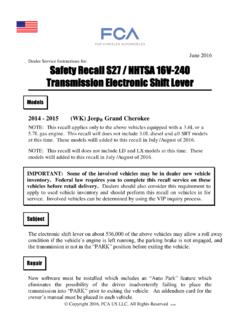
4 Models IMPORTANT: Some of the involved vehicles may be in dealer used vehicle inventory. Dealers should complete this recall service on these vehicles before retail delivery. Dealers should also perform this recall on vehicles in for service. Involved vehicles can be determined by using the VIP inquiry process. Subject Repair safety recall T59 Brake Booster Water Shield Page 3 Dealers should attempt to minimize customer inconvenience by placing the owner in a loaner vehicle if inspection determines that brake booster replacement is required and the vehicle must be held overnight. NOTE: Future part supersessions for Water Shield and Brake Booster may also include an I-Sheet and are acceptable for T59 campaign completion.
5 Part Number Description CBXNP143AA Water Shield, Brake Booster (includes two master cylinder retaining nuts) Part Number Description CBXNP141AD Booster, Brake CBXNP142AA Brake Booster Installation Package Each package contains the following components: Quantity Description 4 Nut, Brake Booster-to-Dash Panel 2 Nut, Master Cylinder-to-Brake Booster 1 Clip, Brake Booster Rod-to-Brake Pedal Due to the small number of involved vehicles expected to require brake booster replacement, no parts will be distributed initially. Brake booster packages should be ordered only after inspection determines that a brake booster is required. Very few vehicles are expected to require brake booster replacement.
6 No parts return required for this campaign. Alternate Transportation Parts Information Parts Return safety recall T59 Brake Booster Water Shield Page 4 The following special tools are required to perform this repair: NPN wiTECH micro pod II NPN Laptop Computer NPN wiTECH Software Special Tools safety recall T59 Brake Booster Water Shield Page 5 A. Inspect Brake Booster Water Shield NOTE: For aftermarket glass without wiper blade alignment marks, mark the windshield wiper blade location with tape before removing wiper arms. NOTE: Remove and save both front wiper arms. 1. Carefully release the latch tab and lift the cover flap on the pivot end of the wiper arm (Figure 2).
7 2. Lift the wiper arm blade off the windshield glass to relieve wiper arm spring tension and prevent the arm from rotating while removing the wiper arm nut (Figure 2). 3. Remove and save the nut that secures the wiper arm to the wiper pivot shaft (Figure 2). CAUTION: The use of a battery terminal puller when removing the front wiper arm is NOT recommended as this may damage the front wiper arm. 4. Use a slight rocking action to disengage the front wiper arm from the pivot shaft then remove and save the wiper arm (Figure 3). Service Procedure Figure 2 Front Wiper Arm Figure 3 Front Wiper Arms WIPER ARM NUT WIPER ARM LATCH TAB COVER FLAP WIPER ARMS safety recall T59 Brake Booster Water Shield Page 6 5.
8 Release the push pins, one on each end of the plenum seal (Figure 4). 6. Remove and save the plenum seal (Figure 4). 7. Release the side retainer clips and the side seals securing the cowl panel cover (Figure 5). CAUTION: There are three retainer clips on each end of the cowl panel cover. Use care not to break them during removal (Figure 5). 8. Release the three front tabs then remove and save the cowl panel cover (Figure 6). Service Procedure (Continued) Figure 4 Plenum Seal Figure 6 Cowl Panel Cover Figure 5 Cowl Panel Cover Clips COWL PANEL COVER SIDE RETAINER CLIPS PUSH PIN LOCATION PLENUM SEAL COWL PANEL COVER COWL PANEL COVER COWL PANEL COVER FRONT TABS safety recall T59 Brake Booster Water Shield Page 7 9.
9 Remove and save the fastener that secures the left side cowl extension to the center cowl extension panel (Figure 7). 10. Release the retainer clip that secures the left side cowl extension panel to the hose/pipe guide (Figure 7). 11. Remove and save the left side cowl extension panel (Figure 7). Service Procedure (Continued) Figure 7 Left Side Cowl Extension Panel LEFT SIDE COWL EXTENSION PANEL CENTER COWL EXTENSION PANEL FASTENER RETAINER CLIP HOSE/PIPE GUIDE safety recall T59 Brake Booster Water Shield Page 8 12. Inspect the brake booster for the presence of a water shield (Figure 8). YES >>> A water shield is installed on the brake booster.
10 Continue with Step 13 inspection of water shield for proper installation. NO >>> A water shield is not installed on the brake booster. Proceed to Section B. Test Brake Booster. Service Procedure (Continued) WATER SHIELD MISSING WATER SHIELD installed Figure 8 Inspect Brake Booster for Water Shield BRAKE BOOSTER WATER SHIELD installed BRAKE BOOSTER WATER SHIELD MISSING safety recall T59 Brake Booster Water Shield Page 9 13. Inspect the water shield tabs location on the brake booster (Figures 9 and 10). Tab edges MUST be flush with brake booster front edge. Tabs MUST be securely adhered to outer circumference of the brake booster.