Transcription of NICU-Friendly T-Bonnet - p2 design
1 2003 Patti Pierce Stone, All Rights Reserveddirections:Cast on 219k1, p1, knit across to last 2 stitches, p1, k19k1, p1, purl across to last 2 stitches, p1, k19k1, p1, knit across to last 2 stitches, p1, k19k1, p1, purl across to last 2 stitches, p1, k19(k2tog, yo) 5 times, k1, (yo, ssk) 5 times (10 eyelets created)9k1, p1, purl across to last 2 stitches, p1, k19k1, p1, knit across to last 2 stitches, p1, k1repeat last 2 rows until there are 20 rows completed from eyelet, or piece is square. end having complted a purl ssides:Cast on 22 stitches before beginning next row (43 st)9k1, p1, k to end of row, then cast on 22 stitches. (65 st)9k1, p1, p to last 2 stitches, p1, k19k1, p1, (k2tog, yo) 15 times, k1, (yo, ssk) 15 times, p1, k1(30 eyelets created)9k1, p1, p to last 2 stitches, p1, k19k1, p1, (k2tog, yo), k to last 4 stitches, (yo, ssk), p1, k19k1, p1, p to last 2 stitches, p1, k1repeat last 2 rows until there are 17 rows or piece is 21/2 (3 )from where the sides were added.
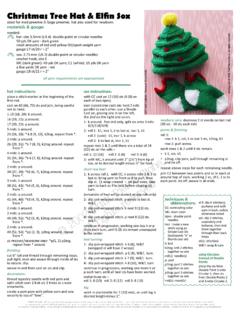
2 End with purl , p1, (k2tog, yo) 15 times, k1, (yo, ssk) 15 times, p1, k1 (30 eyelets created)9k1, p1, p to last 2 stitches, p1, k19k1, p1, k to last 2 stitches, p1, k19k1, p1, p to last 2 stitches, p1, k1begin ppicot eedge9knit across9purl acrossrepeat both rows9(k2tog, yo) 16 times, k1, (yo, ssk) 16 times, p1, k1 (32 eyelets created)9purl across9knit acrossrepeat both rowsstrap aand ffinishingcast off loosely (using a needle 1-size larger is helpful)do not drop last loop. fold over the edge in preparation fortacking an pick up 4 more stitches along the edge, being sureto catch the loops from both pieces of knitted fabric1:knit 4, sl 12:purl 4, sl 13:k2tog, yo, k1, yo, ssk4:purl 4, sl 15:knit 4, sl 16:ssp, yo, p1, yo, p2togrepeat steps 1 - 6 until there are 36 rows completed, or strap isapprox 31/2 (41/2 ) long. the end eyelets will function as buttonholes when hat is onbaby, the rest are used in picture: Paton s Beehive Baby acrylic baby yarnphotograph copyright 2003 Patti Pierce Stone,all rights reserved NICU-Friendly T-Bonnetsuper easy, with decorative eyelet detailall ssizes:1 yd 1/4 - 3/8 satin ribbon (used both for decoration and to stabilize buttons)Three 3/8 flat buttons (please do not use buttons with shanks)small mm (US 0) knitting needles1/2 ounce lace-weight yarngauge:20 sts/25 rows = 5 cm (2 )medium ppreemie (adjustments shown in parenthesis) mm (US 1) knitting needles1/2 ounce baby yarngauge:18 sts/23 rows = 5 cm (2 )large ppreemie (adjustments shown in parenthesis) mm (US 3) knitting needles1 ounce fingering (sock) yarngauge:14 sts/18 rows = 5 cm (2 )TERMS OF USE.
3 This is a pattern for charity or personal use only -- neither it, nor items made from it, are to be sold! You may provide a direct link to this pattern, but may not copy the contents to your web site or any other form of communication. Photocopies may be made and shared as long as the copyright notice and terms of use are visible. If you choose to make these for yourself or family, please also consider making a pair for charity! Not sure where to donate them .. check the charity links page at 7/1/2006 2003 Patti Pierce Stone, All Rights Reservedthe unassembled bonnetTERMS OF USE .. This is a pattern for charity or personal use only -- neither it, nor items made from it, are to be sold! You may provide a direct link to this pattern, but may not copy the contents to your web site or any other form of communication. Photocopies may be made and shared as long as the copyright notice and terms of use are visible.
4 If you choose to make these for yourself or family, please also consider making a pair for charity! Not sure where to donate them .. check the charity links page at a 6 tail and draw through all loops on needle toround edge and weave into the back of the secure the picot edge, tack to the inside of the bonnetin one of 3 ways:-use a contrasting color of yarn and make running stitchthat shows on the outside-whip stitch to the underside, being certain to only catchabout half the stitch on the hat side so it does not showon the outside-attach with a blind hem stitch9weave a length of ribbon (add 2 for folding under ends)through all 3 sets of eyelets. I liked mine to end on theoutside of the hat at both ends. Fold end under and tackin place with sewing buttons, being sure they are sewn securely on topof the ribbon (see picture to clarify placement).
5 One button at the front edge, opposite the chin buttons on the short end assembly9using the eyelet in the corner of the cast-on edge of theT s crossbar as a buttonhole, slip it over the corner buttonon the same side of the with the other sideNurses will secure the hat on the baby s head with the chinstrap and the button on the front :k: knitk2tog: knit two stitches together p: purlp2tog: purl two stitches together sl x: slip x stitches, purlwise unlessotherwise notedst(s): stitch(es)ssk: slip two stitches, one at atime, knitwise then knittogether through the front ofthe stitchesssp: slip two stitches, one at atime, slippedsts to left needle. p2togthrough back bonnet - page 2


