Transcription of NO SMOKING! NO OPEN FLAME! WHILE INSTALLING YOUR …
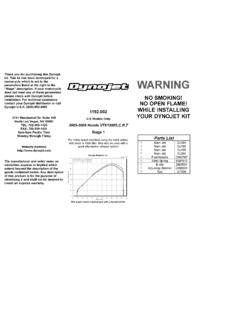
1 Thank you for purchasing this Dynojetkit. This kit has been developed for amotorcycle which is set to the parameters listed at the right in the Stage description. If your motorcycledoes not meet any of these parametersplease check with Dynojet beforeinstallation. For technical assistancecontact your Dynojet distributor or callDynojet (800)-992-49932191 Mendenhall Dr. Suite 105 North Las Vegas, NV 89081 TEL: 702-399-1423 FAX: 702-399-14318am-5pm Pacific TimeMonday through FridayWebsite manufacturer and seller make nowarranties express or implied whichextend beyond the description of thegoods contained herein. Any descriptionof this product is for the purpose ofidentifying it and shall not be deemed tocreate an express Models Only1985-2007 Yamaha V-MaxStage 7 For mildly tuned machines using individual be used with a good aftermarket exhaustsystem with a high flow baffleK&N filter #RU-2989 This graph shows a typical gain with a Dynojet jet kit.
2 WARNINGNO SMOKING! NO open FLAME! WHILE INSTALLINGYOUR DYNOJET KITP arts List4 Main JetsDJ1654 Main JetsDJ1754 Pilot Air JetsDJ1904 Fuel NeedlesDNT4264E-clipsDE00014 Adjusting Washers DW00014 Slide SpringsDSP0444 Main Air Correctors DCO4022 ManifoldsDJ70101 OrificeDJ70111 Breather AssemblyDJ70121 ToolDT0021 GlueDA00011 Slide DrillDD 191 Plug DrillDD 5/321 Screw SEVEN INSTRUCTIONSFig. DPlace E-clip ingroove #4 from the the vacuum slides from the carbs. Remove the stock needles and spacers, noting the order of assembly(Fig. A). With the DD #19 drill bit provided, enlarge the slide lift hole (Fig. A). Do not drill the needle the Dynojet needles on groove #4 from the top.
3 Use all stock spacers (Fig. A). Install the small Dynojetwashers above the E-clip. Install the Dynojet slide springs (DSP044) in place of the stock slide springs. Afterinstalling the slides in the carbs be sure to check slide movement manually before airbox Remove the stock main jets and replace with the Dynojet main jets provided. It is not necessary to break the carbrack apart to remove the main jets. Remove float bowl drain plugs, then slightly loosen the main jet. Use a needle tocompletely remove the main jet. If you are running a modified stock exhaust install the DJ165 main jets. If you areusing an aftermarket exhaust or slip-on with a high flowing baffle use the DJ175 main jets.
4 Be sure that the jet youare changing is the main Locate the fuel mixture plug (Fig. B). If you see a screw head proceed to adjusting procedure. With the DD 5/32 drill bit provided, carefully drill through the plugs. Note:The mixture screw is directly underneath this plug, be ready to pull back on the drill the instant you break screw provided to secure and remove the plug. Carefully turn mixture screws clockwise until lightly seated, then back out you are INSTALLING the complete stage 7 kit remove the stock V-boost assembly and unplug the wires to theservo motor. If you wish to retain the stock V-boost assembly go to step the Dynojet manifolds (DJ7010) in place of the stock V-boost the orifice supplied (DJ7011) into the stock crankcase vent tube as shown in (Fig.)
5 D). the carbs on the bench with bell mouths facing up. Install the main air correctors (DCO402) with flat endfacing the carbs, into the main air jet ports (Fig. C). Using the tool supplied (DT002) lightly tap the corrector until it seats tightly. With a toothpick, lightly dab glue on the outer edge of the corrector. Make sure no glue blocks thecorrector holes. Complete this step on all four Remove the stock oil filler cap. Install the breather assembly so that the threaded end screws into the oil filler hole and the assembly routes up between the rear cylinders and up the center of the four carbs. The two K&N filters with holes in the top of them go on the front two cylinders.
6 Attach the two eyelets from the breatherassembly into the airfilter holes. Attach the bottom of the breather assembly onto the stock crankcase breather for proper throttle linkage operation before starting the ScrewNote:A medium or competition bafflemust be used with this kit. If you noticea stumble or hesitation in the midrangeafter holding steady throttle, drill thepilot air jet with a DD #49 drill bit orremove the jet and replace with HoleDynojet PartsPilot Air JetMain Air JetFig. CFig. BFig. AStockVentHose OrificeDJ7011 Stock Parts