Transcription of Office 365 Outlook Web App - Towson University
1 Office 365 Outlook Web App Room Scheduling Options & Settings Introduction As part of Towson University 's move to Office 365, room resource calendars will be controlled through Office Web App (OWA). By default, a room will allow anyone to book the room's calendar. This document will explain the process of controlling the options and settings for a room resource calendar. Only users that are part of the resource control group will be able to alter room settings. To be added to a room control group or to request a new resource room calendar contact the help desk at 410-704-5151 or create a tech help ticket at Open the Resource Calendar Settings To open a resource calendar's settings, you must first login to your own Office 365 account and access OWA. For more information on this process, please see the OWA documents.
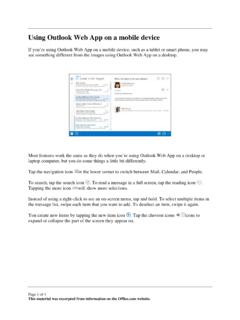
2 1. From OWA, click on your image in the top right corner of the web browser. If you have not yet added your image it will be a silhouette of a person. 2. From the options that appear, click on Open another mailbox . Figure 1. 3. The Open another mailbox screen will appear. Type the name, or part of the name, of the resource room and click Search contacts and directory to find the room. Please note that room names all start with the department abbreviation. For example all Office of Technology Services room will start with OTS . OTS Publication: O365-10 11/15/2017 Office of Technology Services 2017 Towson University This work is licensed under the Creative Commons Attribution-NonCommercial-NoDerivs License. Details available at Office 365 Outlook Web App: Room Scheduling Options & Settings 4.
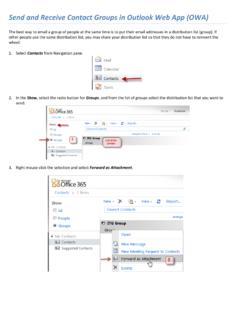
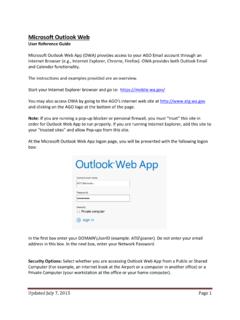
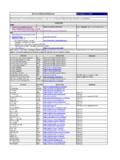
3 Ensure the correct room is selected and click Open. A new tab will open in your web browser containing the inbox for the resource room. Figure 2. 5. From the resource room inbox, click the settings gear icon. 6. From the drop-down list, select Options. Figure 3. 7. From the left navigation pane, click the expand arrow for the Calendar options. 8. Click Resource scheduling. The Resource scheduling settings window will appear. Figure 4. 2. Office 365 Outlook Web App: Room Scheduling Options & Settings Resource Scheduling Settings The room resource settings are broken into three section: Scheduling options, Scheduling permissions and Response message. Scheduling options Figure 5. Automatically process event invitations and cancellations: enables or disables the calendar from processing meeting requests.
4 If unchecked, the owner of the room must process invitations manually. It is recommended that this option be kept enabled. Turn off reminders: Disables room reminders. Attendees and organizers will still receive meeting reminders if they have elected to do so. Maximum number of days in advance resources can be booked: This limits how far in the future the calendar can be booked. By default, Always decline if the end date is beyond this limit is checked and will decline attempted meeting requests. Limit event duration: This check box enables the Maximum allowed minutes option, which sets the maximum allowed time for a meeting. Allow scheduling only during working hours: When checked, this option declines any meeting that is scheduled outside of the rooms working hours. Working hours are set under Calendar appearance from the left navigation pane.
5 Allow repeating meetings: This options enables or disables whether recurring meetings can be booked in the room. Allow conflicts: This check box allows for the room resource calendar to be double booked. Double booking can be limited by the number of meeting conflicts by using the Allow up to this number of individual conflicts or by using the Allow up to this percentage of individual conflicts to specify a double booking percentage. By default this option is disabled. 3. Office 365 Outlook Web App: Room Scheduling Options & Settings Scheduling permissions Figure 6. These people can schedule automatically if the resource is available. o Everyone - allows anyone to schedule a meeting in the room resource calendar. o Specific people and groups - To add, delete, or edit the users with this role, simply click on the users.
6 This will open the permissions window. More information on the permissions window is on the next page. These users can submit a request for owner approval if the resource is available. o Everyone - all meetings must be approved by the room resource owner before they will be scheduled. o Specific people and groups - only the users in this role will need approval before the room resource meeting is scheduled. Other users will be declined and no request will be sent to the room resource owner. Please note that if Specific people and groups is selected and left blank all requests are approved automatically. These people or groups can schedule automatically if the resource is available and can submit a request for owner approval if the resource is unavailable. o Everyone - all meetings may be scheduled if the room is open and an email will be sent to the room resource owner if the room is already booked.
7 O Specific people and groups - only the users with this role will be scheduled automatically with an email sent to the room resource owner if the room is booked. Please note that if Specific people and groups is selected, all users not listed with this role will be declined if the room is previously booked. 4. Office 365 Outlook Web App: Room Scheduling Options & Settings Setting a Response Message An additional message can be sent to individuals attempting to schedule the calendar of the room resource. This message will be sent regardless of the event being approved or declined. This message will only be sent if the Add additional text to be included in responses to event invitations box is checked. The desired message is simply typed in the message box and may include information such as room capacity and a contact name for the room.
8 Figure 7. Adding Users to the Delegate Group Role When altering any of the Scheduling Permissions, it may be necessary to create or edit a delegate role. Users within the delegate role have permissions that are different from the default permissions. Please note that this step is optional and it is recommended to keep the default setting of Everyone unless absolutely necessary. Adding Users 1. The delegate role permissions window is accessed by clicking on the current users already listed, or by clicking on Select one or more if no users are currently set. Figure 8. 2. Type their name or email address into the Search People box. 5. Office 365 Outlook Web App: Room Scheduling Options & Settings 3. Click the magnifying glass. The user will appear in the search results. 4.
9 Click the + next to the user or users you wish to add. Click OK. Figure 9. Removing Users 1. To remove a user, click the X next to the name of the user. The users name will disappear. 2. Click OK. 6.