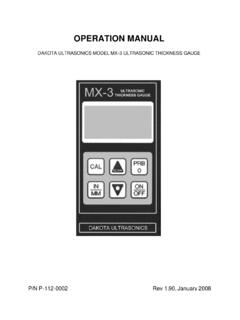
Transcription of OPERATION MANUAL - Dakota Ultrasonics
1 OPERATION MANUAL Dakota Ultrasonics MODEL PX-7 precision THICKNESS GAUGE P/N P-129-0002 January 2008 Copyright 2008 Dakota Ultrasonics . All rights reserved. No part of this publication may be reproduced, translated into another language, stored in a retrieval system, or transmitted in any form or by any means; electronic, mechanical, photocopying, recording, or otherwise, without the prior written consent of Dakota Ultrasonics . Every precaution has been taken in the preparation of this publication. Dakota Ultrasonics assumes no responsibility for errors or omissions.
2 Neither is any liability assumed for damages resulting from the use of information contained herein. Any brand or product names mentioned herein are used for identification purposes only, and are trademarks or registered trademarks of their respective holders. 1500 Green Hills Road, #107 Scotts Valley, CA 95066 USA Tel (831) 431-9722 Fax (831) 431-9723 PX-7 Ultrasonic Thickness Gauge CONTENTS INTRODUCTION OPERATION THE KEYPAD THE DISPLAY THE TRANSDUCER MAKING MEASUREMENTS CONDITION AND PREPARATION OF SURFACES SELECTING MEASUREMENT MODE & THE LOCK MODE CALIBRATION SCAN MODE, ALARM MODE, DIFF MODE, RS232 PORT TRANSDUCER SELECTION APPENDIX A: PRODUCT SPECIFICATIONS APPENDIX B: APPLICATION NOTES APPENDIX C.
3 SOUND VELOCITIES OF COMMON MATERIALS WARRANTY INFORMATION 1 3 3 7 9 10 12 13 14 17 22 25 27 29 31 DISCLAIMER Inherent in ultrasonic thickness measurement is the possibility that the instrument will use the second rather than the first echo from the back surface of the material being measured. This may result in a thickness reading that is TWICE what it should be. Responsibility for proper use of the instrument and recognition of this phenomenon rests solely with the user of the instrument. Dakota Ultrasonics blank page PX-7 Ultrasonic Thickness Gauge 1 INTRODUCTION The Dakota Ultrasonics model PX-7 is a precision Ultrasonic Micrometer.
4 Based on the same operating principles as SONAR, the PX-7 is capable of measuring the thickness of various materials with accuracy as high as inches, or millimeters. The principle advantage of ultrasonic measurement over traditional methods is that ultrasonic measurements can be performed with access to only one side of the material being measured. This MANUAL is presented in three sections. The first section covers OPERATION of the PX-7, and explains the keypad controls and display. The second section provides guidelines in selecting a transducer for a specific application.
5 The last section provides application notes and a table of sound velocity values for various materials. Dakota Ultrasonics maintains a customer support resource in order to assist users with questions or difficulties not covered in this MANUAL . Customer support may be reached at any of the following: Dakota Ultrasonics , 1500 Green Hills Road, #107 Scotts Valley, CA 95066 USA Telephone: (831) 431-9722 Facsimile: (831) 431-9723 Dakota Ultrasonics 2blank page PX-7 Ultrasonic Thickness Gauge 3 OPERATION The PX-7 interacts with the operator through the membrane keypad and the LCD display.
6 The functions of the various keys on the keypad are detailed below, followed by an explanation of the display and its various symbols. The Keypad This key is used to turn the PX-7 on and off. When the tool is turned ON, it will first perform a brief display test by illuminating all of the segments in the display. After one second, the tool will display the internal software version number. After displaying the version number, the display will show " " (or " " if using metric units), indicating the tool is ready for use.
7 The PX-7 is turned OFF by pressing the ON/OFF key. The tool has a special memory that retains all of its settings even when the power is off. The tool also features an auto-powerdown mode designed to conserve battery life. If the tool is idle for 5 minutes, it will turn itself off. Dakota Ultrasonics 4 The CAL key is used to enter and exit the PX-7's calibration mode. This mode is used to adjust the sound-velocity value that the PX-7 will use when calculating thickness. The tool will either calculate the sound-velocity from a sample of the material being measured, or allow a known velocity value to be entered directly.
8 Refer to page 14 for an explanation of the two CAL functions available. The IN/MM key is used to switch back and forth between English and metric units. This key may be used at any time, whether the tool is displaying a thickness (IN or MM) or a velocity value (IN/ s or M/s). The UP arrow key has two functions. When the PX-7 is in calibration mode, this key is used to increase numeric values on the display. An auto-repeat function is built in, so that when the key is held down, numeric values will increment at an increasing rate.
9 When the PX-7 is in measurement mode, this key is used to select between three different modes of measurement ( echo-echo, interface-echo, or auto ). Refer to page 14 for an explanation of the calibration procedure and page 13 to review the various measurement modes. PX-7 Ultrasonic Thickness Gauge 5 The SCAN key switches the SCAN measurement mode on and off. Refer to page 17 for an explanation of the SCAN measurement mode. The DOWN arrow key has three functions. When the PX-7 is in the CAL mode, this key is used to decrease numeric values on the display.
10 An auto-repeat function is built in, so that when the key is held down, numeric values will decrement at an increasing rate. When the PX-7 is not in calibration mode, the DOWN arrow key switches the display backlight between three available settings. OFF will be displayed when the backlight is switched off. AUTO will be displayed when the backlight is set to automatic mode, and ON will be displayed when the backlight is set to stay on. In the AUTO setting, the backlight will illuminate while the PX-7 is making a measurement and turn off after several seconds to conserve battery life.