Transcription of OPERATOR'S MANUAL - Ag-Bag
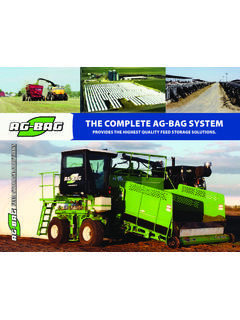
1 , BOX 127ST. NAZIANZ, WI 54232920/773-2121 FAX:920/773-1200 OPERATOR'S MANUALDO NOT OPERATE THIS EQUIPMENT UNTIL THISMANUAL HAS BEEN READ AND Number: 2015 MODEL: MX1012 Commercial BaggerSOME PHOTOGRAPHS USED HEREIN MAY SHOW DOORS, GUARDS AND SHIELDS OPENED OR REMOVED. BE SURE THAT ALL DOORS, GUARDS AND SHIELDS ARE FASTENED IN THEIR PROPER POSITION BEFORE MACHINE IS OPERATED!WARNINGINTRODUCTIONThis OPERATOR'S MANUAL is provided to acquaint the operator with the safety and operation of the Miller Ag-Bag MX1012 Commercial Bagger. Complete Assembly, Operation, Lubrication and Maintenance procedures are provided. Following the recommended procedures will help you achieve many years of dependable service. This MANUAL is considered part of your machine and should remain with the machine at all sure the operator reads and understands the MANUAL before placing the bagger into to follow the recommended procedures may result in personal injury or equipment damage, and could void the SERIAL NUMBERThe machine serial number is located on the support frame below the engine on the tunnel side.
2 For your convenience refer to this number and your product model number when requiring service or parts information. Record the machine serial number, model number, date of purchase and dealership name in the space provided below. Date Purchased Model No. Serial No. Right and Left sides are determined from a position standing at the bag tunnel side looking toward the feed Warranty Registration must be completed by the dealer online to validate your warranty protection. You must read and understand the places where you attest to having received instructions as to care, adjustments, safe operation and applicable warranty policy. Dealership 1 Table Of ContentsIMPORTANT REFERENCE NUMBERS.
3 5 BAGGER CHECK LISTS ..6 SAFETY PRECAUTIONS ..7 General Safety Precautions ..8 Maintenance Safety Precautions ..10 Engine Safety Precautions ..11 Electrical Safety Precautions ..12 Wheels and Tires Safety Precautions ..13 SAFETY SIGN AND DECAL LOCATIONS ..14 Safety Signs ..18 Yellow Reflective Decals ..20 SMV Emblem & Red Reflective Decal ..20 SPECIFICATIONS ..21 FEATURES AND CONTROLS ..22 Operators Platform Controls ..22 Remote Controls (Switch Banks Next To Bag Boom) ..23 Remote Emergency Stop Buttons ..24 Battery Disconnect Switch ..24 Display - Home Screen Overview ..25 Joystick Function Overview ..26 Signal Light Switch Red (#1) ..27 Signal Light Switch Yellow (#2) ..27 Signal Light Switch Green (#3) ..27 Anchor In Switch (Cab End) (#12 & 23) ..28 Anchor Out Switch (Cab End) (#16 & 24) ..28 Anchor In Switch (Engine End) (#11 & 27).
4 29 Anchor Out Switch (Engine End) (#15 & 28) ..29 Anchor Settings and Float ..30 Feed Table Lift/Lower ..31 Power Port For 12 Volt Accessories ..32 Brake Pedal ..32 Direction, Steering, Upper Beater & Feed Table Drive (direction) Control Joystick ..33 Switching Driving/Bagging Modes ..34 Feed Table Belt Control (Joystick) ..36 Upper Beater Control (Joystick) ..37 Emergency Stop Button (Operators Platform) ..38 Ignition Switch ..38 Parking Brake ..39 System Air Pressure Gauge ..39 Brake Pressure Adjustment Controls (Cab & Engine End) ..40 Engine RPM Increase & Decrease Buttons (Operators Platform) (#13 & 14) ..41 Auto Sequence Start/Stop Switch (Operators Platform) ..41 Rotor Control Buttons ON-OFF-REVERSE (Operators Platform) ..42 Rotor Control Buttons Momentary ON-REVERSE (Next To Bag Boom) ..42 Operators Platform Work Light.
5 43 MANUAL Storage ..43 Lighting Operation (#9 & 10) ..442 Contents - continued Light Locations On Vehicle ..44 Engine Data Link Connector ..46 System Monitor Programming Port ..46 Seat Adjustments ..47 Bag Pan Up & Down Switches (#25 & 26) ..48 Bag Boom Winch Cable Up & Down Switches (#29 & 30) ..48 Wireless Bag Boom Winch Cable Controller (Early Production) ..49 Wireless Bag Boom Winch Cable Controller (Current Production) ..50 Engine End Lift Jack Switch (Extend) (#32) ..51 Engine End Lift Jack Switch (Retract) (#31) ..51 Cab End Lift Jack Switch (Extend) (#20) ..52 Cab End Lift Jack Switch (Retract) (#19) ..52 Tunnel Clean Out Floor Retract Switch (cleaning tunnel) (#21) ..53 Tunnel Clean Out Floor Extend Switch (bagging position) (#22) ..53 Battery Disconnect Switch ..54 Remote Battery Terminals ..54 Tunnel Side Emergency Stop Button.
6 55 Rear Emergency Stop Button ..55 OPERATION ..56 Home Screen ..56 Joystick Operation ..56 Upper Beater Operation ..57 Feed Table Drive Operation ..58 Rotor Anti-Stall Operation ..59 Engine Anti-Stall Operation ..59 Re-Fueling ..60 Drain Water From Fuel Filter/Water Separator ..60 CHANGING TUNNELS ..61 BAGGER OPERATION ..62 General ..62 Engine Cold To Start ..63 SETUP BAGGER FOR BAGGING OPERATION ..63 Engine Ladder & Platform In bagging Location For 12 Foot Tunnel ..63 Operators Canopy ..64 Pintle Hitch ..65 Position Bagger At Bagging Site ..66 Install Tunnel Extension On To Tunnel ..67 Lower and Setup Feed Table ..68 Bag Identification ..69 Remove Anchors From Storage Hooks ..69 Install The Bag On To The Tunnel ..70 Seal Beginning End Of Bag ..733 Contents - continuedBAGGING PROCEDURE ..74 Before Starting The Bagger.
7 74 Bagger Start-Up Procedure ..74 Filling The Bag ..76 Anchor Settings and Float ..76 Removing The Bag ..77 Venting The Bag ..78 PREPARE THE BAGGER FOR TRANSPORT ..79 Feed Table ..79 Bag Cradle ..79 Tunnel Extension ..80 Anchors In Storage Position ..81 Place Wheels Into Travel Position ..81 Transport Lock ..82 Pintle Hitch ..83 Operators Canopy ..84 TRANSPORTING ..85 Transporting Bagger On A Equipment Trailer ..85 Transporting With A Tow Vehicle ..86 BAGGING INSTRUCTIONS ..89 Bag Information ..89 STORAGE ..92 TROUBLE SHOOTING ..93 Hydraulic System ..93 Engine ..93 Engine Trouble Shooting ..94 Engine Fault Codes ..94 Engine Fault Codes - QSC Engines ..96 Trouble Shooting ..110 FUSE BLOCK LOCATION ..111 LUBRICATION ..112 Feed Table Drive and Idler Rollers ..112 Cab End Rotor Motor ..112 Lower Beater Bar Bearings ..113 Upper Beater Bar Bearings.
8 113 Anchor Cable Guide Rollers ..114 Bag Boom ..114 Brake Pivot Arms ..115 Hydraulic Lift Jack Slide Tubes ..115 Tunnel Lock Pin Slide Tubes ..115 Wheel Column Posts ..116 Steering Tie Rod ..116 Steering Cylinder Rod End ..116 Beater Bar Drive Chain ..117 Feed Table Drive Chain ..1174 Contents - continuedADJUSTMENTS ..118 Feed Table Drive Chain ..118 Feed Table Belt ..118 Lower Beater Bar Drive Chain ..119 Brake Slack Adjusters ..119 Setting Rotor Speed ..120 Resetting Steering Sensors ..121 MAINTENANCE ..122 Maintenance Schedule ..122 Maintenance Record ..124 Engine Maintenance ..127 Primary Fuel Filter (Water Separator)..128 Secondary Fuel Filter ..128 Chassis & Engine Compartment Inspection & Cleaning ..128 Radiator, Oil Cooler and Charge Air Cooler Heat Exchangers ..129 Engine Coolant ..130 Organic Acid Technology (OAT) Coolant.
9 131 Changing Coolant Types ..131 Definitions Of Coolant Types ..131 Engine Air Cleaner Filters ..132 Air Storage Tank ..133 HYDRAULIC SYSTEMS ..134 Hydraulic System Cleanliness ..134 Access To Hydraulic Fill & Filters ..135 Main Hydraulic System Hydrostat Filter ..140 Feed Table Planetary Oil ..140 Gearbox Oil ..142 Rotor Tooth Tine Caps ..143 Tire Air Pressure ..143 Wheel Lug Nut Torque ..143 Feed Table Wheel Bearings ..144 ANCHOR CABLES ..145 Anchor Cable Replacement ..145 TORQUE SPECIFICATIONS ..146 WARRANTY ..INSIDE BACK COVER5 Important Reference NumbersFill in the important serial numbers and model numbers in the spaces below. These will be helpful when service or maintenance is required. Also listed below are the part numbers and quantities of the filters and belts for this and Serial NumbersBagger Model Number: __MX1012 Commercial_Bagger Serial Number: _____Engine Model Number: __ Cummins QSC __Engine Serial Number: _____Filters Description Part Number Qty.
10 Primary Air Filter Element 1 Secondary Air Filter Element 1 Fuel Filter/Water Separator 1 Secondary Fuel Filter 1 Engine Oil Filter 1 Main Hydraulic Oil Return Filter 2 Case Drain Filter 1 Hydraulic Oil Reservoir Breather 1 Hydrostat Filter 1 Belts Description Part Number Qty. Serpentine 16 Delivery and Pre-Delivery Check Lists (customer and dealer copies) follow this copies can remain with this copies can be removed along perforation and remain with Check ListsDelivery Check List - Customer CopyThe following list is an important reminder of valuable information, which must be passed on to the customer at the time the unit is delivered. Check off each item as you explain it to the customer. Give the customer this operator s MANUAL . Instruct them to be sure to read and completely understand its contents before attempting to operate the unit.