Transcription of Owner’s Manual - Beltronics
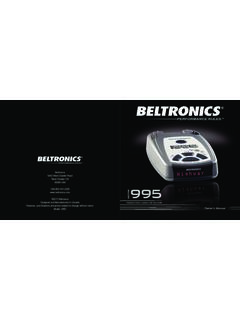
1 owner s ManualBeltronics5442 West Chester RoadWest Chester OH45069 USAUSA 2006 BeltronicsDesigned and Manufactured In CanadaFeatures, specifications and prices subject to change without : V965 The Bel V965 is the most advanced radar,laser and safety detector ever designed Bel V965 includes full X, K,SuperWide Ka, and Safety Warning Systemradar capability, front and rear laser detection, varactor-tuned (VTO) microwavereceiver, digital signal processing (DSP) forsuperior range and reduced false alarms, ourpatented Mute and AutoMute, audible andvisual band alerts, and all the performanceyou d expect from addition, the Bel V965 introducesthe following revolutionary features: Varactor-tuned receiver provides long-range protection against all radar threats New easy-to-use Programming lets you customize up to 6 features New AutoScan mode intelligently reduces unwanted false alarms, plusHighway and City settings Ultra-bright text-display provides easy to read information from any angle Detects and decodes Safety Warning system messagesIf you ve used a radar detector before, areview of the Quick Reference Guide onpages 4 and 5, and the Programming information on pages 12 and 13 will brieflyexplain the new this is your first detector.
2 Please readthe Manual in detail to get the most out ofyour V965 s outstanding performance andinnovative drive Reference Card1 Programming Details EFactory Default SettingsTo reset V965 to its original factorysettings, press and hold the CITY and BRT buttons while turning the poweron. V965 s display will provide a Reset message, accompanied by an audiblealert, acknowledging the V965 Quick Reference CardHRemove card along perforations HHRemovecardalongperforationsHAn exampleHere is how you would turn V965 sAutoMute feature off. 1 Enter the Program Mode by holding both the CITY and BRT buttons down for 2seconds. V965 will beep twice and hold the RVW button scroll through the categories, startingwith Display (Pilot), then Voice (Voice),then Power-On sequence (PwrOn), andthen AutoMute (aMute).
3 3 Release the RVW button when V965shows the AutoMute item. Since thefactory setting is for AutoMute to be on,V965 will display aMute ON.(If you accidentally don t release theReview button in time, and V965 goes tothe next category, hold the RVW buttondown again, and after V965 scrollsthrough all categories, it will begin againat the top of the list.)4 Press the CHG button to change fromaMute ONto aMute complete the Programming, simplywait 8 seconds without pressing any V965 will display Complete, beep 4times, and return to normal are 6 user-selectable options so youcan customize your V965 for your buttons labeled CITY and BRT arealso used to enter the Program Mode,REVIEW your current program settings, andto CHANGE any settings as desired. Thewords PROGRAM, RVW and CHG arelocated on the top of the detector, and arehighlighted in to use Programming1To enter Program Mode, press andhold both CITY and BRT buttons downfor 2 seconds.
4 (The unit will beep twice,and will display the word Program ).2 Then press the RVW button to reviewthe current settings. (You can either tapthe button to change from item to item, orhold the button to scroll through the items).3 Press the CHG button to change anysetting.(You can either tap the button tochange from setting to setting, or hold thebutton to scroll through all the options).4To leave Program Mode, simply wait8 seconds without pressing any button.(The unit will display Complete, beep, andreturn to normal operation).FCC Note:Modifications not expressly approvedby the manufacturer could void theuser s FCC granted authority to operatethe of ContentsQuick Reference Guide4-5 Installation6-7 Power Connection6 Mounting Location6 Windshield Mount7 Controls and Features8-11 Power and Volume Control8 Power-on indication8 Voice8 AutoMute8 Mute8 Highway / AutoScan / City Button9 Brightness and Dark Mode9 Audible Alerts10 Power Connector10 Signal Strength Meter11 Programming12-16 How to use Programming12 Example of Programming12 Overview of Programming13 Details of Programming14-16 Technical Details17-23 Specifications17 Interpreting Alerts18-19 How Radar Works20 How POP Works20 How Laser Works21 How Safety Radar Works22-23 Service24-28 Troubleshooting24-25 Service26
5 Registration28 Warranty and Accessories2932 Quick Reference CardBELTRONICS V965 Quick Reference Card* Factory Default SettingsHRemove card along perforations HHRemovecardalongperforationsHPress the RVWbuttonto go from one categoryto the nextPILOT(Power-on indication)VOICEPOWER-ON SEQUENCEAUTOMUTECITY MODE SENSITIVITYBANDSP ilot HWYP ilotHVoice ONVoiceOFFPwrOn STDPwrOn FSTaMute ONaMute OFFCity STDCityLoXCityNoXBandsDFTB ands MODPOPON orOFF(default is off)SWS ON orOFF(default is off)Press the CHGbuttonto change your settingwithin a category* Full word: Highway or AutoScan or CityLetter: H or A or C* Voice alerts onVoice alerts off* Standard power-on sequenceFast power-on sequence* AutoMute onAutoMute off*Standard City mode sensitivityLow X band sensitivity in City ModeNo X band sensitivity in City Mode* Factory default settingsFactory default settings modifiedTurn bands ON or OFF bypressing the VOLUME/MUTE buttonRadar Antenna and Laser LensThe rear panel of your V965 should have aclear view of the road ahead.
6 For bestperformance, do not mount V965 directly behind windshield wipers or tinted areas. Page 6 Alphanumeric Matrix DisplayV965 s display will show Highway,AutoScan, or City as its power-on you prefer, you can choose other power-on indications. Page 12-14 During an alert, the display will indicateradar band, and a precise bar graph of signalstrength. Page 10 Note: In the Dark Mode the display willnot light during an alert. Page 9 Quick Reference GuideTo begin using your V965, just follow these simple steps1 Plug the small end of the power cord into the side jack of the detector, and plug the large end of the power cord into your car s lighter your V965 on the windshieldusing the supplied windshield the PWR button, located top left, to turn the V965 and hold the Volume/Mute button to adjust the read the Manual to fully understandV965 s operation and Slot Insert V965 s adjustable Windshield mountinto this slot.
7 Page 7 QuickMount ButtonPress the button, and slide the Windshieldmount into one of its four locking 7 City ButtonSwitches between AutoScan, City andHighway, settings. In general, we recommend AutoScan. Page 9 PowerPress the PWR button to turn the V965 onor and hold the Volume/Mute button toadjust the alert volume level. Page 8 AutoMuteV965 s patented AutoMute automaticallyreduces the volume level of the audio alertafter a brief period. If you prefer, you canturn AutoMute off. Page 8 ProgrammingV965 is ready to go, just plug it in and turn iton. But you can also easily change 6 featuresfor your preferences. Page 12-164 Rear Laser PortReceives laser signals from behind JackAccepts standard mono ButtonPress to adjust display brightness. There arethree brightness settings, plus Dark the Dark Mode, the power-onindication will be changed to a AD, HD, or CD (indicating AutoScan, Dark,Highway Dark, or City Dark).
8 In the DarkMode, V965 s meter will not display duringan alert, only the audio will alert you. Page 9 Power Jack Plug the power cord into this 6 Mute Button Briefly press this button (above the display)to silence the audio for a specific alert. (Theaudio will alert you to the next encounter.)Page 85 Power ConnectionTo power V965, plug the small end of thepower cord, (telephone-type connector)into the modular jack on V965 s right side,and plug the lighter plug adapter into yourvehicle s lighter socket or accessory operates on 12 volts DC negativeground only. The lighter plug provided is astandard size and will work in most vehicles. However, some vehicles mayrequire the optional European sleeve toensure a snug fit. If so, simply call ourservice department to order one.
9 Thissleeve slides over the lighter plug. Ofcourse, your lighter socket must be cleanand properly connected for proper : Depending on your vehicle, thelighter socket power may either be continuously on, or it may be switched onand off with your ignition power cordsSee the Accessories section for details onour optional coiled SmartPlug or Direct-wirepower cords. Page 29 Mounting LocationWARNING: Beltronics cannot anticipatethe many ways the V965 can be is important that you mount V965 whereit will not impair your view nor present ahazard in case of an to mount V965 For optimum detection performance, werecommend the following: Using the QuickMount bracket, mountyour V965 level, and high enough on yourfront windshield to provide a clear view ofthe road from the front and rear.
10 Mount V965 away from windshieldwipers, other solid objects, and heavilytinted areas that might obstruct the radarantenna or laser QuickMountV965 s QuickMount bracket is designed forunobtrusive and hassle-free mounting. 1 Depress the QuickMount button on thetop of V965 (by the word Beltronics )and slide the QuickMount bracket into theslot until it is locked into the position whichbest fits the angle of your windshield (thereare four settings available). For extremelyhorizontal or extremely sloped windshields, the QuickMount bracket can be ensure that the suction cups adhere to the windshield firmly, be sure tokeep both your windshield and the suctioncups adjust V965 on your windshield, usethe QuickMount adjustment buttonlocated on the top of the V965, and slideV965 forward or backward to obtain a levelhorizontal installed and adjusted properly, theback top edge of the V965 should restsolidly against your !