Transcription of P68 Pellet Stove Owners Manual - homeandhearth …
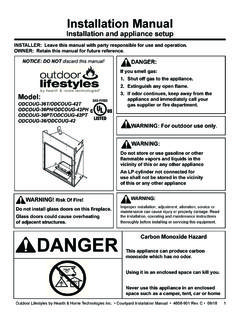
1 Installation Cleaning & Operating & Maintenance Manual Instructions P68 Pellet Stove Owners Manual Ce manuel est disponible en Fran ais sur demande R10. SAFETY NOTICE. Please read this entire Manual before you install and use your new room heater. Failure to follow instructions may result in property damage, bodily injury, or even death. FOR USE IN THE AND CANADA. SUITABLE FOR INSTALLATION IN MOBILE HOMES. IF THIS Pellet Stove IS NOT PROPERLY INSTALLED, A HOUSE FIRE MAY RESULT. FOR YOUR SAFETY, FOL- LOW INSTALLATION DIRECTIONS. CONTACT LOCAL BUILDING OR FIRE OFFICIALS ABOUT RESTRICTIONS AND INSTALLATION INSPECTION. REQUIREMENTS IN YOUR AREA. Contact your local authority (such as municipal building department, fire department, fire prevention bureau, etc.) to determine the need for a permit. Cette guide d'utilisation est disponible en francais. Chez votre concessionnaire de Harman HOME HEATING. R1. save these instructions. Item # 3-90-00688.
2 Maintenance Cleaning the Door Glass Always use a soft cloth and glass cleaner (such as Windex, or a mixture of vinegar & water) to clean the glass. Do not use razor blades or any other hard object to scrape the glass. Scraping the burn pot: Whenever adding fuel to the hopper, take the time and scrape the grate surface of the burnpot, using the scraper tool provided. This can be done while a fire is burning. Wearing heat resistant gloves, open the firebox door. Scrape any accumulated ashes from in front of the fire, into the ash pan. Now, scrape under the fire, in a downward direction, to loosen any carbon deposits. Do not scrape the fire out of the pot. Whatever you loosen will be pushed out with the flow of new fuel into the pot. ( ). Combustion Blower Cover Blower Cover Removing Ashes: Latch Fig 26 After approximately 1 ton of pellets has been burned, it will be necessary to empty the ash pan. Ashes should be placed in a metal container Heat Exchanger Fins with a tight fitting lid.
3 The closed container of ashes should be placed on a noncombustible floor or on the ground, well away from all com- bustible materials, pending final disposal. If ashes are disposed of by burial in soil or other- wise locally dispersed, they should be retained in the closed container until all cinders have thoroughly cooled. Scraper It is recommended that the Stove is cold and shut down when removing ash pan. 1. Pull on latch handle and remove ash pan. Use ash pan handle to carry and dispose of ashes. 2. Slide the ash pan back into the Stove and latch the door by pushing down on the latch handle. Flue Cleaning: Outlet The Stove should be shut-down and thoroughly cleaned after each ton of pellets consumed. The cleaner the Stove , the more efficient it will be. Blower Note: Fuel with higher ash and moisture con- Wheel tent will require more frequent cleanings. 1. Shut down Stove and disconnect power cord to Blower Cover insure that all motors are stopped.
4 Fig 27 Latch 2. Clean heat exchanger with scraper as shown in fig 27. Whenever wood is burned, there is a potential for 3. Brush or scrape the inside of the Stove to remove creosote formation. The venting system should be fly ash. inspected periodically during the heating season to 4. Scrape burnpot with flat end of scraper provided determine if a creosote buildup has occurred. If a with the Stove . Inspect the holes on the burnpot significant layer of creosote has accumulated (3 mm surface. See Fig. 33. or more), it should be removed to reduce the risk of a 5. Open burn pot clean-out. Clean fly ash from burn chimney or venting system fire. pot and replace cover. 6. Remove ash pan. 22 P68 Pellet Stove Maintenance Burn pot 7. Remove combustion blower cover by turning the Clean-out blower cover latch vertical, see Sliding the plate cover out of the slot on the will expose the combustion blower wheel and flue outlet, 8. Clean the combustion blower wheel with a brush and a vacuum cleaner.
5 Note: Do not use a household vacuum to clean the Stove . We recommend that you use a shop vacuum that is equipped with a fine dust filter called a HEPA filter or a vacuum specially made for fly ash and soot. Using a vacuum which is not equipped with a fine dust filter may clog and dis- perse fly ash and soot into the room. Fig. 28 Fig. 29 NOTE: THE Stove MUST BE COMPLETELY OUT. Latch "closed "with blower Latch "open "with blower BEFORE YOU VACUUM THE Stove . LIVE PEL- cover in place. Burn pot cover partly removed. Burn LETS, IF SUCKED INTO THE VACUUM WILL LIGHT. clean-out is closed. pot clean-out is open. THE VACUUM ON FIRE AND MAY ULTIMATELY. CAUSE A HOUSE FIRE. 9. Use a brush to clean the flue, being careful not to damage the ESP probe, see Fig. 30. The flue goes straight through into the vent pipe ( ) therefore, the vent pipe can also be cleaned to some extent through the flue outlet. 10. Reinstall blower cover and relatch.
6 ESP ash pan into Stove and latch the door. probe Blower cover removed. Soot and Fly Ash Formation and Need for Removal- The products of Fig. 30 combustion will contain small particles of fly fly Exposed blower wheel ash will collect in the exhaust venting system and restrict and flue opening, NOTE: the flow of the flue gases. Incomplete combustion, such ESP probe is visible. as occurs during startup, shutdown, or incorrect opera- tion of the room heater will lead to some soot formation which will collect in the exhaust venting system. The Stove should be cleaned after each ton of pellets (50. bags) and the venting system inspected and cleaned yearly, after each heating season. ESP Fig. 33. Probe Be careful not to damage ESP probe when cleaning with Fig. 31 brush. P68 Pellet Stove 23. P68 Maintenance - Burn Pot Burn Pot Cleaning and Maintenance 1. Scrape the top holed surface and sides of the burn pot.(Fig 33) It is not necessary to completely remove all material from the burn pot.
7 The excess will be pushed out during the next use. DANGER. Disconnect the power to the unit before removing cover. 2. Loosen the (2) wing thumb screws on the lower front angle of the burn pot. (Fig. 34). 3. Lift off the clean-out cover ( ) to open the bottom clean-out chamber. ( ). Loosen wing screws 4. Clean ash buildup from inside the chamber while Fig. 34 cover is off. Use the scraper to tap on the top front edge of the burn pot. This will help knock pieces of ash, loosened by the scraping process, down through the holes. It also helps knock scale off of the igniter element. Figure 36. The igniter is made to be removable for service by insulated male/female wire connectors. These connections between the hot leads (the wires inside the burn pot) and the cold leads (the wires from the control board) are always pulled to the inside rear of the feeder body. (Not coiled inside the burn pot.). It is very important that these connections are to the inside rear of the feeder body.
8 Also, the extra wire of the igniter wire service loop must be pulled out Fig. 35 through the rear of the feeder and tied up so that it will not be caught and/or damaged by any moving parts. Warning Use caution when cleaning burn pot clean-out chamber. Do not damage the high temperature igniter wires. Igniter hot lead wires (high temperature). Note: The hot lead/cold lead connection Igniter Element must always be pulled to the rear of the Viewed from below through the ash pan opening. feeder body before operation. Fig. 36. 24 P68 Pellet Stove P68 Maintenance - Gasket Adjustment Your new Harman Stove viewing door gasket has been factory set, however over a period of time some minor adjustment may be necessary. The easiest way to check the adjustment of the door gasket is to take Bolts a small piece of paper or a dollar bill (when the Stove is not burning) and open the door, place the paper between the face of Stove body and the gasket at the top center of the door, close the door.
9 You should have a slight amount of resistance when you try to pull the paper out. Repeat this process on the bottom center of the door. If the paper is loose then some adjustment is necessary. To adjust the door, the Stove must be turned off and cold. Open the door, loosen the 2 bolts shown (see Fig. 37) and bump the latch adjuster (Fig. 38) toward the back of Stove , snug bolts and test for proper seal as described above. Once the proper seal is attained, open the door and finish tightening the bolts. If proper Fig. 37. adjustment cannot be accomplished, then a new gasket should be installed. Over a period of time the gasket will wear out and a new gasket will have to be installed. To install a new gasket you must remove the old gasket. After the gasket is removed the gasket channel should be free of all loose particles. The gasket cement used to hold the gasket in place is RTV (HIGH TEMPERATURE). silicone. Put a bead of RTV silicone in the bottom of the gasket channel, then install the new gasket and close the door.
10 Allow to dry for several hours before lighting the Stove . After the RTV silicone has cured, the door will have to be adjusted for proper sealing. If you have just replaced the door gasket, the latch adjuster Latch Adjuster must be pulled towards the front of the Stove . Follow the procedure mentioned above. Fig. 38. Door Hinge Retainers: Some stoves have experienced the door pins working up and out of the load door hinges during normal opening and closing of the door. To stop this from occurring, there are two 3/8 retainer clips that are in the hardware pack sent with the Stove . They are to be installed onto the load door hinge pins after the trim has been installed and the door is mounted onto the The 3/8" retainer Stove body and ready for use. clips will go on To remove the load door for any service or to change each hinge pin, below the hinge. the trim, the retainer clips must be removed and may be damaged. Replacements can be ordered through your Harman Dealer (Part #3-31-94807031) or a 3/8.