Transcription of Peanut Butter Brown - brewersbestkits.com
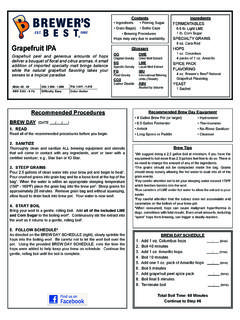
1 Peanut Butter BrownA medium bodied, sweet, malty beer with a strong Peanut Butter flavor and aroma. Crystal and chocolate malts create a rich, Brown color while our natural Peanut Butter flavor provides a unique taste experience. BREW DAY SCHEDULE1. Add 1 oz. pack of GR Tettnang hops : (time)2. Boil 35 minutes3. Add last 1 oz. pack of GR Tettnang hops : (time)4. Boil final 25 minutes5. Terminate boil : (time) Total Boil Time: 60 MinutesContinue to Step #6 Recommended ProceduresBREW DAY (DATE / / )1. READRead all of the recommended procedures before you SANITIZET horoughly clean and sanitize ALL brewing equipment and utensils that will come in contact with any ingredients, wort or beer with a certi-fied sanitizer, , Star San or IO STEEP GRAINSPour gallons of clean water into your brew pot and begin to heat1.
2 Pour crushed grains into grain bag and tie a loose knot at the top of the bag2. When the water is within an appropriate steeping temperature (150 - 165 F) place the grain bag into the brew pot3. Steep grains for approximately 20 minutes. Remove grain bag and without squeezing, allow liquid to drain back into brew pot. Your water is now START BOILB ring your wort to a gentle, rolling boil. Add all of the included LME and DME to the boiling wort4. Continuously stir the extract into the wort as it returns to a gentle, rolling FOLLOW SCHEDULE6As directed on the BREW DAY SCHEDULE (right), slowly sprinkle the hops into the boiling wort. Be careful not to let the wort boil over the pot. Using the provided BREW DAY SCHEDULE, note the time the hops were added to help keep your brew on schedule.
3 Continue the gentle, rolling boil until the boil is complete. Brew Tips1We suggest doing a gallon boil at minimum. If you have the equipment to boil more than gallons feel free to do so. There is no need to change the amount of any of the grains should not be compacted inside the bag. Grains should steep loosely allowing the hot water to soak into all of the grain careful attention not to let your steeping water exceed 170 F which leeches tannins into the canisters of LME under hot water to allow the extract to pour careful attention that the extract does not accumulate and caramelize on the bottom of your brew consumed, hops can cause malignant hyperthermia in dogs, sometimes with fatal results. Even small amounts, including spent hops from brewing, can trigger a deadly Brew Day Equipment 4 Gallon Brew Pot (or larger) Gallon Fermenter Airlock Long Spoon or Paddle Hydrometer Thermometer No-Rinse Sanitizer lb.
4 Amber lb. Light LMESPECIALTY GRAINS8 oz. Cara Munich Dark4 oz. Chocolate Barley6 oz. Carapils HOPS2 packs 1 oz. GR TettnangFLAVORING4 oz. Brewer s Best Natural Peanut Butter FlavoringYEAST1 SachetIBUs: 15 - 19 ABV: - : - : EasyFG: - : BrownContents Priming Sugar Bottle Caps Ingredients Grain Bag(s) Brewing ProceduresGlossaryDMED ried Malt ExtractLMEL iquid Malt ExtractIBUI nternational Bittering Units (Tinseth)ABVA lcohol by VolumeOGOriginal GravitySGSpecific GravityFGFinal GravityCO2 Carbon Dioxide Hops may vary due to availability. Recommended Procedures (continued)6. COOL WORT & TRANSFERCool the wort down to approximately 70 F by placing the brew pot in a sink filled with ice water7. Pour or siphon wort into a sanitized fermenter. Avoid transferring the heavy sedi-ment (trub) from the brew pot to the ADD WATERAdd enough clean water (approx.)
5 64 - 72 F) to the fermenter to bring your wort to approximately 5 gallons8. Thoroughly stir the water into the wort. Using a sanitized hydrometer take an Original Gravity (OG) reading. Once you are satisfied your wort is at the proper volume and within the OG range, record the OG in the ABV% CALCULATOR (right). 8. PITCH YEASTS prinkle the contents of the yeast sachet over top of the entire wort surface (DO NOT RE-HYDRATE) and stir well with sanitized spoon or paddle. Firmly secure the lid onto the fer-menter. Fill your airlock halfway with water and gently twist the airlock into the grommeted lid. Move fermenter to a dark, warm, temperature-stable area (approx. 64 - 72 F).FERMENTATION9. MONITOR & RECORDThe wort will begin to ferment within 24 - 48 hours and you may notice CO2 releasing (bubbling) out of the airlock9.
6 If no bubbling is evident on day two of fermentation, take a gravity reading with a sanitized hydrometer. If gravity has dropped below your OG reading then fermentation is taking place. Take a gravity reading again in 4 - 6 days10 and confirm fermentation has completed by comparing the gravity reading to the FG range listed at the top of the instructions. If gravity is not in the FG range, continue fermentation until it reaches the FG range. Record your FG reading in the ABV% CALCULATOR (right).BOTTLING DAY (DATE / / )10. READRead all of the recommended procedures before you SANITIZET horoughly clean and sanitize ALL brewing equipment, utensils, and bottles that will come in contact with any ingredients, wort or beer with a certified sanitizer, , Star San or IO PREPARE PRIMING SUGAR AND NATURAL FLAVORINGIn a small saucepan dissolve oz.
7 Of priming sugar into 2 cups of boiling water for 5 minutes. Pour this mixture into a clean bottling bucket. Start adding the Peanut Butter flavoring. For a light Peanut Butter flavor add only 2 oz. and for a robust Peanut Butter flavor, add all 4 oz. of flavoring. Carefully siphon beer from the fermenter to a bottling bucket. Avoid transferring any sediment. Stir gently for about a minute. 1 oz. of priming sugar is equal to approx. tablespoons13. BOTTLEU sing your siphon setup and bottling wand, fill the bottles11 to within approximately one inch of the top of the bottle. Use a bottle capper to apply sanitized crown BOTTLE CONDITIONMove the bottles to a dark, warm, temperature-stable area (approx. 64 - 72 F). Over the next two weeks the bottles will naturally carbonate.
8 Carbonation times vary depending on the temperature and beer style, so be patient if it takes a week or so & ENJOY YOUR TASTY BREW AND THANK YOU FOR CHOOSING BREWER S BEST Tips7To avoid bacteria growth do this as rapidly as possible. Do not add ice directly to the wort. Alternatively, you can use a brewing accessory like a Wort careful not to add a volume of water that will cause the wort to fall outside of the OG range specified in the BREW STATS. 9 Within 4 - 6 days the bubbling will slow down until you see no more CO2 being transferring your beer to a second-ary carboy, see Two-Stage (Secondary) Fer-mentation sidebar standard crown bottles, preferably amber color. Make sure bottles are thoroughly clean. Use a bottle brush if necessary to remove stubborn deposits.
9 Bottles should be sanitized prior to Bottling DayEquipment Gallon Bottling Bucket Siphon Setup Bottle Filling Wand 12 oz. Bottles (approx. 53) Crown Caps Bottle Brush Capper SanitizerTwo-Stage (Secondary) FermentationBrewer s Best recommends home brewers employ the practice of a two-stage fermenta-tion. This will allow your finished beer to have more clarity and an overall better, purer flavor. All you need is a 5-gallon carboy, drilled stop-per, airlock and siphon setup to transfer the beer. You will also need to monitor and record the SG with your hydrometer when the beer is in the primary . When the fermentation slows (5-7 days), but before it completes, simply transfer the beer into the carboy and allow fer-mentation to finish in the secondary.
10 Leave the beer for about two weeks and then proceed to Bottling Day. Consult your local retailer to learn more about this technique.(SECONDARY RACK DATE / / )ABV% Calculator(OG - FG) x = ABV%(_____* - _____**) x = ____%*OG from Step #7**FG from Step #9 Brewer s Best is a registered trademark of the LD Carlson Co.