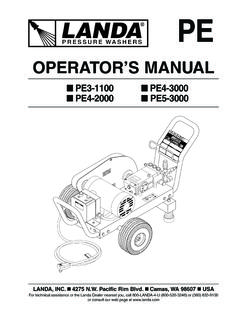
Transcription of PHW2-1100 PHW3-1100 PHW4-2000 PHW4-3000
1 PRESSURE WASHERS OPERATOR S MANUALLANDA, INC. 4275 Pacific Rim Blvd. Camas, WA 98607 USAFor technical assistance or the Landa Dealer nearest you, call 800-LANDA-4-U (800-526-3248) or (360) 833-9100or consult our web page at PHW2-1100 PHW3-1100 PHW4-2000 PHW4-3000 Model Number _____Serial Number _____Date of Purchase _____The model and serial numbers will be found on a decal attached tothe pressure washer. You should record both serial number anddate of purchase and keep in a safe place for future Manual Form #96-6020 Revised 9/02 Introduction .. 4 Unpacking .. 4 Important Safety Information .. 4-5 Component Identification .. 6 Pre-Operation Check .. 7 Set Up Procedures .. 7 Operating Instructions .. 7 Shut Down Procedures .. 7 General Washing Techniques .. 8 Steam Combination .. 8 Preventative Maintenance .. 8 Maintenance & Service .. 8-10 PHW Exterior Exploded View and Parts List .. 11-13 PHW Control Panel Exploded View and Parts List.
2 14-15 PHW Tank Assembly Exploded View and Parts List .. 16-17 PHW Chassis Exploded View and Parts List .. 18-19 PHW Pump Assemblies Exploded View and Parts List .. 20-21 PHW Power Platform Exploded View and Parts List .. 22-23 Hose & Spray Gun Assembly (All Models) .. 24 PHW Float Tank Exploded View and Parts List .. 25 Burner Specifications .. 26 Troubleshooting .. 27-32 Preventative Maintenance .. 33 Oil Change Record .. 33 Warranty .. 34 Spanish Translations .. 35-394 PHW SERIES PRESSURE WASHER OPERATOR S MANUALLANDA PHW 9/02 IMPORTANT SAFETYINFORMATIONCAUTION: To reduce the risk ofinjury, read operating instruc-tions carefully before Read owner's manual thor-oughly. Failure to follow instruc-tions could cause malfunctionof the machine and result indeath, serious bodily injury and/or property Know how to stop the product and bleed pressuresquickly. Be thoroughly familiar with the Stay alert - watch what you are All installations must comply with local codes.
3 Con-tact your electrician, plumber, utility company or theselling distributor for specific details. To comply withthe National Electrical Code (NFPA 70) and provideadditional protection from risk of shock, this productis provided with a ground fault circuit interrupter(GFCI) built into the power cord plug (250V 30 ampor less, 1 PH). If replacement of the plug or cord isneeded, use only identical replacement : Improper connection of the equipment-grounding conductor can result in a risk of electro-cution. Check with a qualified electrician or servicepersonnel if you are in doubt as to whether the outletis properly grounded. Do not modify the plug providedwith the product. If it will not fit the outlet, have aproper outlet installed by a qualified : Do not use gasoline,crankcase drainings or oil con-taining gasoline, solvents or alco-hol. Doing so will result in fire and/or : Risk of explosion-donot spray flammable In oil burning models, use onlykerosene, No.
4 1 home heatingfuel, or diesel. If diesel is used, add a soot removerto every : Risk of this product only in a wellventilated Avoid installing machines insmall areas or near exhaustfans. Adequate oxygen isneeded for combustion or dan-gerous carbon monoxide will you for purchasing a Landa Pressure manual covers the operation and main-tenance of the PHW3-11021D, PHW4-20021A,PHW4-20021B, PHW4-20021C, PHW4-20021G,PHW4-20021H, PHW4-20025K, PHW4-20025N,PHW4-20025P, PHW4-30021A, PHW4-30021B,PHW4-30021C, PHW4-30021F, PHW4-30021H,PHW4-30021M, PHW4-30021G, PHW4-30021P,PHW4-30025N, PHW5-30021B, PHW5-30021C,PHW5-30021F, PHW5-30021H, PHW5-30021N andPHW5-30025N washers. All information in this manualis based on the latest product information available atthe time of , Inc. reserves the right to make changes at anytime without incurring any PHWS Series was designed for maximum useof 8 hours per day, 5 days per Responsibility:The owner and/or user must have an understanding ofthe manufacturer s operating instructions and warningsbefore using this Landa pressure washer.
5 Warning infor-mation should be emphasized and understood. If the op-erator is not fluent in English, the manufacturer s instruc-tions and warnings shall be read to and discussed withthe operator in the operator s native language by the pur-chaser/owner, making sure that the operator compre-hends its and/or user must study and maintain for futurereference the manufacturers manual should be considered a permanentpart of the machine and should remain with it ifmachine is ordering parts, please specify model andserial unpack your new LANDA washer and checkcontents against packing slip. Basic equipment with eachmachine includes:1. Pressure washer assembly2. High pressure discharge hose3. Wand assembly4. Spray gun on machines where applicable5. Operator s manualWARNINGRISK OF EXPLOSION:DO NOT USE THIS PRODUCTONLY IN A WELL VENTILATED OPERATOR SMANUAL THOROUGHLYPRIOR TO SERIES PRESSURE WASHER OPERATOR S MANUAL5 LANDA PHW 9/02 WARNING: Risk of fire.
6 Do not addfuel when machine is operating orstill Turn machine off before refuel-ing. Fire and/or explosion mayoccur if this is not done. Refuelin a well ventilated : Keep water sprayaway from electrical wiring orfatal electrical shock may warning tag on To protect the operator fromelectrical shock, the machinemust be electrically is the responsibility of theowner to connect this machineto a UL grounded receptacle of proper voltage andamperage ratings. Do not spray water on or nearelectrical components. Do not touch machine withwet hands or while standing in water. Always dis-connect power before : Spray gun kicks back hold with Grip cleaning wand securely with both hands beforestarting the cleaner. Failure to do this could result ininjury from a whipping : Flammable liquidscan create fumes which can ignitecausing property damage or se-vere Oil burning appliances shall beinstalled only in locations wherecombustible dusts and flam-mable gases or vapors are notpresent.
7 Do not store or usegasoline near this : Risk of injection or se-vere injury to persons. Keep clearof nozzle. Do not touch or directdischarge stream at persons. Thismachine is to be used only bytrained : Hot discharge fluid. Donot touch or direct dischargestream at High pressure developed by these machines will causepersonal injury or equipment damage. Use cautionwhen operating. Do not direct discharge stream atpeople, or severe injury or death will Never make adjustments on machine while it is : High pressure spraycan cause paint chips or otherparticles to become airborne andfly at high Eye safety devices, foot protec-tion and other protective cloth-ing must be worn when usingthis The spray gun should not beoperated with the trigger in the off position for exten-sive periods of time as this may cause damage tothe pump. Check to make sure burner shuts off withspray gun Protect from Protect discharge hose from vehicle traffic and To prevent serious injury, be certain quick coupleron discharge hose has locked before using pres-sure Before disconnecting discharge hose from hot wa-ter outlet, turn off burner and open spray gun to al-low water to cool to 100 , then turn off pump motorand water supply and open spray gun to relieve backpressure in hose.
8 This will prevent coil damage fromthermal Do not allow acids, caustic or abrasive fluids to passthrough the Inlet supply water must be cold and clean fresh The best insurance against an accident is precau-tion and knowledge of the will not be liable for any changes made toour standard machines or any components not pur-chased from To reduce the risk of injury, close supervision is nec-essary when a product is used near children. Do notallow children to operate the pressure washer. Thismachine must be attended during OF EXPLOSION:DO NOT USE WATER SPRAYAWAY FRO MELECTRICAL OF EXPLOSION:DO NOT USE PRESSURESTREAM CANPIERCE SKIN PROTECTIVECLOTHING SERIES PRESSURE WASHER OPERATOR S MANUALLANDA PHW 9/02 COMPONENT IDENTIFICATIONALL MODELSD ischargeNippleGFCIAll Three PhaseMachines PlusPHW4-20021 GPHW4-30021 AWater Supply(not included)Spray GunTriggerInletSwivelConnectorHigh Pressure/Steam ValveAdjustmentVariablePressureControlWa ndControlHandleQuick Coupler& CollarPump & BurnerSwitchDetergentBucket(not included)WaterSupply Hose(not included)Float TankNozzle QuickCouplerBrass SoapNozzleHandBrakeFuelTankHourMeterPHW4 -20021 AHigh PressureNozzlePHW3-11021 DPHW2-11021 DPower Supply20 AmpStackless TopAdapter Kit(optional #30-199)PHW SERIES PRESSURE WASHER OPERATOR S MANUAL7 LANDA PHW 9/0224.
9 Do not overreach or stand on unstable support. Keepgood footing and balance at all Follow the maintenance instructions specified in Do not operate this product when fatigued or underthe influence of alcohol or drugs. Keep operating areaclear of all CHECK Check pump oil level. (Use SAE 30W non-detergentoil). Dipstick is located on top of pump. Cold water supply (minimum 6 gpm, 5/8", 20 psi) Hose, wand, nozzle (nozzle size per serial plate) Water filter (intact, non restrictive) Open spray gun to relieve pressure before star PROCEDURES Machines must be stored indoors when not in use. Location of machine is important. Avoid installingnear combustible material or in poorly ventilated ar-eas. Electrical connection to machine should be theproper voltage, phase and amperage. See specifi-cations for particular model. Plug the power cord intoa grounded receptacle. The PHW2-11021D andPHW3-11021D each require a 20 amp receptacleto comply with UL 1776 standards.
10 Water source for machines should be supplied by a5/8" garden hose with a city water pressure ofnot less than 30 PSI. If the water supply is inad-equate, or if the garden hose is kinked, the machinewill run very rough and the burner will not fire. Fill fuel tank with proper fuel. Adding exhaust vent pipe to your oil fired burner isnot recommended because it restricts air flow. Thiscauses carbon build-up, which affects the operationand increases maintenance on the coil. If a stackmust be used, refrain from using 90 degree bends. Ifthe pipe can not go straight up then use only 45 de-gree bends and go to the next larger size pipe. Theoverall pipe length must not exceed 6 feet in INSTRUCTIONS Read safety, installation and preventative mainte-nance instructions before starting machine . Connect the water supply hose to the float tank inletswivel connector and turn on water supply. Check fuel tank level. Connect the high pressure hose quick coupler to dis-charge nipple by sliding the quick coupler collar backand inserting quick coupler on coupler nipple andpushing the quick coupler collar forward to secure it.
