Transcription of Planter Operation, Maintenance and Care - MDF
1 Planter Operation, Maintenance and Storage Establishing an optimal plant population in late April or early May is a critical Gold Standard Agronomy practice leading to profitable sugarbeet production (see Fact Sheet). Proper operation of a well maintained and cared for Planter is essential to effective stand establishment. Growers must give careful attention to details of Planter storage and Maintenance if they expect it to operate properly. Planters are precision treat them as such. Planter downtime can seriously delay planting. Planter malfunction or incorrect operation can significantly reduce stand establishment. Planter off Season Storage Clean Planter with a pressure washer or high pressure air especially important to wash off all starter fertilizer to prevent corrosion Remove plates and store on a wood dowel hung horizontally Remove seed plate doors do not stack on top of each other, use original boxes for storage Release tension on press wheel springs Check for missing insecticide spoons or banders Make a list of needed repairs and parts Mouse proof seed tubes (fabric softener sheets in seed hoppers) Save all new Planter plate boxes for warranty use referral Keep track of how many acres are seeded on a set of plates (write the date of purchase in owners manual or on the plates themselves).
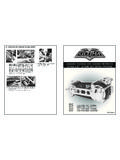
2 Following these steps should eliminate nearly all warped plates, damaged doors and hinges, ruined gaskets and metal corrosion by starter fertilizer. These procedures will extend life of the Planter and seeding mechanism and maintain optimum stand establishment. Preparing Seed Hoppers for a Test Stand Clinic Number each seeding unit Number each plate for each unit Number each door for each seeding unit Mark position of each plate when installed on seed unit If new plates were installed, use 1/16 inch drill bit to clean out seed plate holes (drill from the back side of the plate) Ensure the proper brush is in use Make sure knocker wheels are installed not wiper bars Ensure the black plastic door inside the unit is in the closed position Clean each seed tube and seed hopper with high pressure air Leave hopper lids off (leave at home) Keep Planter units dry during transport to test stand locations Don t forget Planter plates for each seed size ordered and to be evaluated Bring vacuum gauges for calibration Factors Influencing Seed Spacing Choices Variety vigor Variety emergence potential Is the seedbed ideal, average, fair or poor Are crop residues excessive, about right, or too low to prevent blowing and erosion Is soil moisture excellent, good, fair or poor Insecticide method of application Figure 4 Figure 6 Figure 2 Figure 1 Figure 3 Planter Preparation and Maintenance Checklist Have Planter plate and vacuum chart available page 3 Is starter fertilizer equipment calibrated and working properly Calibrate insecticide applicator units Check seed hoppers.
3 Drives and chains Be sure disk openers are clean and turn freely Be sure row markers are set properly or precision guidance system is ready Plant at to mph for best results, slower for older plate planters Check each row for press wheel pressure, using a digital fish scale Figure 1 Level the tool bar in the field Figure 2 Check planting depth in the field Figure 3 Select desired seed spacing Figure 4 Are press wheels set properly for sugarbeet row closure Figure 5 Have tarp ready for covering seed and insecticide hoppers when it rains Figure 6 Figure 5 SeedJohn Deere MaxEmergeJohn Deere 71 FlexSizeVacuum PlanterPlate (plastic) PlanterSmallSmall (A 51712) - Medium (H 136445)Red (B-9-083)MediumMedium (H 136445)Blue (B-10-105)LargeMedium (H 136445) - *Large (A 51713)Green (B-11-105)X-LargeLarge (A 51713)Brown (B-12-115)Mini-PelletSmall (A 51712) - Medium (H 136445)- Large (A 51713)Orange (B-11-140MP)All CompaniesRegular PelletMedium (H 136445) - Large (A 51713) - Sorghum (A 43066)Light Green (B-12-160RP)Pro25 Medium (H 136445)Blue (B-10-105)Pro50 Medium (H 136445) - Large (A 51713)Tan(B-11-115)-Orange(B-11-140MP)Pr o100 Medium (H 136445) - Large (A 51713) - Sorghum (A 43066)Light Green (B-12-160RP)Pro200 Sorghum (A 43066)------Jumbo PelletSorghum (A 43066)------2 Extra LargeSorghum (A 43066)------AgracoatMedium (H 136445) - Large (A 51713)------Agracoat'S'Sorghum (A 43066)------S1 Medium (H 136445)------S2 Large (A 51713) - Sorghum (A 43066)------* Large Plate not recommended by SESV anderHave for large seedHilleshog2007 Crystal Beet Seed Hilleshog SESV anderHave Holly Seedex BetaseedCrystal Beet SeedSeedex RECOMMENDATIONS FOR JOHN DEERE MAXEMERGE Planter Small Plate (A 51712) Small Seed: Inches of Vacuum Mini Pellets: 3-4 Inches of Vacuum Regular Pellets: Not Recommended Medium Plate (H 136445) Medium Seed: 3/4-1 Inch of Vacuum Large Seed.
4 1-2 Inches of Vacuum Mini Pellets: 2 Inches of Vacuum Regular Pellets: 2 Inches of Vacuum Pro25: 3/4 1 Inch of Vacuum Pro50: 2 Inches of Vacuum Pro100: 2 Inches of Vacuum S1: 2-3 Inches of Vacuum Agracoat: 2-3 Inches of Vacuum RECOMMENDATIONS FOR JOHN DEERE MAXEMERGE Planter Large Plate (A 51713) Small and Medium Seed Not Recommended Large Seed: 1-2 Inches of Vacuum * Extra Large Seed: 1 -2 Inches of Vacuum Mini Pellets: 2-3 Inches of Vacuum Regular Pellets: 2-3 Inches of Vacuum Pro50: 2 Inches of Vacuum Pro100: 2-3 Inches of Vacuum Agracoat: 2-3 Inches of Vacuum S2: 2-3 Inches of Vacuum * Large seed not recommended by SESV anderHave Sorghum Plate (A 43066) Mini Pellets Not Recommended Regular Pellets: 3-4 Inches of Vacuum Jumbo Pellets: 5-8 Inches of Vacuum Pro200: 5-8 Inches of Vacuum Pro100: 3-4 Inches of Vacuum 2 Extra Large: 5-8 Inches of Vacuum S2: 3-4 Inches of Vacuum Agracoat S : 5-8 Inches of Vacuum RECOMMENDATIONS FOR MonoSem NG+ Planter 4025 Large, Extra Large, 2XL Seed Mini, Regular, Jumbo Pellets Pro50, Pro100, Pro200 3622 2 XL Seed Regular & Jumbo Pellet Pro100 & Pro200 Agracoat S S2 RECOMMENDATIONS FOR MonoSem NG+ Planter 4016 Small, Medium, Large, Extra Large Seed Mini Pellet Pro25, Pro50, Pro100 Agracoat S1 4020 Large & Extra Large Seed Mini & Regular Pellet Pro25, Pro50, Pro100 Agracoat S1 & S2 4025 Large, Extra Large, 2XL Seed Mini, Regular, Jumbo Pellets