Transcription of PREMIUM SHALLOW WELL JET PUMP - Red Lion Pump Products
1 Table of ContentsBefore Getting Started ..2 Installation ..4 Voltage Setting Instructions ..4 Materials and Tools Needed ..5 Important Information ..5 Quick Installation Guide ..6 Plug Descriptions and Socket Sizes ..6 Detailed Installation Instructions ..7 Typical Installations ..9 Pump to Tank Installation ..10 Wiring Instructions ..11 Priming the Pump ..12 Maintenance ..13 Troubleshooting ..14 Replacement Parts ..15 Limited Warranty ..16 ENGLISHENPREMIUM SHALLOWWELL JET PUMPRJS-PREM SeriesOwner s ManualTHIS PUMP IS DUAL VOLTAGE AND FACTORY SET FOR 230 VOLTAGE SETTING INSTRUCTIONS TO SET FOR 115 is the safety alert symbol. When you see this symbol on your pump or in this manual, look for one of the following signal words and be alert to the potential for personal injury or property damage if ignored:warns about hazards that will cause serious personal injury, death or major property damage if about hazards that can cause serious personal injury, death or major property damage if about hazards that will or can cause minor personal injury or major property damage if special instructions which are important but not related to hazards.
2 Carefully read and follow all safety instructions in this manual and on DANGER!s WARNING!s CAUTION!s NOTICE!BEFORE OPERATING OR INSTALLING THIS PUMP, READ THIS MANUAL AND FOLLOW ALL SAFETY RULES AND OPERATING INSTRUCTIONS. s WARNING!READ AND FOLLOW ALL SAFETY WARNING!ELECTRICAL PRECAUTIONS - All wiring, electrical connections, and system grounding must comply with the National Electrical Code (NEC) and with any local codes and ordinances. Employ a licensed WARNING!FOR DUAL VOLTAGE MOTORS (115/230 V) - Voltage change instructions are located in this NOTICE! The motor voltage is factory set at 230 WARNING!RISK OF ELECTRIC SHOCK Have an electrician provide electrical power to motor. We recommend that a separate circuit be lead from the home electrical distribution panel, properly protected with a fuse or a circuit breaker. A ground fault interrupter (GFI) protected circuit is also recommended for use with any electrical device operating near water.
3 For recommended cable size see Table 2. Motor must be grounded and terminal cover in place to reduce electrical shock hazard. Keep motor operating area as dry as possible. Always disconnect power before servicing. Not investigated for use in swimming pool WARNING!75 PSI PRESSURE RELIEF VALVE RECOMMENDEDThis pump is capable of producing high pressure. Installing a 75 psi pressure relief valve is highly GETTING STARTEDRead and follow safety instructions. Refer to product data plate(s) for additional operating instructions and CHECKLISTThis checklist has been provided for your convenience. If a step was missed, ensure power has been shut off at the breaker and completely relieve pressure from the water system before continuing to work on the system. s WARNING! 75 PSI PRESSURE RELIEF VALVE RECOMMENDEDThis pump is capable of producing high pressure. Installing a 75 psi pressure relief valve is highly #: _____Serial #: _____Date purchased: _____Location purchased: _____KEEP THIS MANUAL ACCESSIBLE FOR FUTURE REFERENCE.
4 DescriptionVoltage setting on pump verified and set to match voltage on the circuit breakerFoot valve (for drilled wells) or check valve (for driven wells) installedWiring and electrical connected by licensed electricianPump intake connected to piping in wellWell seal in placePump discharge connected to tank and service lineTank pressure checked and charged to 28 psiAll joints sealed with PVC cement, PTFE tape or heat and clampsAll connections checked for leaksPressure relief valve installedAll other accessories installed: drain cock, shut-off valve, pressure gauge (optional)Breaker turned onPump primedModel number and serial number recorded in this manualReceipt stapled to manual3 INTRODUCTIONThe SHALLOW well jet pump is ideal for the supply of fresh water to rural homes, farms, and cabins. This pump is suitable for installations where the vertical distance from the pump to the water level does not exceed 25 ft ( m), including drawdown (less at high altitudes).
5 In offset installation, friction losses in the suction pipe must be taken into consideration (refer to Table 1, Friction Loss). This instruction sheet provides you with the information required to safely own and operate your product. Retain these instructions for future product you have purchased is of the highest quality workmanship and material, and has been engineered to give you long and reliable service. This product has been carefully tested, inspected, and packaged to ensure safe delivery and operation. Please examine your item(s) carefully to ensure that no damage occurred during shipment. If damage has occurred, please contact the place of purchase. They will assist you in replacement or repair, if THESE INSTRUCTIONS CAREFULLY BEFORE ATTEMPTING TO INSTALL, OPERATE OR SERVICE YOUR PRODUCT. KNOW THE PRODUCT S APPLICATION, LIMITATIONS, AND POTENTIAL HAZARDS.
6 PROTECT YOURSELF AND OTHERS BY OBSERVING ALL SAFETY INFORMATION. FAILURE TO COMPLY WITH THESE INSTRUCTIONS COULD RESULT IN PERSONAL INJURY AND/OR PROPERTY DAMAGE!VOLTAGE SETTING INSTRUCTIONSTo change the pump voltage from the factory setting of 230 volts, a qualified electrician should:1. Disconnect the power supply to the Remove the cover from the motor terminal #2, the motor's switch is set for 115 V. The black voltage change device is pressed down onto both terminals with the white arrow on the voltage change device pointing directly to the 115 V arrow on the terminal board.#2 (Set to 115 V)115230L2L1L2L1115230L2L1115230 OrangeBrownIn #3, the motor's switch is set for 230 V. The black voltage change device is pressed down onto only one terminal with the white arrow on the voltage change device pointing directly to the 230 V arrow on the terminal board.
7 #3 (Set to 230 V)115230L2L1L2L1115230L2L1115230 OrangeBrownIn #1, the motor's switch is shown before the black voltage change device is pressed down onto the voltage : DO NOT MOVE WHITE LEAD WIRES ON L1 & L2.#1115230L2L1L2L1115230L2L1115230 Terminal BoardVoltage Change DeviceOrangeBrownMotor Terminal Box Cover4 MATERIALS AND TOOLS NEEDEDMATERIALS NEEDEDPipe Joints One roll of PTFE tape One can PVC primer One can PVC cement Steel clamps (optional)Drilled Wells (driven well materials are listed separately) One 1-1/4" foot valve (not needed for driven wells) One 1-1/4" PVC pipe (to attach to foot valve; needed for SHALLOW well only) Rigid 1-1/4" PVC pipe and couplings to reach from bottom of well to pump One 1-1/4" male PVC adapter (for discharge opening) Well seal with vent tube One 1-1/4" PVC 90 elbow (to join piping from well to pump) One 1-1/4" male galvanized adapter (for suction opening)Driven Wells Well point (more than one may be needed) 1-1/4" galvanized pipe from bottom of well to top of well plus 1 ft (30 cm) (if more than one well point is needed, additional piping and elbows will be needed to join the well points together) One 1-1/4" galvanized 90 elbow One 1-1/4" galvanized nipple One 1-1/4" check valve One 1-1/4" male PVC adapter One 1-1/4" male galvanized adapter 1-1/4" PVC pipe measured from adapter connected to pump to check valve Restrictor valve (connected after the elbow on the pump discharge)
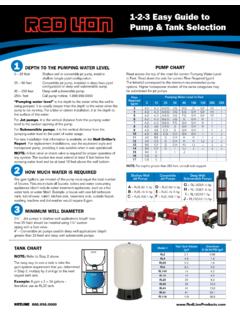
8 Low pressure cut-off pressure switch (recommended)Pump to Tank Installation One male PVC adapter (attached to tank) the tank fitting size depends on the system connect on the tank One tank tee size should be the same as the adapter above One 1" PVC elbow PVC piping to fit from tank tee to the elbow on the pumps discharge and to join the service line High pressure safety relief valve (attached to the tank tee) One 1/2" drain cock (attached to the tank tee)TOOLS NEEDED Round file Pipe clamp Pipe wrench or crescent wrench Slotted screwdriver Cross-head screwdriver Hacksaw or reciprocating saw Heat gun (optional) 5/16" - 8 point socket and ratchet 9/16" - 8 point socket and ratchet Measuring tapeIMPORTANT INFORMATIONJOINING PIPE FITTINGSF ollow the fitting guidelines below for all attachments unless otherwise PIPE FITTINGSWhen joining two PVC joints together (such as joining an adapter to a PVC pipe), always use PVC primer to clean both pieces.
9 Apply the primer to the inside of one joint and the outside of the other joint so the primed areas meet. Select Method 1, 2 or 3 to affix the joints. When tightening PVC, tighten securely, but do not overtighten or you could break the 1 - PTFE tape: Wrap PTFE tape tightly around the male threads. Start wrapping the threads at the end of the pipe, keeping tension on the tape. Do not let the tape hang over the edge of the adapter. Starting from the end, wrap in the direction of the threads for the full length of the adapter. Overlap each wrap about 70%. Method 2 - Using PVC cement: Apply PVC cement to the areas that were just primed and join the two pieces together. Twist to the right and back to the left to help embed the cement between the pieces. Method 3 - Using heat and clamps: Add two steel clamps to the largest fitting before joining the fittings. Heat the largest fitting with a heat gun (follow all safety instructions in the heat gun manual).
10 This will shrink the fitting, bonding it to the smaller joint. Once the joint has cooled down, tighten the clamps with a PIPE FITTINGS Use PTFE tape or thread compound to coat the TO ENSURE THE JOINTS ARE AIRTIGHT. EVEN A PINHOLE CAN PREVENT PROPER OPERATION OF THE AND PRESSURE PIPEIt is recommended that only new, clean 1-1/4" pipe or hose be used. If the pump is installed any appreciable distance away from the source of water, the suction pipe should be increased to 1-1/2". Horizontal lengths of pipe must gradually slope upward from the source of water to the pump to avoid air pockets in the line. Thread compound should be used on all pipe joints and connections should be thoroughly tightened. A foot valve or check valve must be installed and its operation should be checked, since a leak will prevent proper operation of the system. Make sure the foot valve is located so that it will be submerged at all times.