Transcription of PROCEDURE QUALIFICATION RECORD (PQR) Sheet 1 of 4
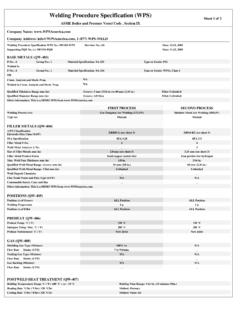
1 PROCEDURE QUALIFICATION RECORD (PQR) asme Boiler and Pressure Vessel Code , section IX Sheet 1 of 4 Company Name: Address: 1 (877) WPS-WELDPQR No.: DEMO-PQRDate: 11,12, 2005 Welding PROCEDURE Specification WPS No.: DEMO-WPS Revision No.: (0)BASE METALS (QW-403)Material Specification: SA-515 Type or Grade: 60P-No.: 1 Group No.: 1 Welded to Material Specification: SA-515 Type or Grade: 60P-No.: 1 Group No.: 1 Thickness of Test Coupon mm (in): 90 mm ( in.) Diameter of Test Coupon mm (in): N/AOther Information: This is a DEMO PQR prepared by online welding software of JOINTS (QW-402) Joint Design: Double-Vee groove weld Backing: No Backing Backing Material (Refer to both backing and retainers.): N/AGroove Details (or per production drawing): Root Opening G: 0 to 1/8 in.
2 Root Face RF: 1/8 in. Groove Angle: 60 (both sides) Radius (J-U): N/AJoint Details/ Sketch: Table for recorded welding parameters; Refer to QW-409 Pass No. (s)Process Filler Metal Classification Filler Size Diameter mm (in) Current AmpsVolts Wire Feed Speed mm/min(in/min) Travel Speed mm/min(in/min)Max. Heat InputkJ/mm (kJ/in)Or Remarks 1 to 3 SMAW E7018 mm (5/32) 160-200 24-26 N/A 5-10 (in/min) Root Pass 4 to n SMAW E7018 mm (3/16) 220-250 24-26 N/A 5-10 (in/min) Fill and Cap Passes Side 2 Backgouged 1 to n SMAW E7018 mm (3/16) 220-250 24-26 N/A 5-10 (in/min) Fill and Cap Passes PQR No.: DEMO-PQR Date: 11,12, 2005 Sheet 2 of 4 FIRST PROCESS SECOND PROCESSW elding Process (es):Shielded Metal Arc Welding (SMAW)Type (s):Manual FILLER METALS (QW-404) AWS ClassificationElectrode-Flux Class (SAW)E7018 SFA SpecificationSFA Filler Metal Weld Metal Analysis Size of Filler Metals mm (in)5/32 to 3/16 Metal Product Form Iron powder low hydrogen Max.
3 Weld Pass Thickness mm (in)3/16 Weld Metal Thickness mm (in)90 mm ( in.)Weld Deposit ChemistryN/AFlux Trade Name and Flux Type (SAW) N/AOther information: This is a DEMO PQR from POSITION (QW-405) Position of Groove1 GWelding Progression PREHEAT (QW-406) Preheat Temperature C ( F)150 CInterpass Temperature C ( F)150 C GAS (QW-408) Shielding Gas Type (Mixture)N/AFlow Rate lt/min. (CFH) _Trailing Gas Type (Mixture) N/AFlow Rate lt/min. (CFH)_Gas Backing (Mixture)N/AFlow Rate lt/min. (CFH)_ ELECTRICAL CHARACTERISTICS (QW-409)Following data may also shown on Table in Sheet 1 of 4 Current/ PolarityDCEPAmps (Range)160 to 250 Volts (Range)24 to 26 Wire Feed Speed (Range) mm/min (in/min)N/A Travel Speed (Range) mm/min (in/min)5 to 10 ( ) Mode of Metal Transfer for GMAW (FCAW)N/ATungsten Electrode Size mm (in)_Tungsten TypeN/A TECHNIQUE (QW-410) String or Weave Bead String and Weave Bead Multiple or Single Electrodes Single Multiple or Single Pass (per side) Multiple Orifice or Gas Cup SizeN/A Contact Tube to Work Distance mm (in) N/A Initial and Interpass Cleaning Brushing and Grinding Method of Back GougingGrinding OscillationNot Required PeeningNot Required Other information.
4 Clean each layer before start welding new passes/layers POSTWELD HEAT TREATMENT (QW-407) Holding Temperature Range C ( F): 600 to 620 CHolding Time Range: 1 Hour per Rate C/hr ( F/hr): 120 C/hrMethod: FurnaceCooling Rate C/hr ( F/hr): 120 C/hrMethod: Open Air PQR No.: DEMO-PQR Date: 11,12, 2005 Sheet 3 of4 Heat Treatment ( asme Code s Guideline): PREHEAT TABLE: asme section VIII-Division 1: Preheating from Appendix R (a) 175 F (80 C) for material which has both a specified maximum carbon contentin excess of and a thickness at the joint in excess of 1 in. (25 mm): (b) 50 F (10 C) for all other materials of P-No. 1 group. POSTWELD HEAT TREATMENT TABLE: asme section VIII-Division 1: Requirements for PWHT of Table UCS-56 Min. Holding Temperature: 1,100 F (595 C) Min. Holding Time for Weld Thickness (Nominal): Up to 2 in.
5 (50 mm): 1 hr/in. (2 min/mm), 15 min 2 in. (50 mm): 2 hr plus 15 min for each additional inch over 2 in. (50 mm)Heating and Cooling rate: Max. 400 F (220 C) per hr divided by the maximum thicknessof material in inches at the weld, but no more than 400 F (220 C)/hr: Min. 100 F (55 C)/hrFor Mandatory & Non-Mandatory thickness conditions of PWHT, See Note (2) of Table UCS-56 For PWHT at lower temperatures for longer periods of time, See Note (1) of Table UCS-56 PQR Qualified Range ( asme IX Guideline): Qualified Positions (Groove, Fillet): All Positions for Plate or Pipe. Unless specifically required otherwise by the welding variables (QW-250), aqualification in any position qualifies the PROCEDURE for all positions. The welding process and electrodes must be suitable for all positionspermitted by the WPS ( asme section IX, QW-203).
6 (For impact test application, there are some restrictions for welding in vertical-uphillprogression position; See asme section IX, ) Qualified Thicknesses (Groove, Fillet): 3/16 in. (5 mm) Min., 8 in. (200 mm) Max. (Plate or Pipe)[When testing longitudinal-bend tests only: 2T Max.][For impact test application, except ESW process: Min. Qualified Thickness is 5/8 in. (16 mm); This variable does not apply when a WPS isqualified with a PWHT above the upper transformation temperature or when an austenitic material is solution annealed after welding. asme IX, ][For ferrous base metals other than P-No. 7, 8 and 45 (when test coupon receives a PWHT above the upper transformation temperature): asme IX, ][For any weld pass greater than 1/2 in. (13 mm) thick: Max. (Except GTAW process). asme IX, ]T: Thickness of Test Plate or Pipe Wall in PQR ( asme section IX, Table ) Qualified Diameters (Groove, Fillet): All Nominal Pipe (Tube) Sizes, within Qualified Thicknesses in PQR WPS Base Metal P-Number Allowed by PQR: Any metals of the same P-No.
7 1 tested in PQR ( asme section IX, QW-424) Qualified WPS Filler Metal Allowed by PQR: Only Filler Metal categories with the same F-number and same A-number tested in PQR. Anyelectrode diameter sizes can be used in WPS, as it is not an essential variable for the most process and conditions. For Non-impacted testapplications only, filler metal classification within an SFA specification, with the same F-number and the same A-number and the same minimumtensile strength and the same nominal chemical composition can be used in WPS. ( asme section IX, QW-250) Qualified Weld Metal Deposit (Groove, Fillet): 2t Max. when t is less than 3/4 in. (19 mm) (Plate or Pipe)Qualified Weld Metal Deposit (Groove, Fillet): 8 in. (200 mm) Max. when t is equal or larger than 3/4 in. (19 mm)[For GMAW-Short Circuit Arc, when t is less than 1/2 in.]
8 (13 mm): Max.][When testing longitudinal-bend tests only: 2t Max.]t: Thickness of Weld Metal Deposit in PQR, Plate or Pipe Wall ( asme section IX, Table ) PROCEDURE QUALIFICATION RECORDS Test Results PQR No.: DEMO-PQR Date: 11,12, 2005 Sheet 4 of 4 TENSILE TEST (QW-150) Specimen mm (in) Thickness mm (in) Area mm x mm(in x in) Ultimate Total Load, Kg (lb) Ultimate Unit Stress, MPa (psi) Type of Failure and Location TA1 30 753 36212 Kg 471 (MPa) Ductile out Weld TA2 30 753 36712 Kg 477 (Mpa) Ductile out Weld TM1 25 30 750 35712 Kg 466 (MPa) Ductile out Weld TM2 30 753 35612 Kg 463 (MPa) Ductile out Weld TB1 25 30 750 36412 Kg 475 (MPa) Ductile out Weld TB2 25 745 36312 Kg 478 (MPa) Ductile out Weld GUIDED-BEND TESTS (QW-160) Type and Figure No. ResultsRemarksQW PL1 Satisfactory Ductile QW PL2 Satisfactory Ductile QW PL3 Satisfactory Ductile QW PL4 Satisfactory Ductile TOUGHNESS TESTS (QW-170) Location Specimen Sizemm x mm(in x in) TestTemperature C ( F) ImpactValuesLateral Exp.
9 Drop WeightBreak:Yes/ No JouleJ (ft-lb) % Shear mm/mm TVA1 in weld 10 X 10 0 C 78 TVA2 in weld 10 X 10 0 C 39 TVA3 in weld 10 X 10 0 C 83 TVB1 in weld 10 X 10 0 C 73 TVB2 in weld 10 X 10 0 C 78 TVB3 in weld 10 X 10 0 C 73 Comments (Notch type, etc.): Charpy V Notch, 2 mm Other Tests (Notes):No further tests are required. Radiographic-ultrasonic examination: RT report no: 1230-RT Result: UT report no: 2310-UT Result: FILLET-WELD TEST RESULTS (QW-180)Result-Satisfactory: Penetration into Parent Metal: Macro-Results: N/A Welder s name: Joe Smith Clock No.: 123-12-1234 Stamp No.: JS-02 Name of Laboratory: Quality Weld Lab, Inc.
10 Tests conducted by: Laboratory Tests Number: TN-46547 We certify that the statements in this RECORD are correct and that the test welds were prepared, welded, and tested in accordance with the requirements of section IX of the asme Code. Additional Notes: This is a DEMO-PQR prepared with online welding software. Manufacturer or Contractor s Welding Engineer:Name: Jim Clark Signature: Title: Welding Engineer Date: 12, 12, 2005 Authorized by: Name: John Smith Signature: Title: QA Manager Date: 12,12, 2005
