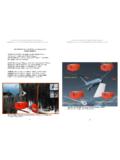
Transcription of PROGRAMMING THE TRANSMITTER SET BRAND …
1 300/310300/310300300/310310310 -318390390390300/3903903903905. Opener Has DIP Switches:- Use a pen to set the DIP switches to match the code of your existingtransmitter or receiver. If your opener is a Chamberlain , Lift-Master ,Sears , Wayne Dalton or Master Mechanic and does not have anyDIP switches, go to point # dip switch of this keypad has 3 positions (" + ", " 0 ", " - "). If the switchesof your existing receiver (Stanley , Genie , Multi-Code , Linear , Moore-O-Matic , Martec , Skylink ) have only two positions, set the switches of themodel 88 to " + " for ON, and " - " for OFF or OPEN. (Do not use " 0 " centerposition.) If the switches of your existingtransmitter (Chamberlain , Sears ,Lift-Master ,Wayne Dalton , Pulsar or Master Mechanic ) have 3 positions,set the dip switches of the model 88 tomatch their corresponding DIP SWITCHESDIP SwitchLocation3. Set BRAND jumper by movingthe red plastic tab to the correctjumper (see diagram and chartbelow).
2 Slide an opened paperclip, into the top of the red plas-tic tab, then lift and Set frequency switch located above theABCD to the corresponding letter:FrequencySwitchDIP Switch Location12345678 BRAND Jumper6. If your existing TRANSMITTER has fewer DIPswitches than this TRANSMITTER , matchonly the first corresponding DIP the remaining DIP switches at 0 , or the center position. If your garagedoor opener is a Stanley or Multi-Code ,the unused DIP switches may need tobe set to either the + or the - posi-tion. If the TRANSMITTER is still not working,try reversing the set Dip switches,(example, if the #1 DIP switch is set to + , change it to - and continuereversing the remaining DIP try the unused DIP switches inthe + , 0 or - positions.)LinearM-O-MStanleyMulti-CodeC hamberlainLift-MasterSearsWayne DaltonMaster MechanicGenie (9 positions)Genie (12 positions)Master CraftMartecPulsar/Allister/AllstarSkylin k11223332 or 33455678 BRAND of your opener Use Jumper Number Stanley 1976-1997 Multi-Code 1976-1997 Martec/Teckey 1992-2001 Skylink 1993-2001 Linear 1975-1997M-O-M 1983-1997 Master Craft 1985-1997 Pulsar/Allister/Allstar 1985-2001 Chamberlain 1983-1997 Lift-Master 1983-1997 Sears 1983-1997 Wayne Dalton 1983-1997 Master Mechanic 1983-1997 Genie (9 positions)1983-1997 Genie (12 positions)
3 1983-1997 Unknown** Works with Skylink s Universal Receiver UR-100A or BA or BAA or BBB-CDDDA or DDDD Unknown**310310-310310310315/390318315/3 90315/390315/390315/390315/390315/390315 /390AA-AAAB or DCB or DB or DB or DB or DB or DB or DB or D Unknown** BRAND of your openerSet switchto position Set switchto positionFrequencyFrequencyUSACANADA If your Sears , Cham-berlain or Lift-Master TRANSMITTER has threebuttons (two small, onelarge) then the buttonthat operates the receiverwill determine how to setthe number 1 DIP switchof the Skylink the large button is usedto operate the unit, setthe #1 DIP switch to - position; if the middlebutton is used set the #1 DIP switch to the centerposition; if the button at the end is used, set the #1 DIP switch to " + " position. Set theother DIP switches (DIP switch #2 onward) to match the setting of your existing - LEARN CODE Some transmitters/receivers do not have DIP switches, this meansthey can learn new code settings.
4 Just set the DIP switches on our TRANSMITTER to any codecombination. Press the learn button, (located on the back of the garage door receiverlocated in the ceiling of the garage), for 2 seconds then release, so that the light besidethe learn button goes on. While the light is on, enter the 4 digit pin number, (currently setat 0000), then press the # key. If the light beside the learn button flashes, the operator hasnow learned and will recognize the keypads your Stanley / Multi-Code receiver has fewer than 10switches and you have a 2 button TRANSMITTER then the buttonthat operates the receiver will determine whether you useChannel 1 or Channel 2. If the number 10 Dip switch of yourexisting TRANSMITTER is set in the OPEN or OFF position, youhave Channel 1, set the number10 DIP switch in the model #88 to - position. If the number 10 Dipswitch of your TRANSMITTER is setin the CLOSED or ON position,you have Channel 2, set the num-ber 10 DIP switch in the model#88 to + position.
5 2. To Program Your Keypad -Open the cover on the of how to set Model 88 Diagram AExisting TransmitterIf your Pulsar /Allister /Allstar #ADX9921 has 2position Dip switches, refer to the chart below. If anyof the Dip switches in your Pulsar /Allister /Allstartransmitter/receiver are set to the OFF position, setthe switches in the model 88 to the 0 position. If Dipswitches 1-4 on the Pulsar /Allister /Allstar areset to the ON position, set the switches in the modelPULSAR / ALLISTER / ALLSTARMODEL 88 DIP switch position settingDIP switch position setting1ON / OFF1+ OR 02ON / OFF2+ OR 03ON / OFF3+ OR 04ON / OFF4+ OR 05ON / OFF5- OR 06ON / OFF6- OR 07ON / OFF7- OR 08ON / OFF8- OR 09ON / OFF9- OR 0 DIP switch setting to match with Pulsar/Allister/Allstar B88 to the + position. If the Dip switches 5-9 on the Pulsar/Allister /Allstar are set to the ON position, set theswitches in the model 88 to the - position.
6 (see DiagramA and B) 1. Open the front cover andslide open the batterycompartment. Removethe battery isolator (theplastic strip between thetwo batteries), then re-place the battery IsolatorPROGRAMMING THE TRANSMITTERT hank you for your purchase of the Skylink garage doorremote control, Model 88. There are 3 different things youneed to setup in order to use this universal garage doorremote control to operate your existing garage door 3 things are:1) Frequency switch select the correct frequency accord-ing to the BRAND of your existing garage door ) BRAND jumper place the BRAND jumper at the correctposition according to the BRAND of your existing garagedoor ) Code setting Set the DIP switches on the Model 88so that they match the code setting of your existinggarage door follow the detail instructions below in order to set-up the Skylink Model 88 to work with your existing BRAND JUMPERSET FREQUENCY SWITCHSET DIP SWITCHESM odel 88 WARNINGWARRANTYIf this TRANSMITTER triggersother garage doors inyour neighborhood,change all your trans-mitters and receiver to anew code NOT let children usethe garage door tran-smitter without adultsupervision.
7 Childrencan injure themselves orothers by the , within one year from dateof purchase, this productshould become defective(except battery), due tofaulty workmanship ormaterials, it will be repairedor replaced, without of purchase 3 volt Lithium type(CR2032) batteries (included).+-It is time to change the bat-teries when the backlight nolonger Universal Garage DoorRemote Control is approvedby the FCC and it complieswith Part 15 of the FCCR ules. Its operation issubject to the following twoconditions :1. This device may notcause harmful This device must acceptany interference thatmay cause will not be heldliable or responsible forany misuse or applicationof this product other thanfor its intended ENTRYUSER'S INSTRUCTIONS(Model 88) are registered trademarks of their respective corporationsSKYLINKTECHNOLOGIES Dunwin Drive,Mississauga, Ontario,L5L 1X1, CANADA(905)608-9223(905)608-8744 FAXC ustomer Service : (800)304-1187 101A069-006 no.
8 5680134 Patents Pending 1995 SKYLINK TECHNOLOGIES :Changes or modificationsto this unit not expresslyapproved by the party res-ponsible of compliancecould void the user sauthority to operate the battery is completelydrained or if it is disconnectedlonger than 1 week, the PINyou have set WILL revert tothe factory preset of 0000. Topreserve your PIN and reducethe chance of someone usingPIN#0000 for unauthorizedentry, be sure to check andreplace the battery replacing the battery,check your PIN and reset it ifneeded. If your Pulsar /Allister /Allstar TRANSMITTER orreceiver has fewer than 9switches and the existingtransmitter has 2 buttons(see diagram C), then thebutton that operates thereceiver will determine howto set the number 9 DIPswitch of the model 88. Ifthe left button is used tooperate the receiver, set the#9 DIP switch to + posi-tion; if the right button isused, set the #9 DIP switchto 0 CLinear (1975-1997)Position 1 to 8 + OR -M-O-M (1983-1997)Position 1 to 8 + OR -Stanley (1976-1997)Position 1 to 10 + OR -11 & 12 set to + or - Multi-Code (1982-1997)Position 1 to 10 + OR -11 & 12 set to + or - Chamberlain (1983-1997)Position 1 to 9+, 0 (center), OR -Lift-Master (1983-1997)Position 1 to 9+, 0 (center), OR -Sears (1983-1997)Position 1 to 9+, 0 (center), OR -Wayne Dalton (1983-1997)Position 1 to 9+, 0 (center), OR -Master Mechanic (1983-1997)Position 1 to 9+, 0 (center), OR -Genie (9 positions) (1983-1997)Position 1 to 9 + OR -Genie (12 positions) (1983-1997)Position 1 to 12 + OR -Master Craft (1985-1997)Position 1 to 12 + OR -Martec/Teckey (1992-2001)Position 1 to 10 + OR -11 & 12 set to + Pulsar/Allister/Allstar (1985-2001)Position 1 to 9+, 0 (center)
9 , OR -Skylink (1993-2001)Position 1 to 8+, 0 (center), OR -1-5 set + or 0 6-8 set 0 or - 9-12 must set to 0 DIP switch setting to match your openerIf your Skylink Universal Remote Control does not activate your Garage Door Opener (GDO), the reasonmay be that your GDO age or manufacturer is not listed on the compatibility solution is the Skylink UR-100 Universal Receiver, or the 838 The Code Scrambler , (convert anyGDO to a Total Security System !) For more information, call (800) 304-1187 7. If your existing opener does not have any switches, then it can learn the keypads code. First open the battery compartment,remove the battery isolator (the plastic strip between the twobatteries), replace the battery cover. Press the learn button onthe garage door opener (unit with motor located in the ceilingof the garage) for approximately two seconds, so that the lightbeside the learn button goes on. While the light is on, enter the4 digit pin number, (currently set at 0000), then press the SEND key.
10 If the light beside the learn button flashes, the operator hasnow learned and will recognize the keypads code. Learn ButtonGarage DoorOpener (GDO)NOTE: The backlight comes on and a beep isemited when any key is pressed. The backlightof the key pad may not be visible when it is toobright outside. When any key is pressed, thenext key must be pressed within 5 seconds orthe backlight turns off and the sequence iscanceled. You must begin Key Pad Operation 8. Installation-Position the keypad on the garage door up the cover and insert screw above the keypad in the slot provided (a).-Remove the battery cover and insert the second screw in the lower slot (b).-Replace the battery cover and insert screw (c). - OperationPress [ PIN ] , [SEND]To open or close garagedoor, press your fourdigit PIN and the [SEND]key. If confirmed, themodel 86 will emit threebeeps. (a) (c) (b)If the keypad does not emit a beep when pressed,wait a few seconds and press the key again.