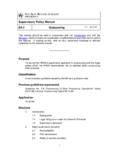
Transcription of Quick Tip 3 - Understanding the Unit Banking Terms
1 Girl Guides of Canada, Ontario Council: Understanding the unit Banking Terms Quick Tip 3 - Understanding the unit Banking Terms This reference will show you how to navigate the Transactions Screen. It will also explain commonly used unit Banking Terms . A Filter by Status: Click on the drop-down arrow to filter the transactions on the screen by the transaction Status (refer to G). The status defaults to Waiting, Guide , to see all transactions, select All . 1. Waiting, Guide: New transactions that require allocation. Allocation . is selecting the category for the money spent or received ( craft supplies, dues, special events). For purchase card transactions, there is an extra step to edit amounts to input the taxes if applicable. 2. Unverified, Guide: Transactions that need to be reviewed and re- submitted or deleted by the Treasurer.
2 A unit Banking Clerk has indicated there is missing info or something has been incorrectly entered. 3. Verified, Guide: Transactions that have been allocated and verified by the Treasurer. The next step is for the Treasurer to send the receipt or deposit slip to their unit Banking Clerk for verification. 4. Verified, Provincial: The transaction is fully verified by the Treasurer, unit Banking Clerk, and the Finance Department. For Manual Expenses, the payment is issued once the transaction is Verified, Provincial status. B Filter by Date: Click on the calendars and select a date range to limit the transactions on the screen by the transaction date. To see all transactions, remove the dates from these boxes. C Transaction ID: Each transaction is assigned a unique ID number.
3 You can click on any underlined ID number to open up a detailed view of the transaction. Always write the Transaction ID number on your receipts and deposit slips for the unit Banking Clerk to match. Quick Tip 03 v. Sept 2018. Girl Guides of Canada, Ontario Council: Understanding the unit Banking Terms D User ID and unit Name: Your Centralized Banking User ID and unit Name will appear on all transactions. E Type: This refers to the kind of expense or revenue. There are 6 Types: (1) Expense - Purchase Card (2). Expense - Manual (3) Expense Transfer (4) Revenue - Royal Bank Deposit (5) Revenue - Royal Bank Bill Payment and (6) Revenue - Transfer. F Community: Your Community number will appear on all transactions. G Status: This refers to the stage in the verification process that the transaction is currently at.
4 Waiting, Guide (Stage 1) represents a new transaction and Verified, Provincial (Stage 4) is a fully verified completed transaction. (refer to A) Any Transaction that is not Verified, Provincial is considered outstanding and needs to be followed-up and completed. H Net Amount: Is the amount once a transaction is Verified, Provincial that will appear in your balance sheet. Because each unit now receives a tax rebate, this is the net amount = amount tax rebate (exp) or tax collected (rev). Example: this unit 's manual expense was a total of $ and it had HST. tax, therefore they have a rebate and only $ goes through on their balance sheet. I Amount: Total amount that went through either on your purchase card or deposit or your manual reimbursement.
5 J Date: Is the date the transaction occurred. Detailed View of a Transaction: K Printer: Click this icon to print the transaction. You may choose to attach this printout to the receipt or deposit slip. L Thumbs-Up: Click this icon after you have made corrections to re-submit an Unverified expense or revenue. You will only see this icon on Unverified, Guide transactions that require re-submission or deletion. M Edit Amounts and Edit: For purchase card transactions, click on Edit Amounts first to input the taxes if applicable and then click on Edit. For revenues and expenses that don't have taxes, click on Edit to choose the distribution (allocation) and input comments on the transaction. N Close: Once you have either finished looking at the detailed view of a transaction or made changes to a transaction and clicked Save, you can then close the transaction.
6 Quick Tip 03 v. Sept 2018.