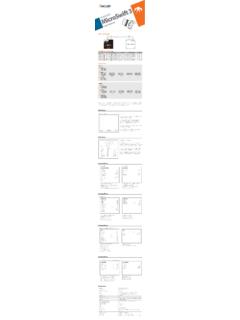
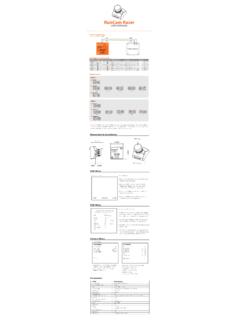
Transcription of RC Split mini manual E-edition(V8)180827 - RunCam
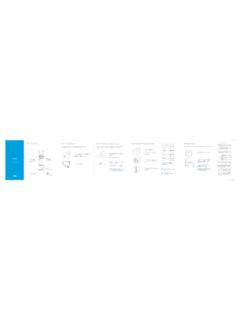
1 For example, we connect the RunCam Split Mini to the UART 3 interface on the Flight Controller: connect the Flight Controller to the computer, then open the configurator software of the Flight Controller. (Open up the configurator that matches the firmware you are running, Betaflight Configurator for Betaflight, Cleanflight Configurator for Cleanflight). In the Peripherals column of the line UART3 (on the Ports tab), select RunCam Device and click Save And the Flight Controller Configurator, navigate to the Modes tab. There are new CAMERA WI-FI, CAMERA POWER and CAMERA CHANGE modesAssign any available channel to the function you need, for example: CAMERA WI-FI: in the OSD of the camera, this is used to confirm your selection. CAMERA POWER: start/stop the video. When in the OSD of the camera, this is used to move to the next menu item. CAMERA CHANGE MODE: switch among the two modes: video and OSD setting mode.
2 When in the OSD of the camera, this will exit the menu Assign the AUX1 to the CAMERA WI-FI, range 1900-2100 Assign the AUX2 to the CAMERA POWER, range 1900-2100 Assign the AUX3 to the CAMERA CHANGE MODE, range 1900-2100 Please choose your Model on the controller, then access to the MIXER interface andassign the channel to the switch of the controller. Take opentx for example, assignthe channels CH5, CH6 and CH7 to SA, SB and SD respectivelyPower the Flight Controller and the RunCam Split Mini Set the SA to the bottom, the camera starts/stops the video Set the SD to the bottom, the camera switches among the two modes: video and OSD setting On/OffSimultaneously press the Power/Shutter button and Mode Switch Status Light: Orange is On Press the Power/Shutter button to move to a setting. Press the Mode Switch button to select. Long press the Mode Switch button to exit the Status Light: Blue blinks Press the Power/Shutter button to start/stop Standby Mode, long press the Mode Switch button to cycle through the three modes: Video/Photos/OSD press the Power/Shutter buttonStandby ModeCamera Status Light: Blue is OnFirmware UpgradingCamera Status Light: Orange blinks SwitchingVideo ModeOSD Setup ModeForced ShutdownIn standby mode, press the Mode Switch button three times in rapid succession (within 2 seconds).
3 When resetting is complete, the status light (orange) blinks twice, and the camera automatically shuts of View (FOV )Video ResolutionVideo File FormatImage ResolutionTV ModeInterfaceMax Micro SD Card SupportedDimensionsPower InputWorking CurrentWeightFPV FOV 130 /Recording FOV 165 1080@60fps/1080@30fps/720@60fpsMOV2 MPNTSC (720*480)/PAL (720*576) SwitchableMicro USB / UART64G(need Class 6 or above,recommend Class 10/UHS-I/UHS-II/UHS-III)PCB 27*29mm / Lens Module 19*19mmHole Distance of Installation20*20mmDC 5-15V / DC 5V(USB) 650mA @5V/270mA @12V15gPlease visit: CardVCC +(5-15V )GNDV ideoMicro-USBC apacity up to 64GB; Please use high speed cards(Class 10/UHS-I/UHS-II/UHS-III)Please push the metal piece a little bit up with one hand like showed in above step 1 and then press the SD card(step 2) with another hand to let the card pop Switch ButtonPower/Shutter ButtonSensor ConnectorMetal CoverRunCam21 PDBGNDV ideoPower inGND5-15V5-15 VPower inGNDGNDV ideo5 VGNDPDBUART InterfaceFCGNDGNDRXRXTXTXUser manual Instruction Diagram Installation Diagram Lens Module Connection Diagram Micro SD Card Basic Camera Operation Transmitter Connection Diagram Flight Controller Set Technical Support ParameterSide ASide BMicrophoneUSBDC 5 VWarning: USB port only supports DC 5 VWarning: Please press the Metal Cover(showed above) to make sure the Sensor Connector fixed steadily.
4 Method One (Recommended): connect by the soldering padsVideo TransmitterVideo TransmitterMethod Two: connect by the TV-out and power USB cableWarning: USB port only supports DC 5 VPreparation Firmware: CleanFlight ( ) / BetaFlight ( ) Any available UART interface on the Flight Controller1. Connect the RunCam Split Mini with the UART interface of the Flight Controller2. Make the Flight Controller recognize the RunCam Split Mini3. Instructions of the functions of the camera and assigning transmitter channels to them4. Assign the channel to the switch of the controller5. Test