Transcription of Rosemount Wireless Pressure Gauge - Emerson
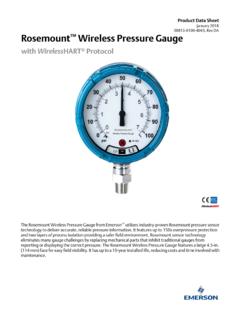
1 Quick Start Guide00825-0100-4045, Rev BAJanuary 2018 Rosemount Wireless Pressure Gaugewith WirelessHART ProtocolJanuary 20182 Quick Start GuideRequired equipmentNOTICEThis guide provides basic guidelines for Rosemount Wireless Pressure Gauges. It does not provide instructions for configuration, diagnostics, maintenance, service, troubleshooting or intrinsically safe ( ) installations. Refer to the Rosemount Wireless Pressure Gauge Reference Manual for more instruction. The manual and this guide are also available electronically on \ considerationsThe unit is shipped with the battery installed. Each device contains one D size primary lithium-thionyl chloride battery. Primary lithium batteries are regulated in transportation by the Department of Transportation, and are also covered by IATA (International Air Transport Association), ICAO (International Civil Aviation Organization), and ARD (European Ground Transportation of Dangerous Goods).
2 It is the responsibility of the shipper to ensure compliance with these or any other local requirements. Consult current regulations and requirements before could result in death or serious injury. Installation of device in an explosive environment must be in accordance with appropriate local, national and international standards, codes, and practices. Ensure device is installed in accordance with intrinsically safe or non-incendive field shock can result in death or serious injury. Care must be taken during transportation of device to prevent electrostatic charge build-up. Device must be installed to ensure a minimum antenna separation distance of 8 in. (20 cm) from all leaks could result in death or serious injury. Handle the transmitter to follow safe installation guidelines could result in death or serious injury.
3 Only qualified personnel should install the paste or PTFE tape (for NPT threaded connection)Standard tools, screwdriver, wrench, pliersAMS Wireless Configurator version or later, or Field CommunicatorContentsWhat s in the box .. 3 Optional: Power/device check .. 4 Optional: Normal range indication option .. 4 Installation procedure .. 5 Troubleshooting .. 8 Product Certifications .. 9 AMSQ uick Start Guide3 January 2018 What s in the boxThe following options are also available and will ship with the Rosemount Wireless Pressure Gauge if Pressure GaugeQuick Start GuideRosemount 306 Integral Manifold (Model Code S5)B4 Bracket (Model Code B4) Rosemount 1199 Seal (Model Code S1)Product Certification (Model Codes below)Q4: Calibration CertQG: Calibration Cert and GOST Verification CertQP: Calibration Cert and Tamper Evident SealQ8: Material Traceability cert per EN : Cert of Compliance to NACE MR0175/ISO 15156 for wetted materialsQ25: Cert of Compliance to NACE MR00103 for wetted materialsNormal Range Indication (Model Code LK)January 20184 Quick Start : Power/device checkThe device is designed to be installation-ready.
4 To check device battery prior to installation, perform the following:1. Perform Turn on device on page Slide the ON/OFF switch to the OFF position until ready for use. : Normal range indication optionNoteThe stickers are intended to be installed on the dial only and should not be applied on the inside or outside of the housing should be applied in an environment where the ambient temperature is above 50 F (10 C).1. Modify each of the stickers to desired size prior to proceeding to step Remove housing Slide ON/OFF switch to the OFF position and wait for LED to stop Gently move the needle in the clockwise direction until it is pointing at the Red Use caution as the electronics assembly is connected to the needle. 5. Remove any debris on the dial, so it does not become trapped under the Peel back the white paper backing of the Slowly lower the sticker onto the surface of the dial in the desired location and rub it in place firmly.
5 Repeat steps 6 and 7 until desired indication locations are the sticker after initial contact is not recommended as this decreases the amount of adhesive on the back of the Slide ON/OFF switch to the ON Replace housing Start Guide5 January procedureStep 1: Seal and protect threadsStep 2: Mount deviceNoteUse wrench on flats, not on orientationThe low side Pressure port (atmospheric reference) on the process Pressure Gauge is located in the neck of the device behind the housing. The vent path is between the housing and sensor (see Figure 1).Figure 1. Low Side Pressure PortA. Low side Pressure port (atmospheric reference)Keep the vent path free of any obstruction, including but not limited to paint, dust, and lubrication by mounting the device so the process can drain 20186 Quick Start GuideStep 3: Turn on deviceCheck to ensure the device and battery are working Twist the cover counterclockwise to remove Slide the OFF/ON switch to the ON position to initiate the power the power sequence, the dial tests full range of motion and LED flashes Once the power sequence ends, verify the LED flashes LED may display several colors; see Figure 1 in Troubleshooting on page 8 for device 4: Connect to deviceField Communicator1.
6 Turn on the Field From the Main menu, select the HART Wireless Configurator1. Start AMS Wireless From the View menu, select Device Connection Double click the device under the HART Field CommunicatorB. HART ModemC. AMS Wireless Configurator12 36458709 ABCQ uick Start Guide7 January 2018 Step 5: Eliminate mounting effectsDevices are factory-calibrated. Once installed, it is recommended to perform this step to eliminate potential error caused by mounting position or static Pressure . Instructions for using a Field Communicator are listed the Rosemount Wireless Pressure Gauge Reference Manual for the following: Using AMS Wireless Configurator Sensor trim function on absolute gauge1. Vent the Connect the Field From the HOME screen, enter the HART Fast Key Follow the commands to perform the 6: Activate Wireless Do not activate Wireless until Smart Wireless Gateway is installed and functioning properly; toggling off and on reduces battery Network ID and Join Key is specified at order entry, then the device will automatically search and connect to the Wireless network when powered device to network1.
7 Obtain Network ID and Join Key for the Wireless network (available in Wireless gateway).2. From the HOME screen, enter the HART Fast Key Follow the commands to perform the Select Overview> Verify the communication status displays Connected. NoteJoining the device to the network could take several dashboard Fast Keys2, 1, 1 Device dashboard Fast Keys2, 1, 2 January 20188 Quick Start section provides information for basic troubleshooting. See the reference manual (document number 00809-0100-4045) for advanced troubleshooting .Device statusThe flashing LED indicates device status using the colors descibed in Table 1. Status DescriptionsPressure measurementIf the mounting effects have not been eliminated after completing Step 5, perform this alternative procedure for verifying the Pressure value.
8 1. From the HOME screen, eter the HART Fast Key Follow the commands to perform the connectivityIf the device has not joined to the network after power up, verify the following: Active Advertising has been enabled on the Smart Wireless Gateway Network ID and Join Key in the device match the Network ID and Join Key of the GatewayThe Network ID and Join Key may be obtained from the Smart Wireless Gateway on the Setup > Network > Settings page on the web interface . LED colorDevice statusGreenFunctioning properlyAmberBattery is low, battery replacement recommendedRedBattery replacement requiredORDevice is malfunctioningNo colorNo power, verify ON/OFF switch is in on positionDevice dashboard Fast Keys2, 2, 1, 1, 1 Quick Start Guide9 January Certifications Rev: Directive InformationA copy of the EU Declaration of Conformity can be found at the end of the Quick Start Guide.
9 The most recent revision of the EU Declaration of Conformity can be found at compliance (WPG only)All Wireless devices require certification to ensure that they adhere to regulations regarding the use of the RF spectrum. Nearly every country requires this type of product certification. Emerson is working with governmental agencies around the world to supply fully compliant products and remove the risk of violating country directives or laws governing Wireless device and IC (WPG only)This device complies with Part 15 of the FCC Rules. Operation is subject to the following conditions: This devices may not cause harmful interference, this devices must accept any interference received, including interference that may cause undesired operation. This device must be installed to ensure a minimum antenna separation distance of 20 cm from all device complies with Industry Canada license-exempt RSS-247.
10 Operation is subject to the following two conditions: (1) this device may not cause interference, and (2) this device must accept any interference, including interference that may cause undesired operation of the or modification to the equipment not expressly approved by Emerson could void the user's authority to operate the appareil est conforme la Partie 15 de la r glementation FCC. Son fonctionnement est soumis aux conditions suivantes: Cet appareil ne doit pas causer d'interf rences nuisibles. Cet appareil doit accepter toute interf rence re ue, incluant toute interf rence pouvant causer un fonctionnement ind sirable. Cet appareil doit tre install pour assurer une distance minimum de l'antenne de s paration de 20 cm de toute appareil est conforme la norme RSS-247 Industrie Canada exempt de licence.
