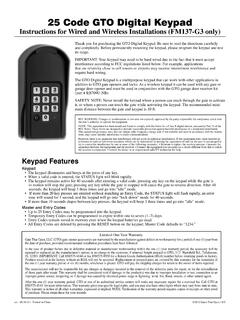
Transcription of RVLock Keypad/Remote Programming and Syncing …
1 RVLock Keypad/Remote Programming and Syncing Instructions Version (Additional remote (s) can be purchased at ) Programming a new code into your RVLock Keypad 1. Write your desired new code below and then read through all instructions before you start the Programming process as this will make the Programming much easier. 2. While holding down the 8 button, press the lock button and release both. (You will hear a long confirmation beep this signifies that you have entered the Programming mode) 3. Type in the keypads existing code, for example 1234, then press lock.
2 (1234 is the default code from the factory and also after the code reset button is held down.) 4. Now type in the new code written below (up to 8 digits), then press lock. 5. Again type in the same new code as written below and again press lock. (A long confirmation beep from the keypad confirms and completes Programming . 6. Test to ensure your new code works by typing in your new code and press the lock/unlock button . The Keypad should confirm the accepted code by a long beep and then actuate the handles deadbolt. NOTE: - If Programming of Keypad is unsuccessful or you forget your code, simply press and hold down the Code Reset button for 5-10 seconds on the back handle and start again at step #1.)
3 (A long tone will confirm the reset to the default 1234 code.) - Programming mode is only 12 seconds long, so keypad will reset to former code/operation after 10 seconds of being idle during Programming mode. (If you take too long or make a mistake, simply wait 10 seconds and start over at step 1.) - Always keep your keys OUTSIDE of your coach in case of electronics/battery failure. - Changing the batteries on your RVLock products will not cause your handle to forget the current code or remote Programming . TONE CHART: - Long beep Confirmation/Correct code - 5 short beeps Error/Wrong code - Short set of tones after you input your code and before the dead bolt extends signifies that the batteries are getting low and will need to be changed soon.
4 New Code: - Code can be between 0 and 8 digits long, we recommend at least 4 digits for security. Syncing the RVLock handle with your optional RVLock remote (s) 1. Turn the FOB switch to on and lightly press the FOB LEARN button located above the ON/OFF switch on the back of the handle. A short quick beep will confirm that you have entered the Programming mode. 2. Now press the LOCK button on your remote until the handle confirms with a long beep. (Usually takes one or two times). Additional pressing of the LOCK/UNLOCK button will actuate the deadbolt on your RVLock handle.
5 -If remote Programming did not work or if you have additional remotes to program, repeat steps 1 and 2. -Holding down the LEARN button for 10 seconds will remove all previously synced remotes from the handles memory. - You can have up to 10 remotes operating the same RVLock handle. remote FOB s have the ability to control multiple RVLock handles. - You must hold the remote buttons down for a couple seconds to actuate the handle, this is a safety feature against accidental pushes in pockets. Changing the Batteries on your RVLock Handle ** Remove the two (2) screws holding the battery cover on the back handle next to the on/off switch.
6 Install four (4) AA alkaline batteries. NOTE: Install high quality, fully charged alkaline batteries. Batteries should last at least 12 months in between changes depending on usage. (Remove batteries at the end of the season and/or during large gaps between trips to avoid draining and/or leaking batteries and possible damage.) After new batteries are in, a beep will confirm that the handle has power. Replace the battery cover and screws. (DO NOT OVERTIGHTEN) Changing the batteries on your RVLock handle will not change the current code or remote Programming .
7 If you choose not to use the remote FOB s, you can turn the wireless switch to off to save power and simply use the keypad. Page 1