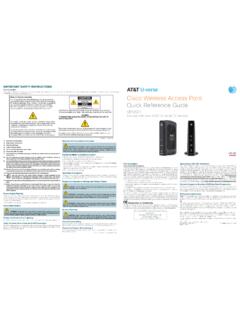
Transcription of Samsung S8 / S8+ G950U / G955U User Manual - AT&T
1 SMARTPHONE. user Manual Please read this Manual before operating your device and keep it for future reference. Table of Contents Special Features ..1 Learn About Your Device ..15. Bixby ..2 Front View ..16. Edge Screen .. 2 Back View ..18. Flexible Security ..2 Home Screen ..19. Water and Dust Resistance ..3 Notification Panel .. 22. Getting Started .. 4 Customize Your Home Screen .. 25. Set Up Your Device ..5 Bixby .. 29. Assemble Your Device ..6 Navigation .. 30. Start Using Your Device ..10 Entering Text .. 32. Set Up Your Device .. 11 Face Recognition .. 35. Fingerprint Scanner.
2 36. ATT_G950U_G955U_EN_UM_TN_QC9_033017_FINA L. Iris Scanner .. 37 Gallery .. 83. Multi Window .. 40 Google Apps .. 88. Emergency Mode .. 42 Internet .. 92. Edge Screen .. 44 Messages .. 96. Apps .. 49 My Files ..101. Using Apps .. 50 Phone .. 103. Applications Settings .. 53 Samsung Connect ..113. AT&T Apps .. 55 Samsung Gear ..113. Calculator .. 58 Samsung Health ..114. Calendar .. 60 Samsung Notes ..116. Camera and Video .. 63 Samsung Pay ..118. Clock .. 70 Samsung + ..121. Contacts .. 73 Secure Folder ..121. Email .. 79 Smart Switch ..121. Galaxy Apps .. 82. Table of Contents iii Settings.
3 122 MirrorLink .. 140. How to Use Settings .. 123 Virtual Private Networks (VPN) .. 140. Connections .. 124 Reset Network Settings .. 142. Wi-Fi .. 125 Ethernet .. 142. Bluetooth .. 128 Sounds and Vibration .. 143. Phone Visibility .. 130 Sound Mode .. 144. Data Usage .. 130 Easy Mute .. 144. Airplane Mode ..132 Vibrations .. 144. NFC and Payment .. 133 Volume .. 145. Mobile Hotspot .. 134 Ringtone ..147. Tethering ..137 Notification Sounds ..147. Mobile Networks ..137 Do Not Disturb .. 148. Location .. 138 System Sounds .. 148. Nearby Device Scanning .. 139 Key-Tap Feedback.
4 149. Printing .. 139 Sound Quality and Effects .. 149. Table of Contents iv Separate App Sound .. 150 Navigation Bar .. 158. Notifications ..151 Screen Timeout .. 159. Block App Notifications ..152 Keep Screen Turned Off .. 159. Customize App Notifications ..152 Screen Saver .. 159. Display .. 153 Wallpapers and Themes .. 161. Screen Brightness .. 154 Wallpapers .. 162. Blue Light Filter .. 154 Themes .. 162. Screen Mode ..155 Icons .. 163. Screen Resolution ..155 Always On Displays (AODs) .. 163. Screen Zoom and Font .. 156 Device Maintenance .. 164. Full Screen Apps.
5 156 Quick Optimization .. 165. Easy Mode ..157 Battery .. 165. Icon Frames ..157 Performance Mode .. 166. LED Indicator .. 158 Storage .. 166. Status Bar .. 158 Memory .. 168. Table of Contents v Language and Input .. 169 Encrypt SD Card ..181. Date and Time ..172 Factory Data Reset Password ..181. Report Diagnostic Information ..172 Set Up SIM Card Lock ..181. Reset ..173 View Passwords ..181. Factory Data Reset ..173 Security Update Service .. 182. Software Update ..175 Device Administration .. 182. Lock Screen and Security ..176 Credential Storage .. 183. Set a Screen Lock.
6 177 Advanced Security Settings .. 183. Always On Display Settings ..178 Accounts .. 185. Lock Screen and AOD Settings ..178 Samsung Cloud .. 186. Samsung Pass ..179 My Profile ..187. Find My Mobile ..179 Add an Account ..187. Unknown Sources .. 180 Backup and Restore .. 189. Secure Folder .. 180 Google Settings .. 190. Secure Startup .. 180. Table of Contents vi Accessibility ..192 Samsung Support .. 201. Vision .. 193 Legal .. 202. Hearing .. 194 Legal Information .. 203. Dexterity and Interaction .. 195. More Accessibility Settings .. 196. Accessibility Services .. 196.
7 Other Settings ..197. Help .. 198. Manage Game Features .. 198. Device Assistance App .. 198. About Phone .. 199. Getting Help ..200. Videos .. 201. Simulators .. 201. Tips .. 201. Table of Contents vii Special Features Learn about your mobile device's special features. Bixby Fingerprint Scanner Bixby allows you to quickly set reminders, create voice Use your fingerprint as an alternative to entering dictation, and search and access content on your phone passwords in certain apps. You can also use your and on the Internet. fingerprint to verify your identity when logging in to your Samsung account.
8 For more information, see Bixby on page 29. For more information, see Fingerprint Scanner on Edge Screen page 36. The Edge screen provides a variety of useful tools for Iris Scanner notifications, information feeds, and timekeeping. Use iris recognition as an alternative to entering For more information see Edge Screen on page 44. passwords in certain apps. You can also use your eyes to verify your identity when logging in to your Samsung Flexible Security account. Use your face, fingerprint, or iris to unlock your device. For more information, see Iris Scanner on page 37.
9 Face Recognition Configure facial recognition security to add an extra layer of security when using your phone. For more information, see Face Recognition on page 35. Special Features 2. Water and Dust Resistance This device is rated IP68 using the Ingress Protection rating system. For more information, see Maintaining Water and Dust Resistance on page 208. Special Features 3. Getting Started Learn about your mobile device hardware, assembly procedures, and how to get started using your new device. Set Up Your Device Learn how to set up your device for the first time. Assemble Your Device Caution: Exercise care when using the removal tool to eject the internal SIM card/Memory card tray.
10 This section helps you to assemble your device. 1. Insert the removal tool into the hole on the SIM card/Memory card tray, and then push until the Install the SIM Card and a tray pops out. Memory Card 2. Place the SIM card on the tray. When you subscribe to a cellular network, you are provided with a plug-in SIM card. During activation, Make sure that the card's gold contacts face down into the device and that the card is your SIM card is loaded with your subscription details, positioned as shown. such as your Personal Identification Number (PIN), available optional services, and other features.