Transcription of SebArt professional line
1 SebArt professional lineSU29 3D Monster 140E ARFASSEMBLY MANUALThe new Su29 3D Monster 140E ARF was designed by Italy aerobatic pilot, Sebastiano Silvestri and the design is based on of his latest Tournament Of Champion s competition professional ARF kit is the result of Sebastiano s long research in 3D unlimited performances and it is made for the new F6A class. This combined with an extremely lightweight structure, the all wood airframe, the very big control surfaces with special airfoil and the lift generators on landing gear give the Su29 3D Monster 140E ARF an impressive thrust-to-weight ratio and crisp control authority at any airspeed and flight new 140 class model will enter you into the next level of performace! The Su29 3D Monster 140E ARF can do it easy harriers, torque rolls, blenders, waterfalls and almost anything else you can dream up are waiting you!
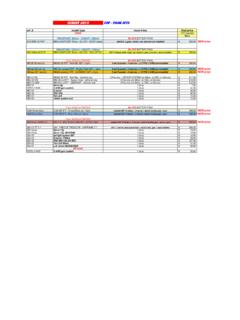
2 The only aerobatic limit is your fantasy!Specifications: Recommended Set Up:Wingspan:..194 cm (76,37 in) Weight:.. - RTF less motor batteryLength:..192 cm (75,59 in) Radio:..5-ch with 4 high torque digital servo MG2 Wing Area:..83 dm (129 ) Motor: ..Hacker C50-XL + ESC 99A-Opto Required radio, motor and batteryRadio equipment: Minimum 5-channel radio system 5 high torque digital servos with metal gear (JR PROPO DS 8911) 4 servo extension 100mm, for aileron s servosRecommended electric motor for best performance: Hacker C50-10XL + ESC 99-Opto + APC 20 x 10E + 8S Li-Po packs Hacker C50-13XL + ESC 99-Opto + APC 20,5 x 12WE + 10S Li-Po packsRecommended Li-Po battery pack for best performance: 3400mAh F6A category and for unlimited 3D performances 4000 or 4500mAh 3D, duration and precisionAdditional required item, tools and adhesivesTools: Drill Drill bits: 1,5mm Flat blade screwdriver Phillips screwdriver large and small Hobby knife Masking tape Soldering iron synthetic oilAdhesives: 5-minute epoxy thin CA medium CAWarningThis RC aircraft is not a toy!
3 If misused, it can cause serius bodily harm and damage to only in open areas, preferably in official flying sites, following all instructions included with your radio and plane is a compromise between Aerobatics and 3D flying, and not a pylon racer. It is built with a very light structure and for this reason we hardly recommend: Do NOT fly your airplane at high speeds, because this may cause structural failures or flutter due to the extremely large control starting assemblyBefore starting the assembly, remove each part from its bag and protection for a prior inspection. Closely inspect the fuselage, wing panels, rudder, and stabilizer for damage. If you find any damage or missing parts, contact the place of you find any wrinkles in the covering, use a heat gun or covering iron to remove them. Use caution while working around areas where the covering material overlap to prevent separating the informationSebArt garantees this kit to be free from defects in both material and workmanship at the date of warranty does not cover any parts damage by use or modification, and in no case shall SebArt s liability exceed the original cost of the purchased , SebArt reserve the right to change or modify this warranty without notice.
4 In that SebArt has no control over the final assembly or material used for the final assembly, no liability shall be assumed or accepted for any damage of the final user-assembled product. By the act of using the product, the user accepts all resulting the buyer is not prepared to accept the liability associated with the use of this product, the buyer is advised to return this kit immediately in new and unused condition to the place of SET UPControl throwsWe recommend the use of a computer radio, that will allow you to do quite a bit of fine-tuning of the feel of the Sukhoi, which will make aerobatics even the AILERON we recommend the following throws:Low rate: 20 up / 20 downExpo: 40% 43D rate: 45 up / 45 downExpo: 80%For the ELEVATOR we recommend the following throws:Low rate: 20 up / 20 downExpo: 25%3D rate: 60 up / 60 downExpo: 80%For the RUDDER we recommend the following throws:Low rate: 30 left / 30 rightExpo: 30%3D rate: 50 left / 50 rightExpo: 60%Note.
5 The Expo is (+) for JR systems, and ( ) for Futaba best performance, we recommend a linear-mix*: Rudder Elevator UPWhen you give full rudder to the right or left side, the elevator have to go up (positive) approx. 4% * if you have a programmable computer and exposUse the recommended expos to soften the feel of the model, especially on high 3D rates. The goal is to get the model to feel the same around neutral as it does on low low rate settings for all flying, included starts and landings, and high rate for 3D precision flying or general sport fliers, the low rate throws are perfect, even for snap rolls. When doing 3D aerobatics, flip to 3D rates just before the manover. As soon as the manover is done, flip back down to low rate to avoid over-controlling the model. Recommended CGThe recommended Center of Gravity location is 165mm behind the leading edge of the wing against the fuselage.
6 Use the motor battery pack, moving it forward or backward, to achieve the correct attempt to make full throttle dives!This model have to be flown like a full-scale airplane. If the airframe goes too fast, such as in a high throttle dive, it may fail. Throttle management is absolutely test your radio Before fly, be sure to range check your radio as manufacturer s instruction manual of you radio-system recommend. Double-check all controls (aileron, elevator, rudder and throttle) move in the correct direction. Be sure that your motor battery pack is fully charged, as per the instructions included with your batteries and that your radio is fully charged as per its nice flights! SebArt International L. Tabellione, 147891 Rovereta - Repubblica di San Marino (RSM)